Project Collaboration
Invite Members to Project
- Open the project and go to Project Settings → Invite → Members.
- Click Add Members.
- Click the field under Invite specific people.
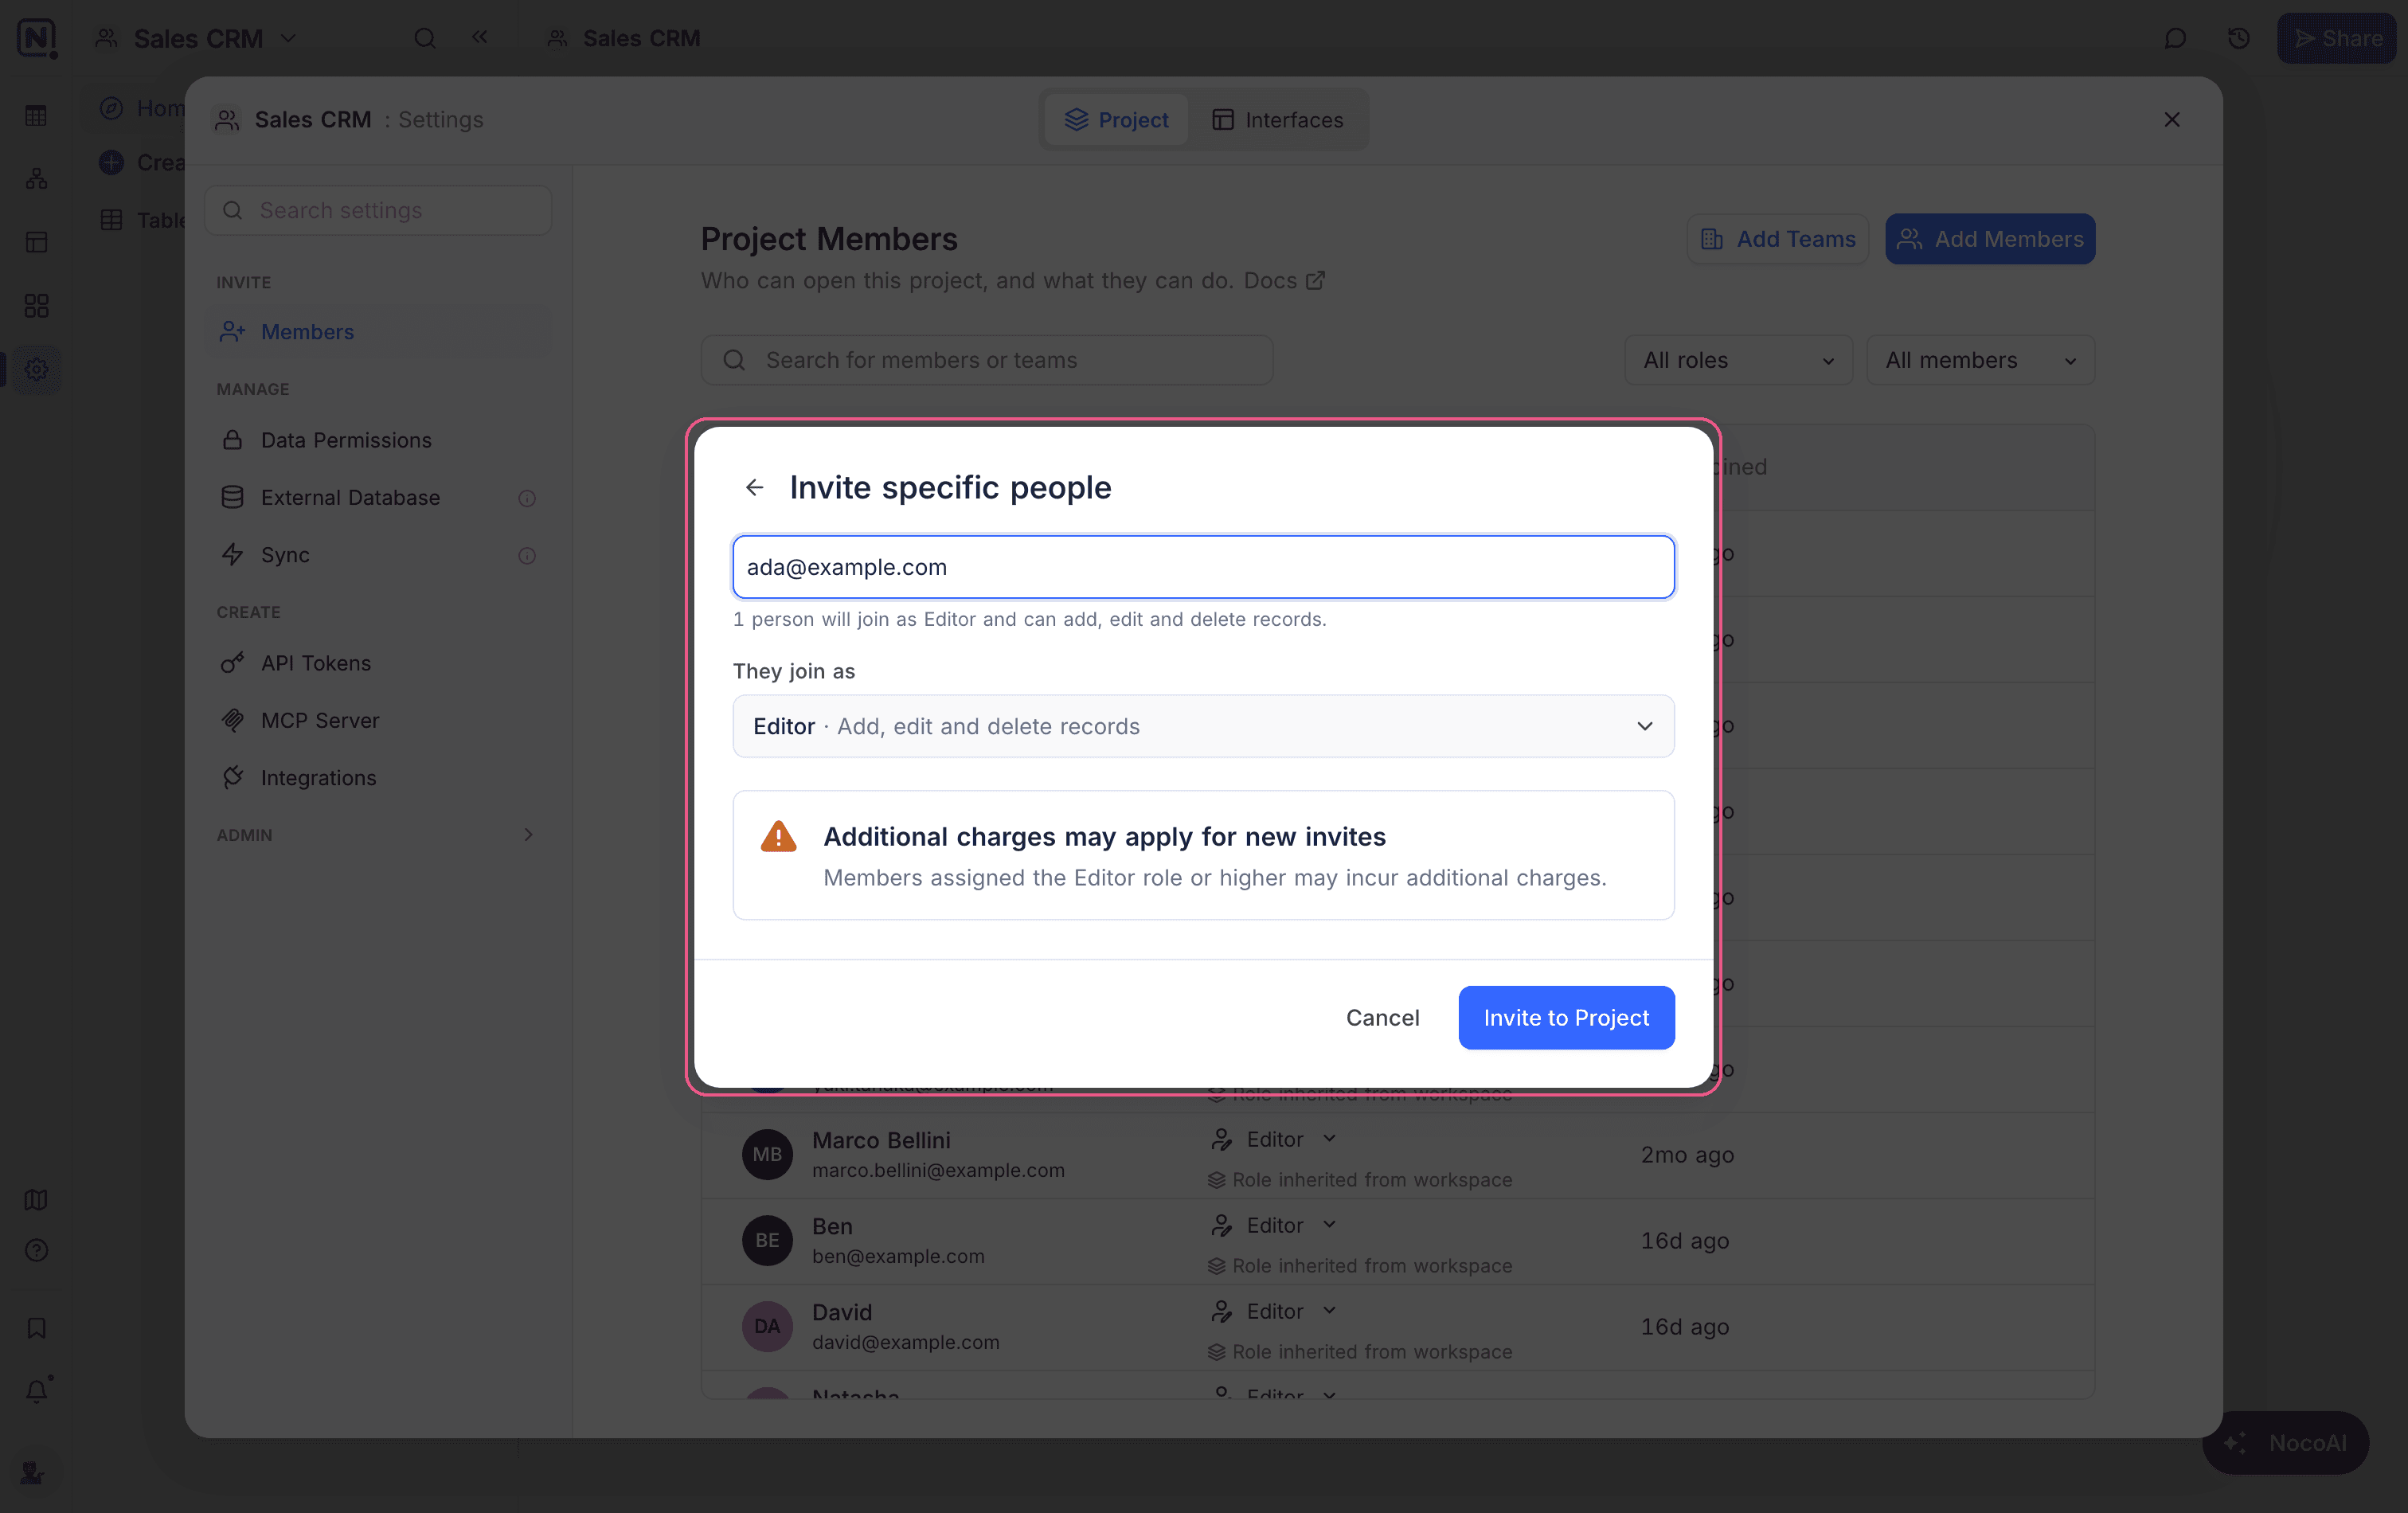
- Type one or more email addresses. Separate them with commas or spaces.
- Below They join as, select a role. All people in this invite get this role. The default role is Editor.
- Click Invite to Project.
name+team@example.com, unless a NocoDB account already uses that exact address. Invite the primary address of the person instead. Sign-up refuses an alias in the same way.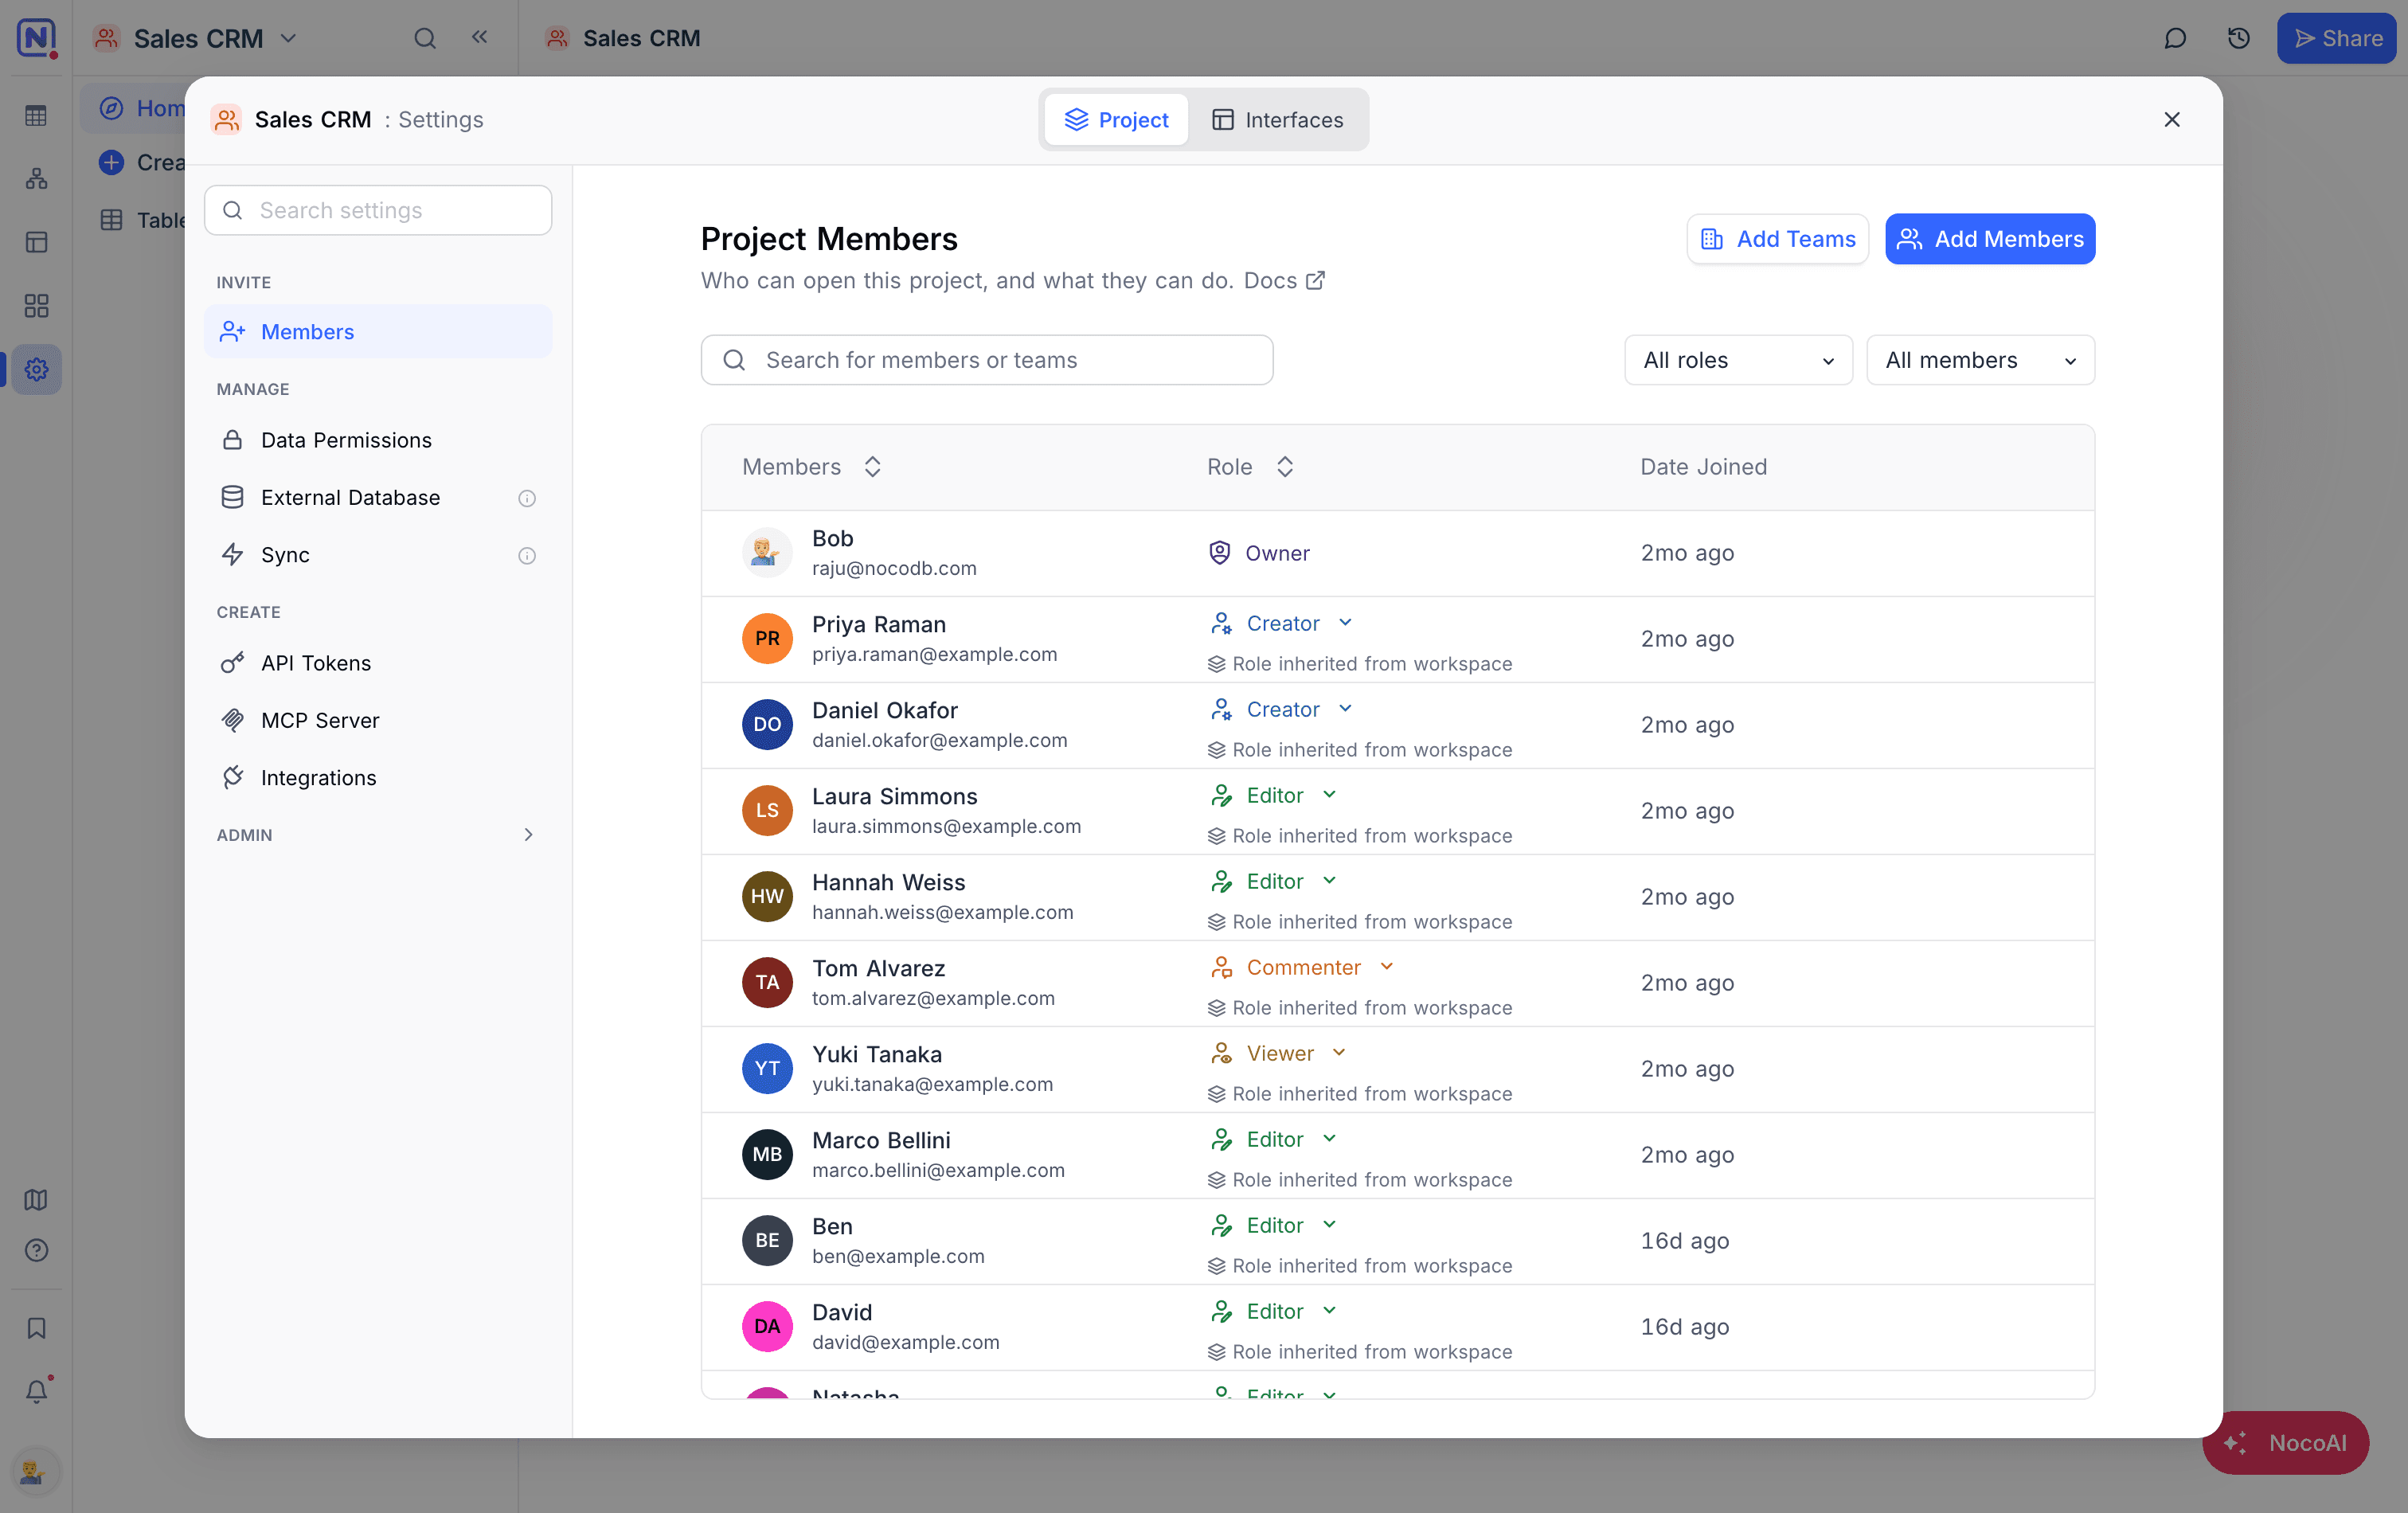
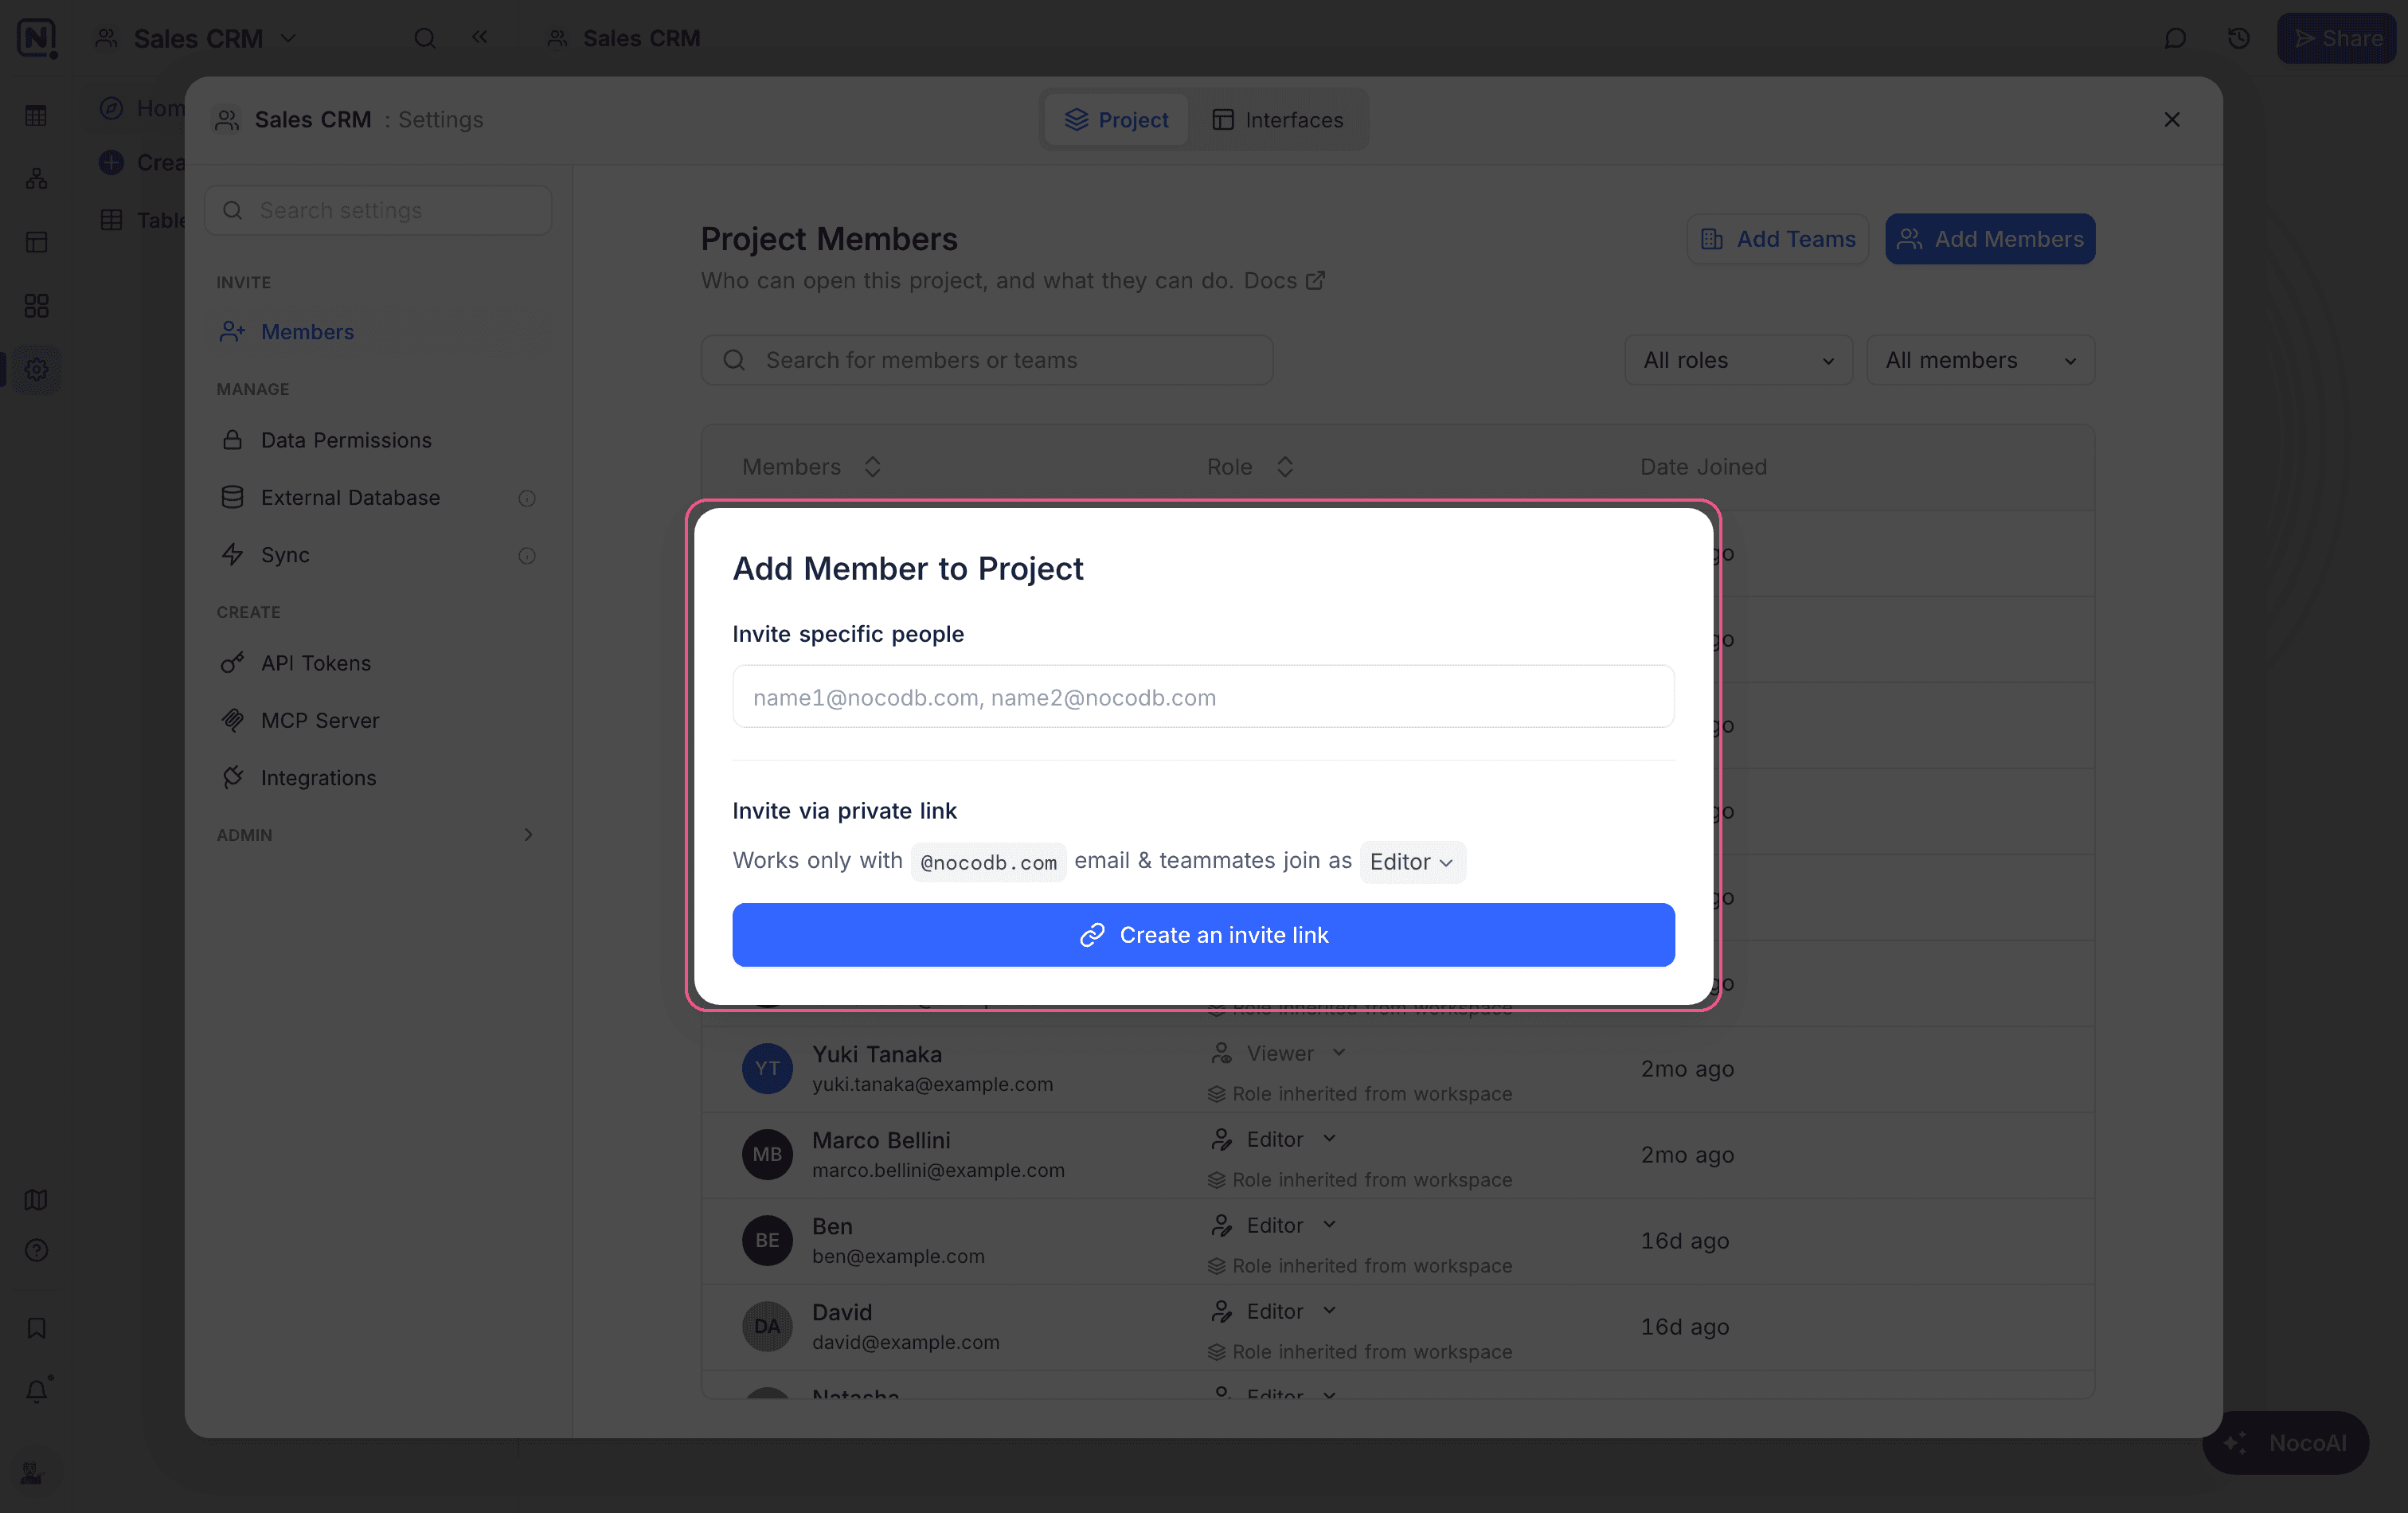
To invite people with a link and not one address at a time, use Invite via private link in the same dialog:
- Select a role.
- Click Create an invite link. Anyone who opens the link can use it to join this project.
A link gives access to this project only. To limit a link to an email domain, manage several links, or delete a link, see invite links.
Workspace members get their workspace role in the project, unless they have a project role. You can also invite users to a project only, without access to the full workspace. This is ideal for external partners or temporary contributors.
Invite Teams to Project ☁
- Open the project and go to Project Settings → Invite → Members.
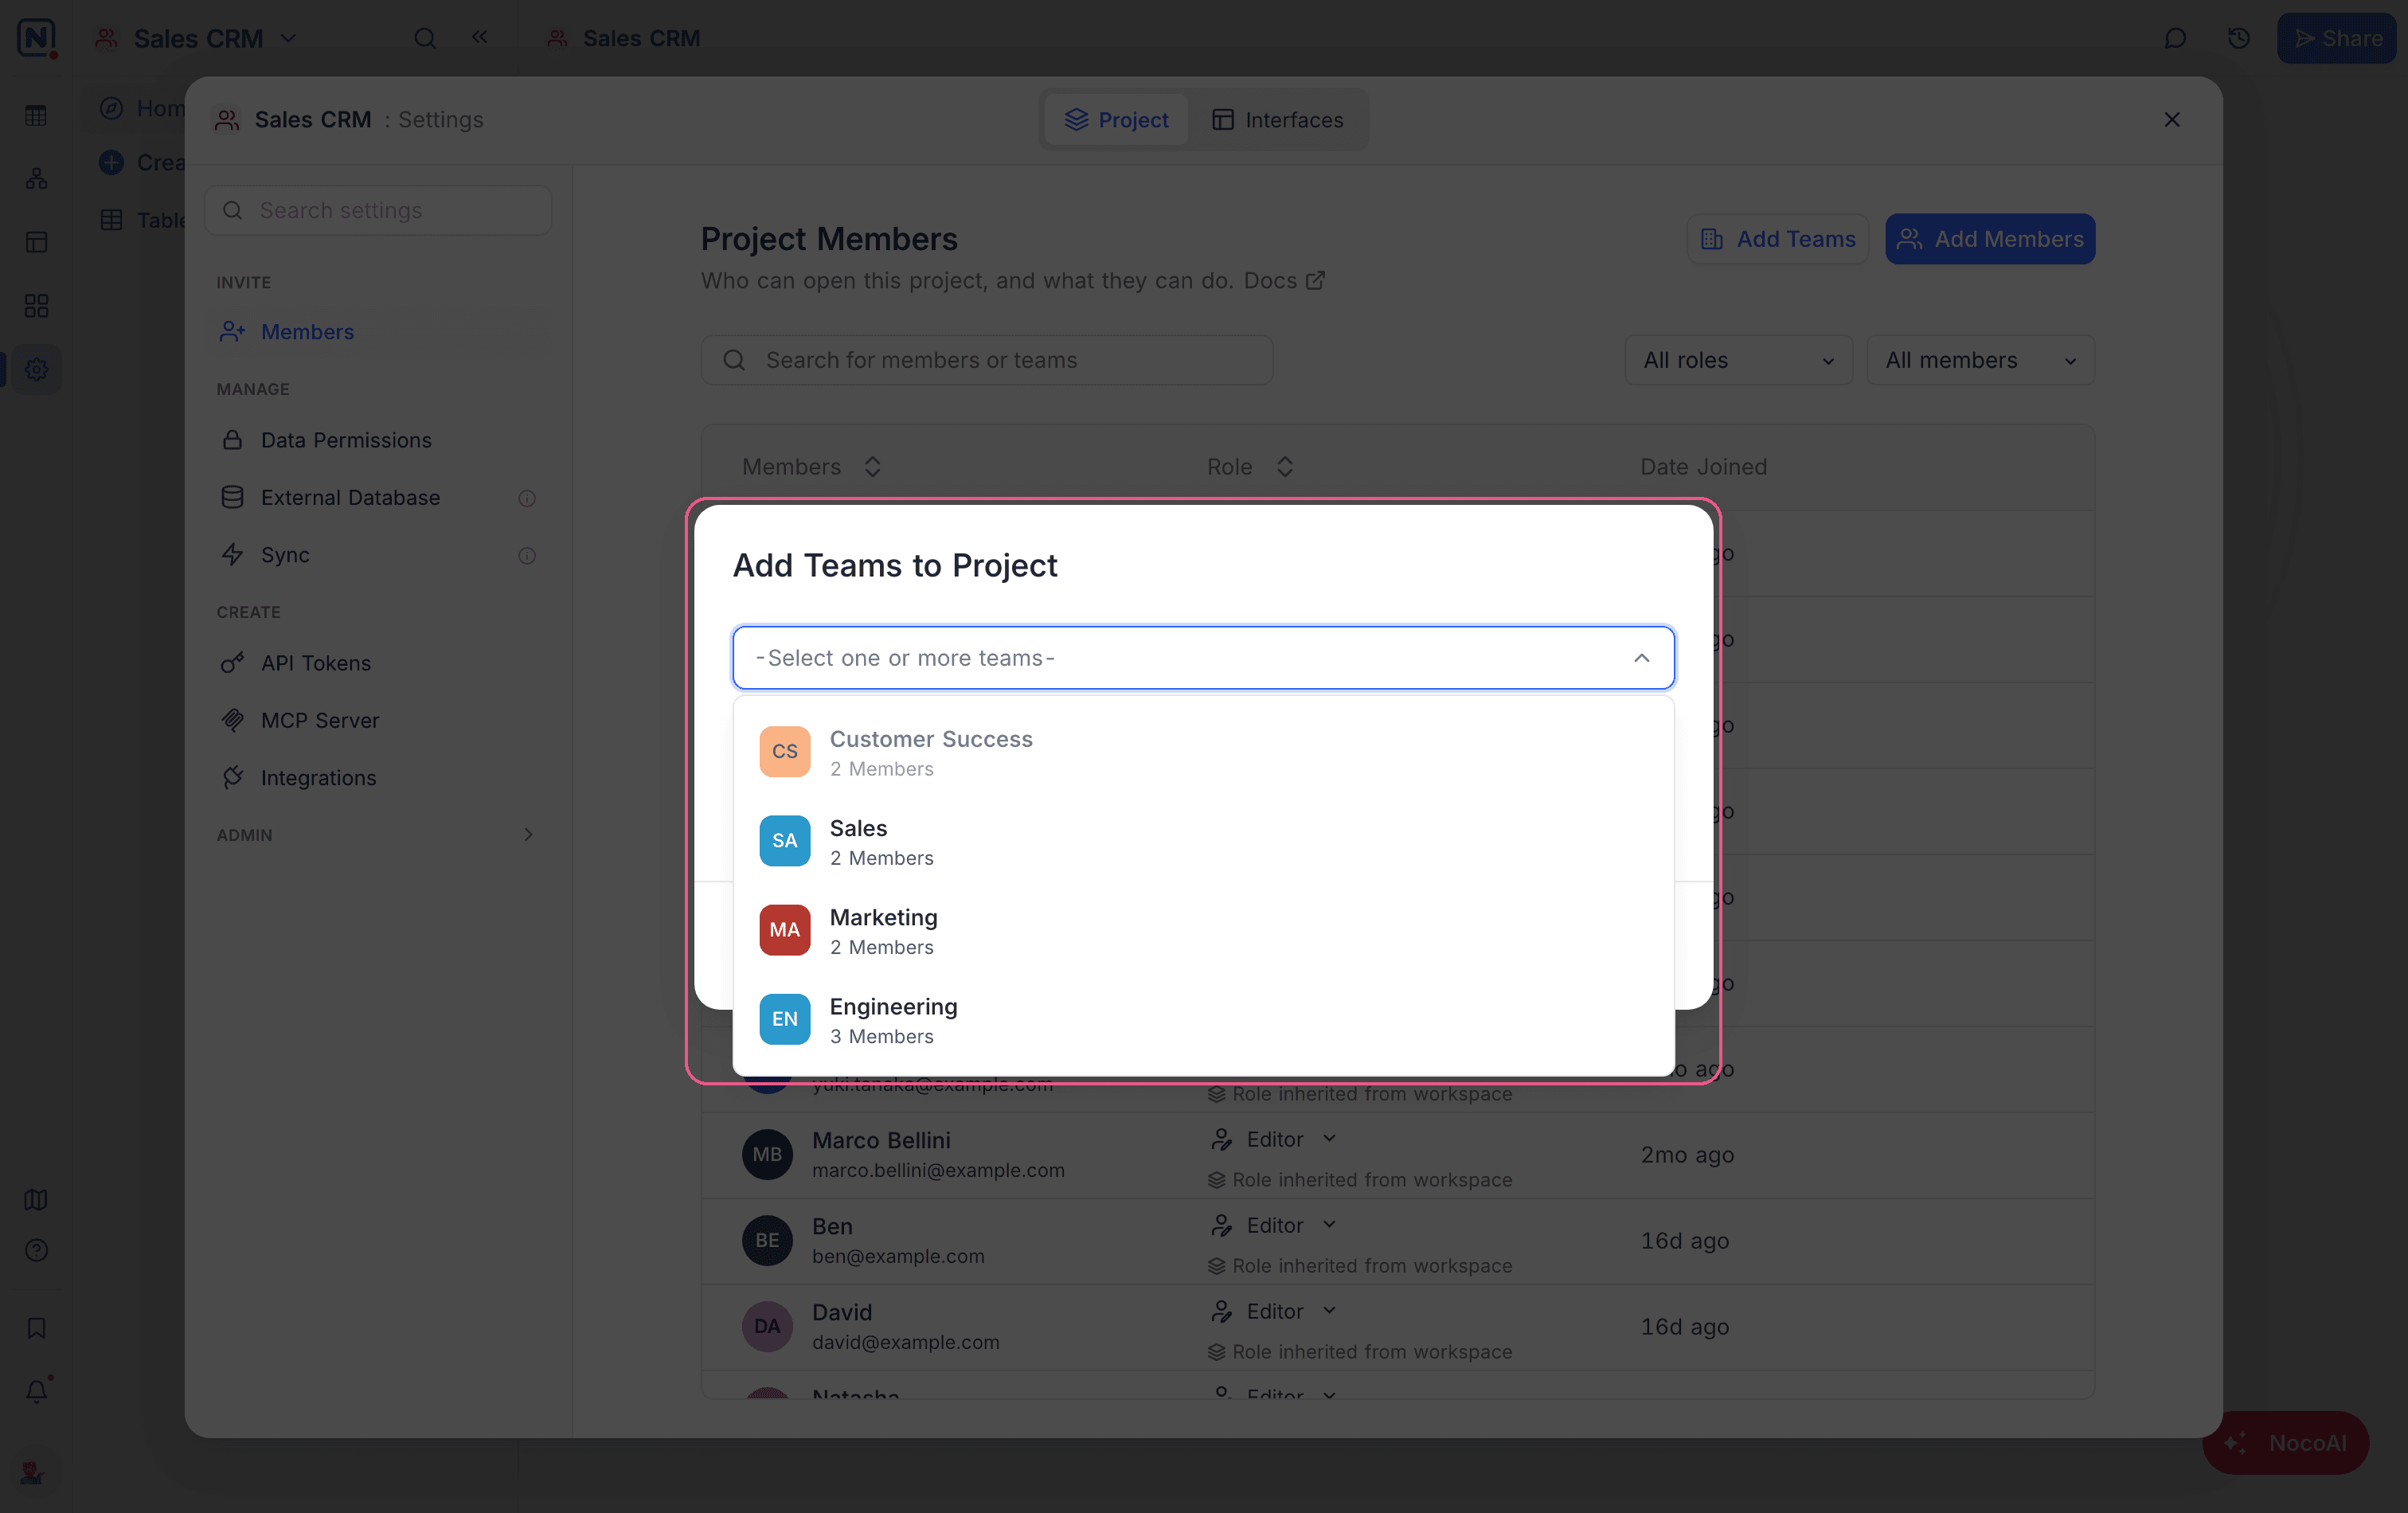
- Click Add Teams.
- From the dropdown, select one or more teams.
- Select a role: Editor, Commenter, Viewer, or No Access.
- Click Add Teams.
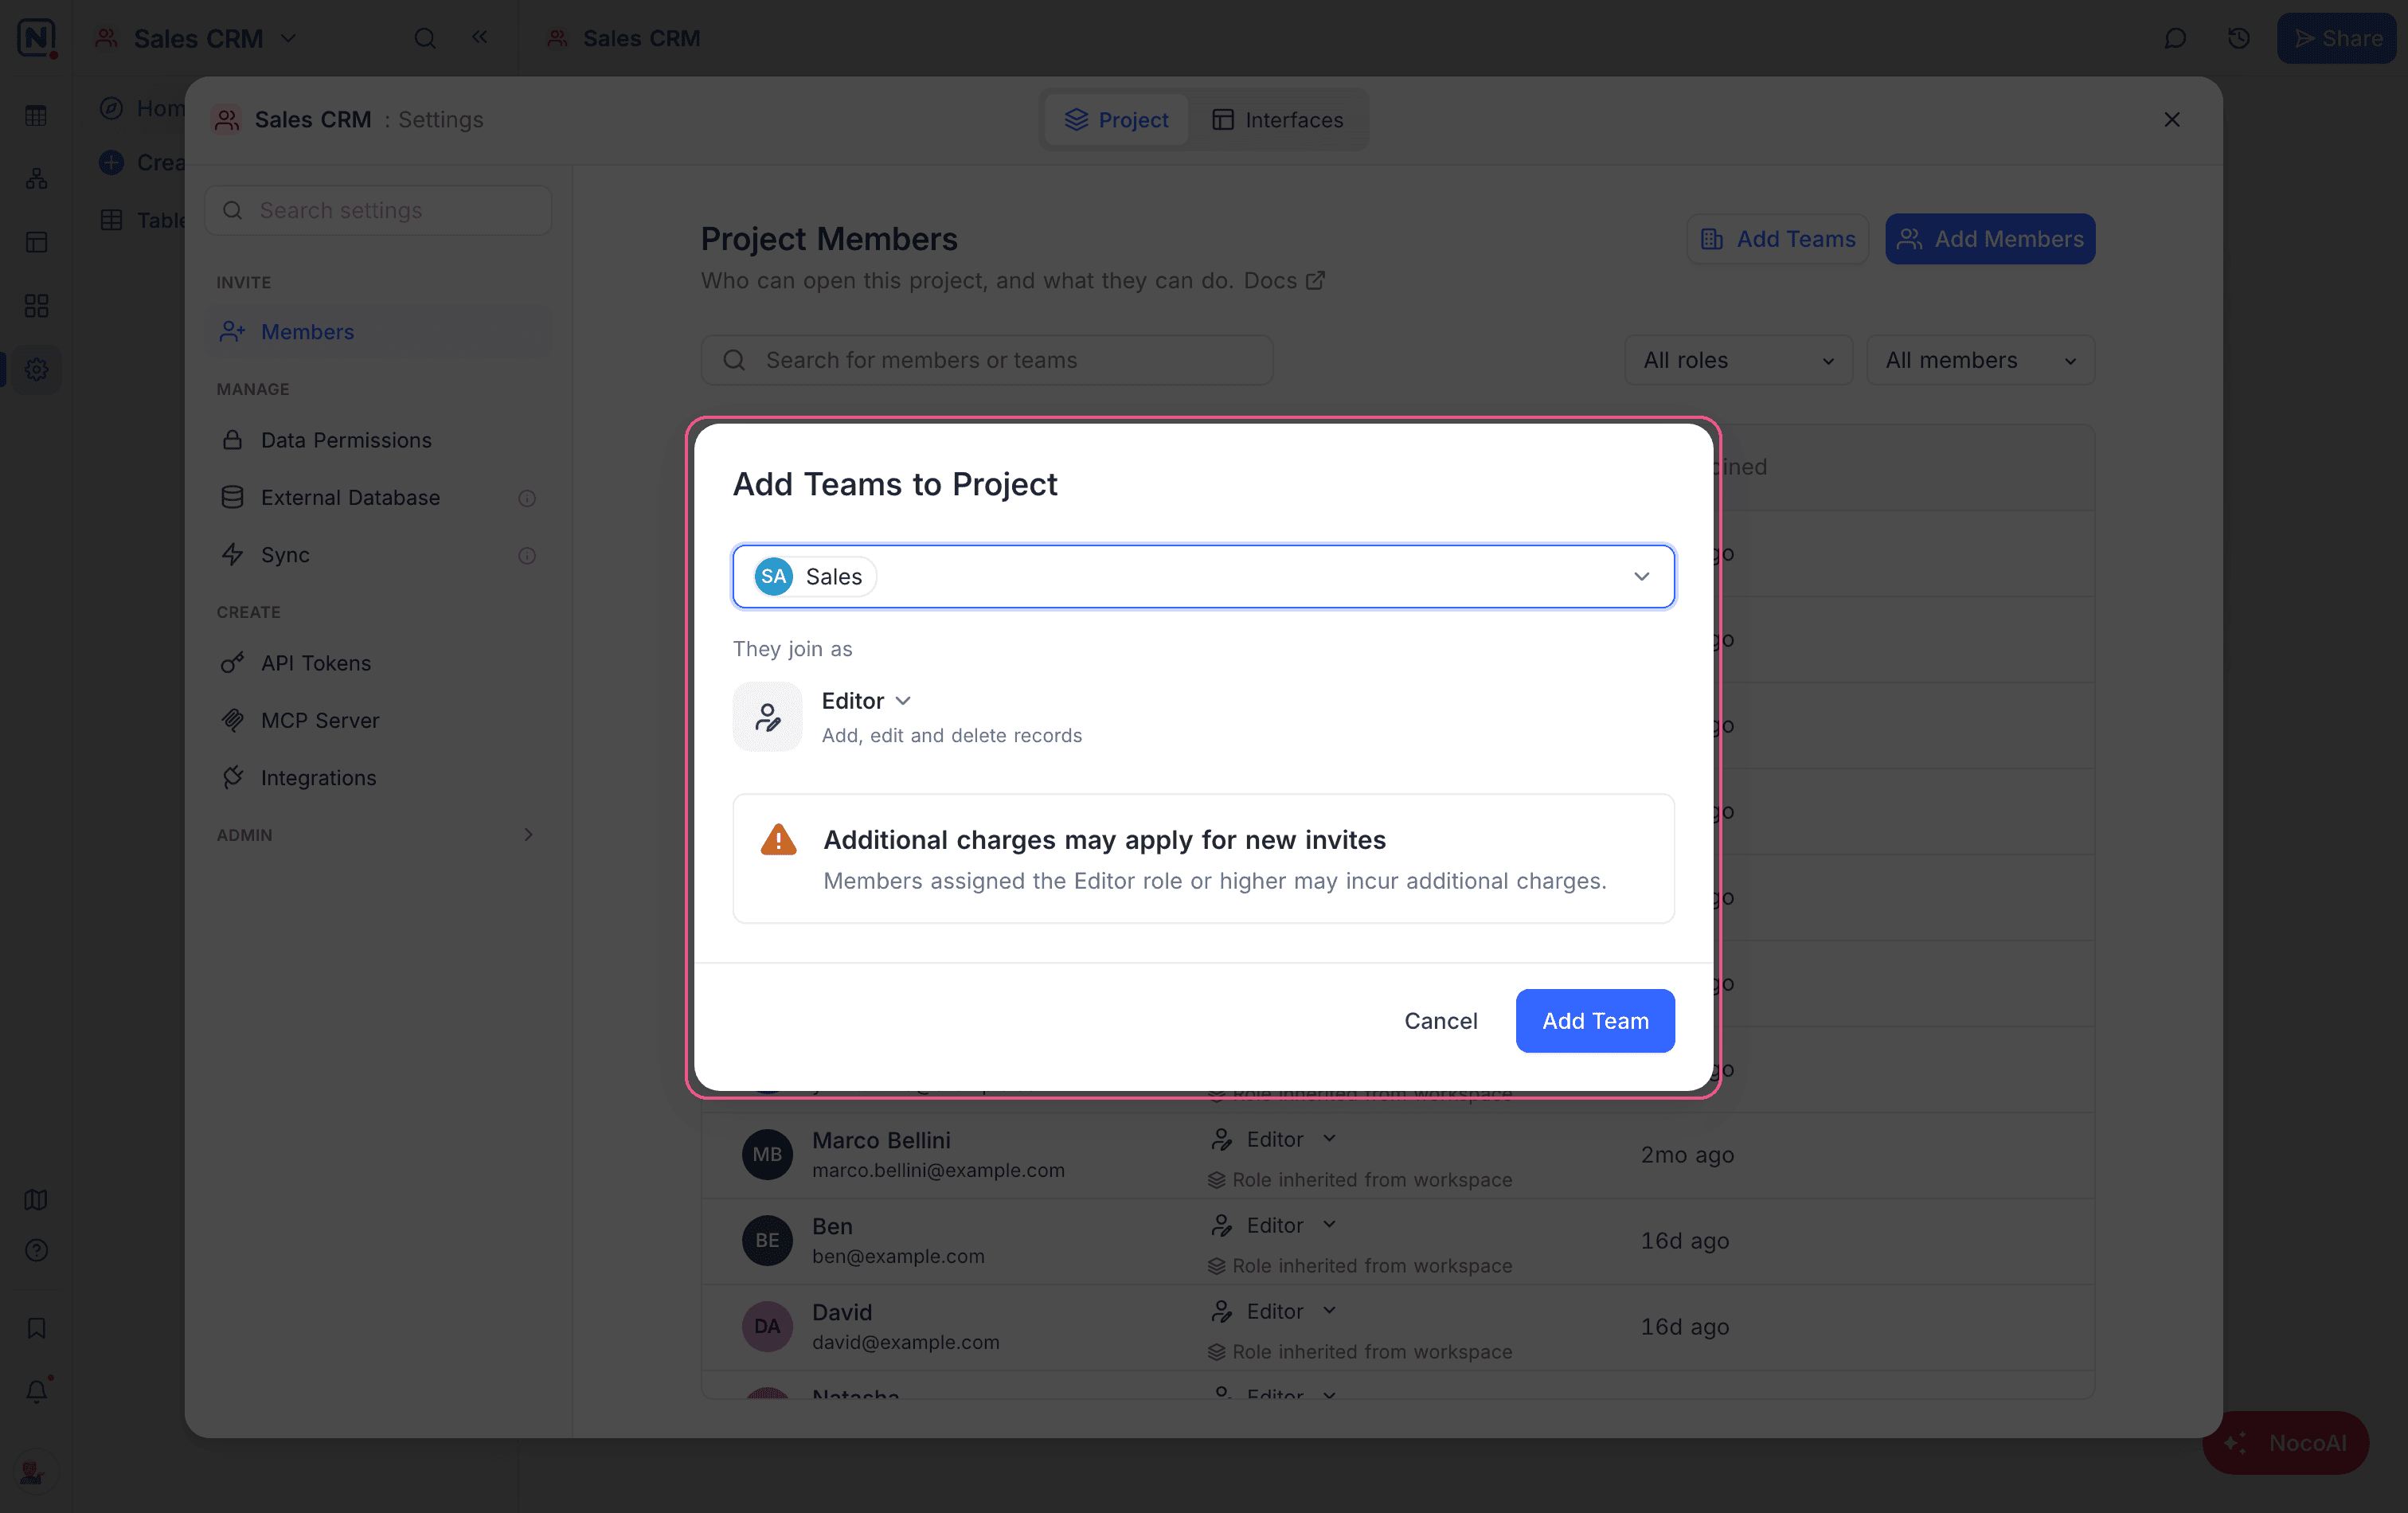
To learn more about creating and managing teams, refer to the Teams documentation.
List Project Members and Teams
The Members page shows all users and teams that have access to the project, with their role and the date they joined. If a role comes from the workspace, it has the label Role inherited from workspace.
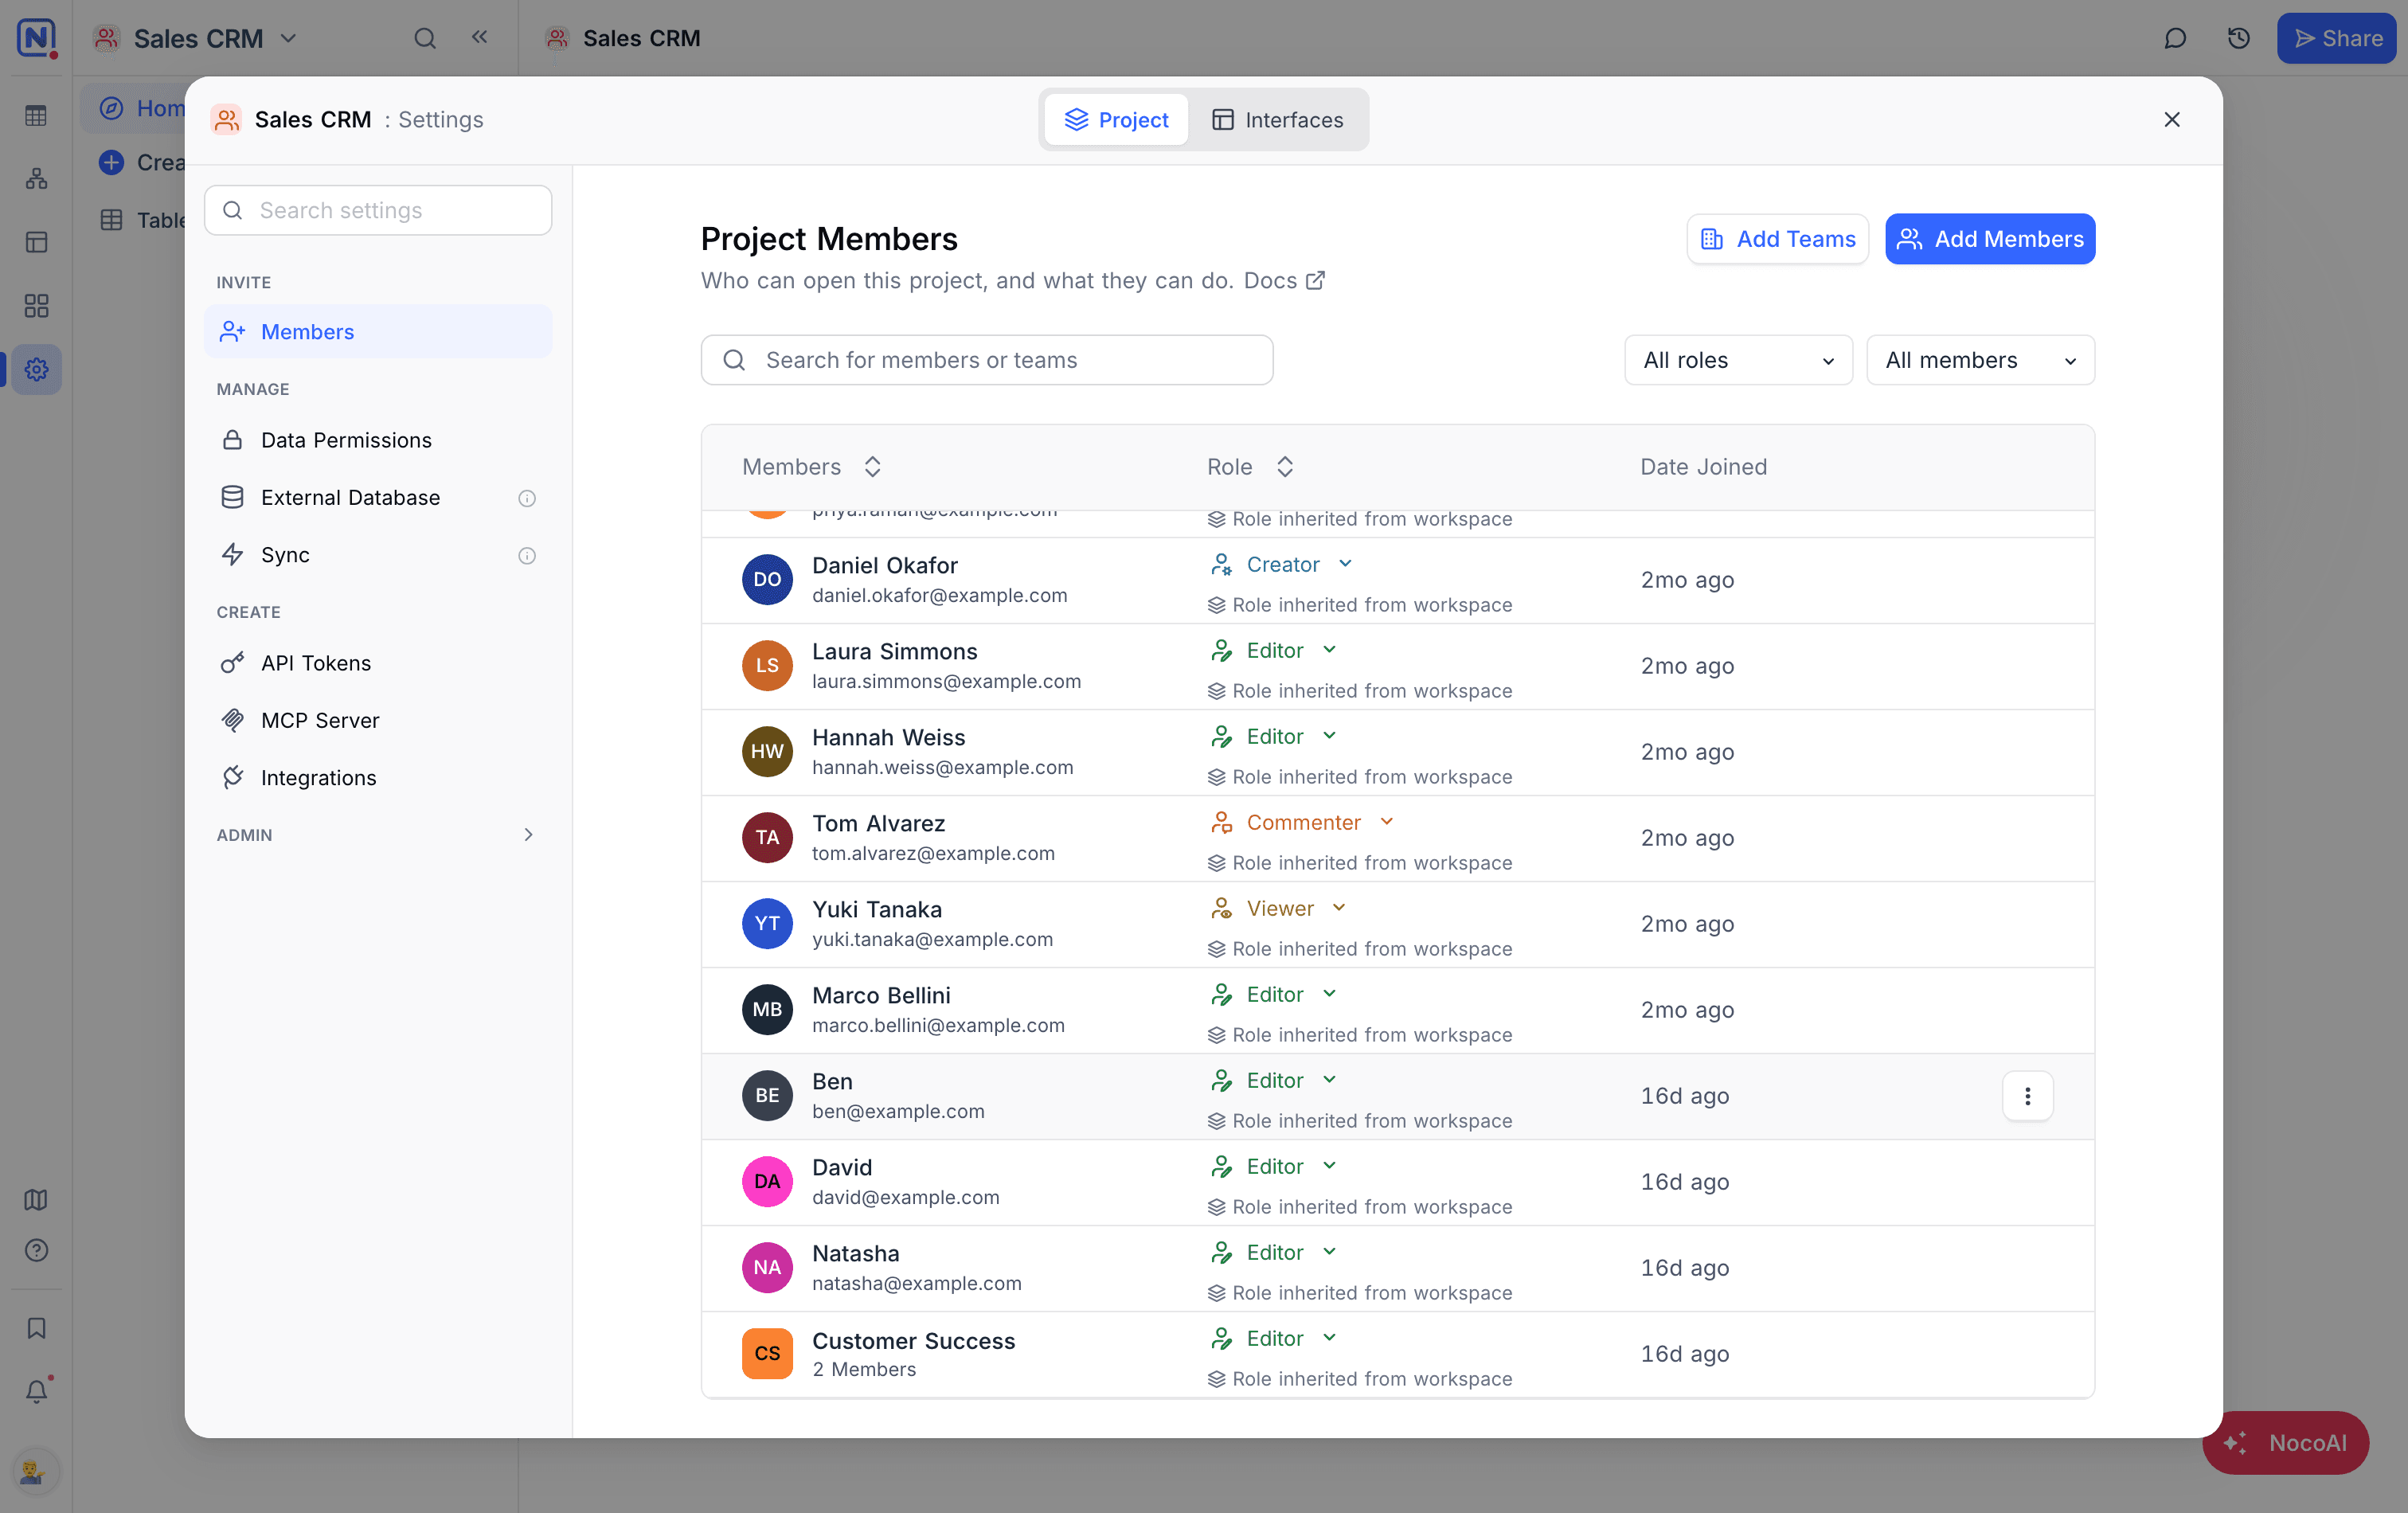
Modify Roles for Members or Teams
- Click the role dropdown next to the member or team.
- Select a new role: Creator, Editor, Commenter, Viewer, App User, No Access, or Inherit. Each role shows a one-line description. The change applies immediately. Owner is not in the list, because the dropdown cannot grant it.
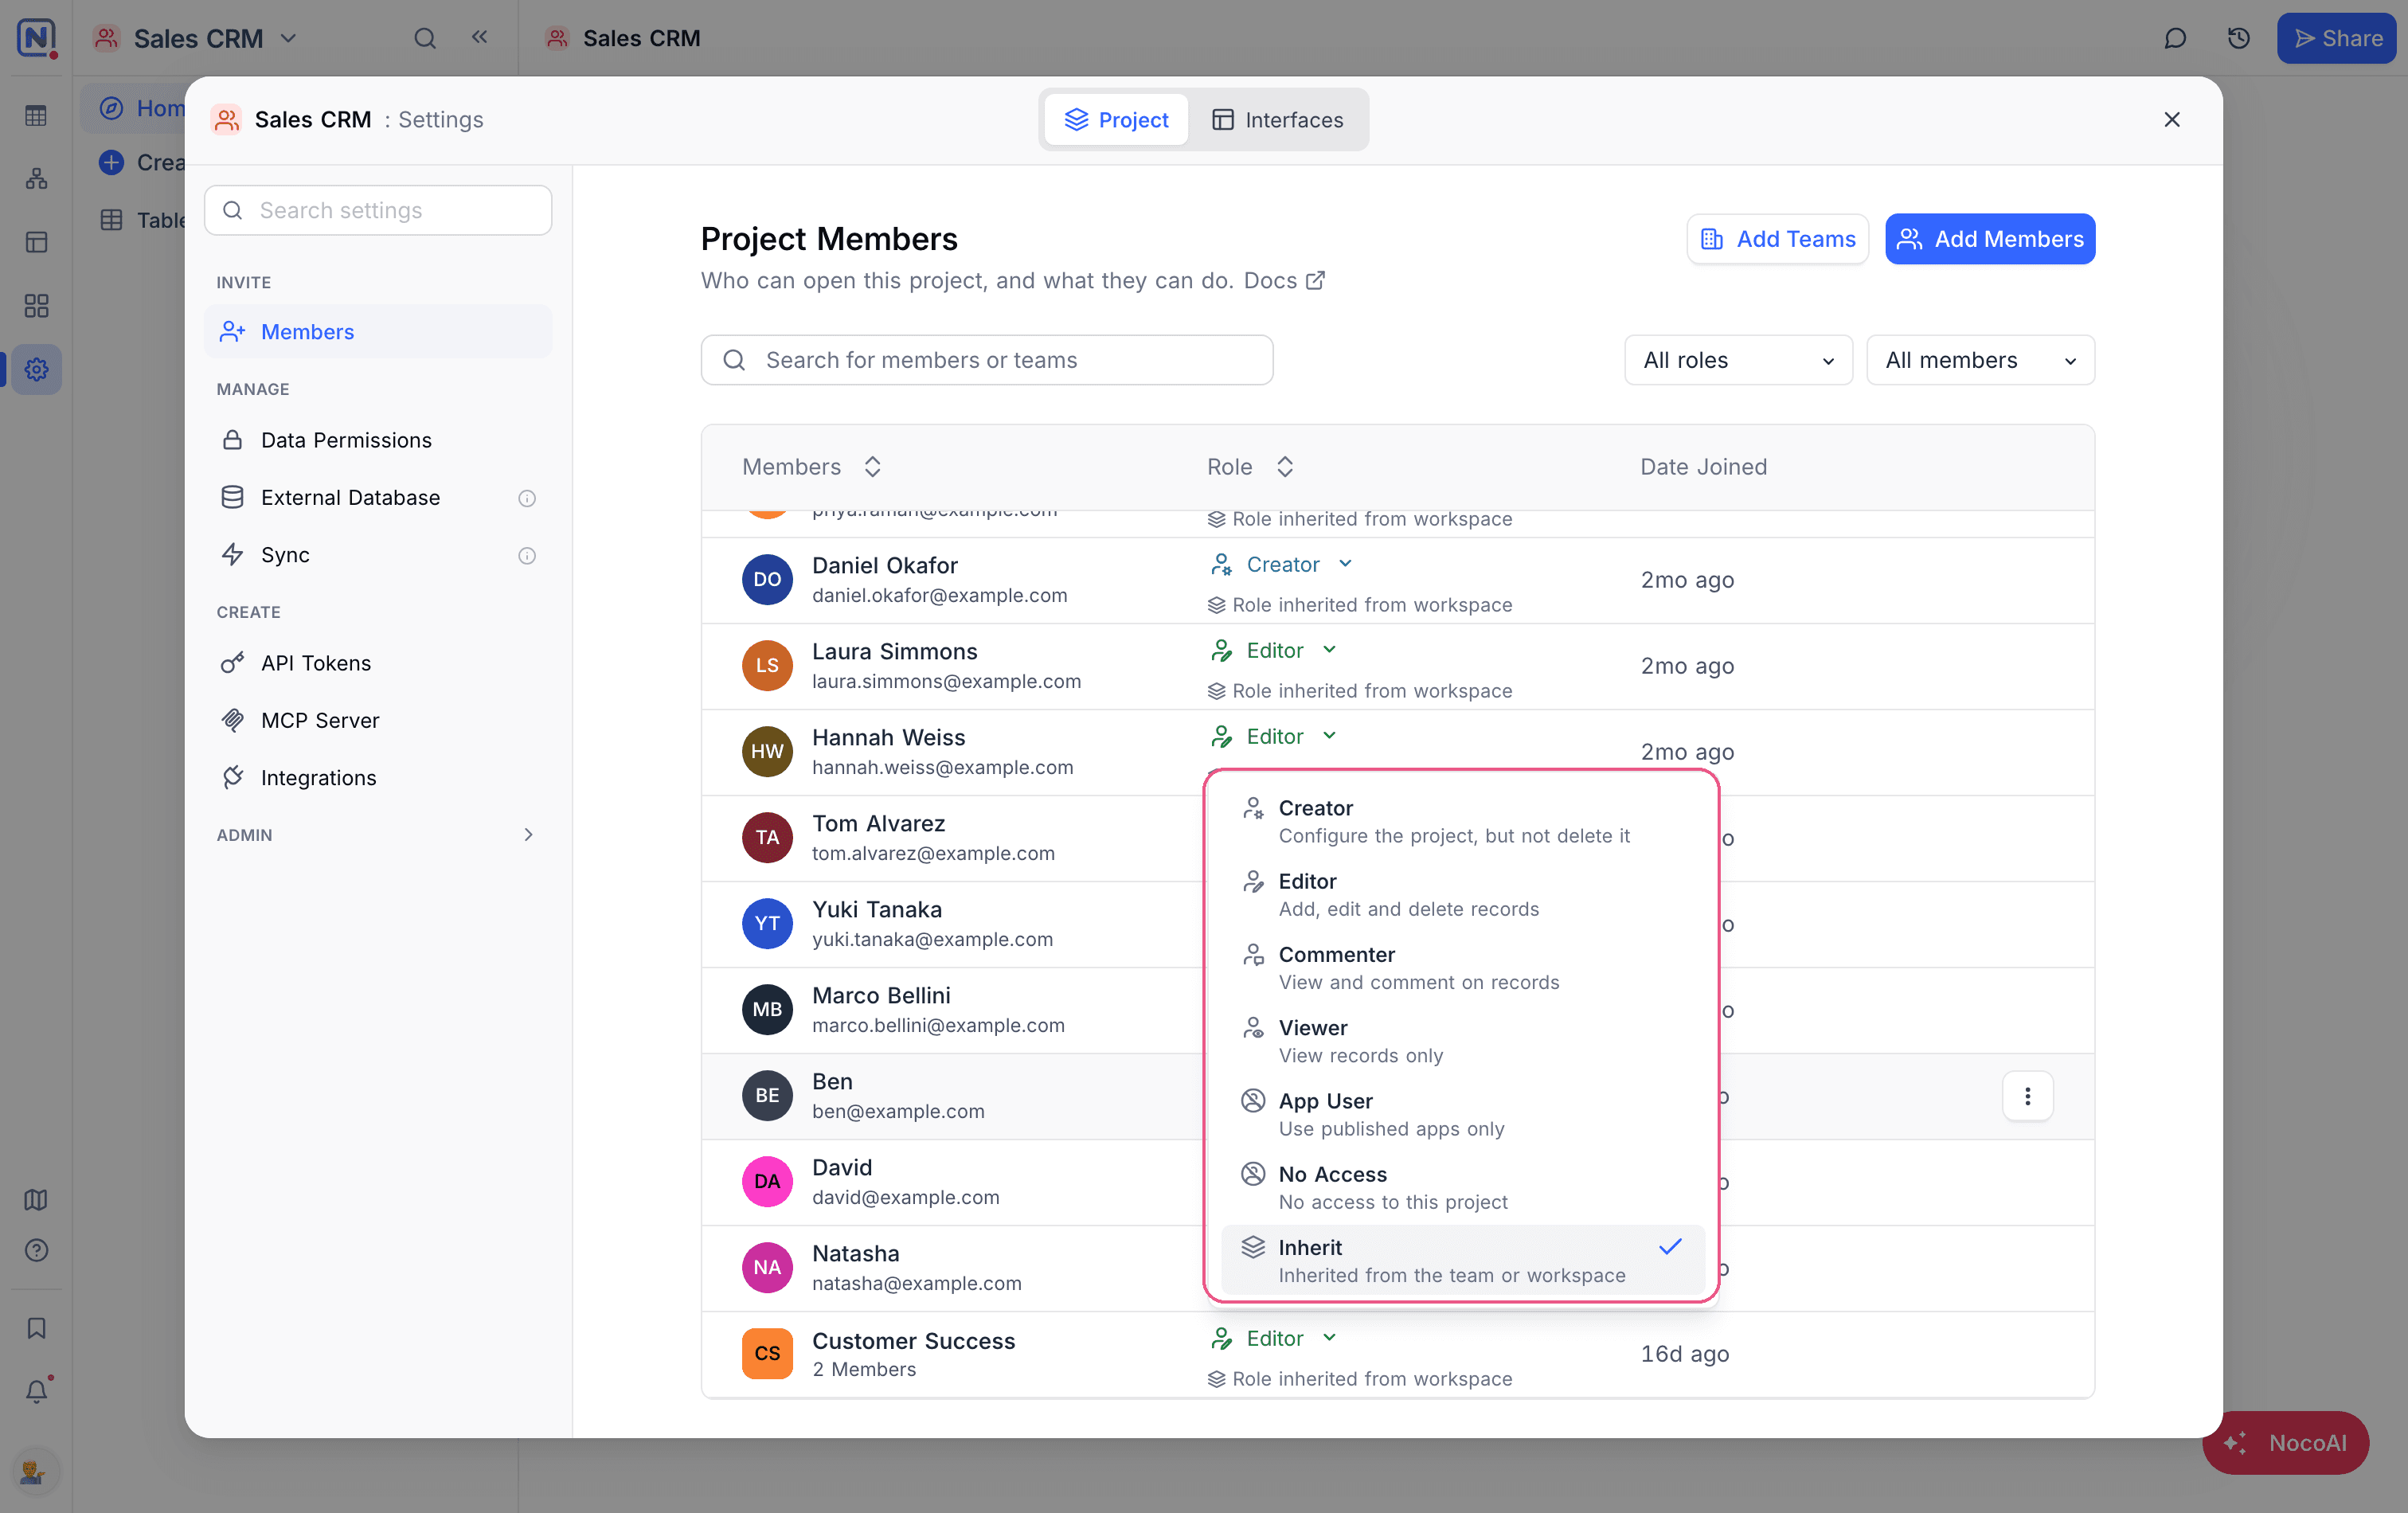
Role Precedence
NocoDB uses these rules when a user gets roles from teams and from individual access:
| The user has | The role that applies |
|---|---|
| An individual role and a team role | The individual role |
| A workspace role and a project role | The project role |
| Roles from two or more teams | The highest team role |
Learn more about effective role resolution.
Remove or Revoke Project Access
Deny Access
To block a user or team from the project:
- Click the role dropdown next to the member or team.
- Select No Access.
Revoke Explicit Assignment
To remove a project-level role and use the workspace or team role again:
- Click the role dropdown next to the member or team.
- Select Inherit.
Availability
- Teams are available on NocoDB Cloud (Business plan and above) and on licensed self-hosted deployments (Scale plan and above).
Related
Last updated on