Azure AD (Entra)
Learn how to configure Active Directory as an identity provider for NocoDB.
SAML SSO is available on NocoDB Cloud (Business plan and above) and licensed self-hosted deployments (Business plan and above). For access, please reach out to sales team.
This article briefs about the steps to configure Active Directory as Identity service provider for NocoDB
For users on Business plan, the SSO configuration menu is available under Workspace Settings.
Refer here for more details.
Domain Verification Required for Cloud Plans: Before configuring SAML SSO, you must verify your domain in NocoDB (required for both Business and Enterprise plans in the cloud). Only users with email addresses from verified domains can sign in via SSO. See Domain Verification for details.
NocoDB, Retrieve SAML SSO Configuration details
- Go to
Account Settings - Select
Authentication (SSO) - Click on
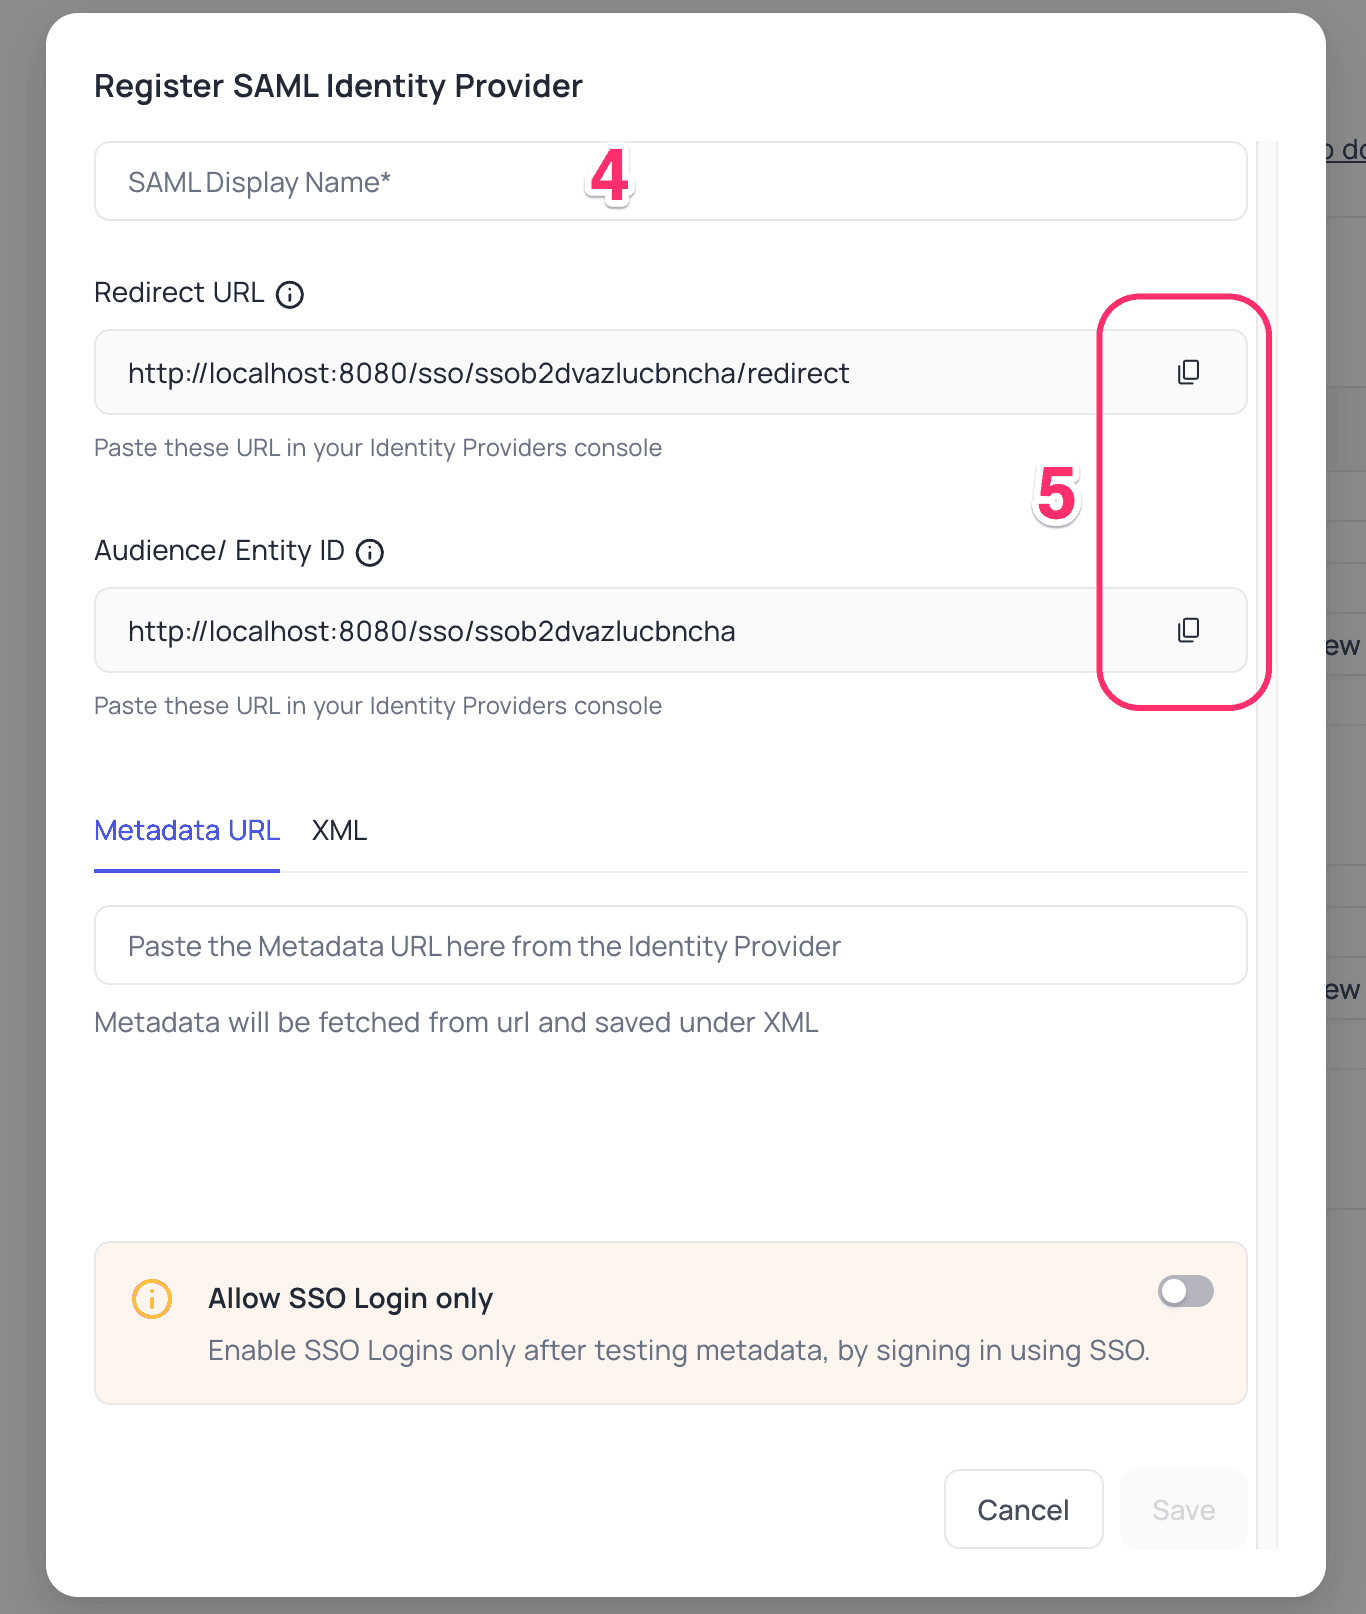
New Providerbutton - On the Popup modal, Specify a
Display namefor the provider; note that, this name will be used to display the provider on the login page - Retrieve
Redirect URL&Audience / Entity ID; these information will be required to be configured later with the Identity Provider


Azure AD, Configure NocoDB as an Application
- Sign in to your Azure account and navigate
to
Microsoft Entra admin center>Identity>Enterprise applications - Click
+ New application - On the
Browse Microsoft Entra Gallerypage, selectCreate your own applicationfrom the navigation bar.- Provide your application's name.
- Choose
Integrate any other application you don't find in the gallery (Non-gallery) Create
- On your application page, navigate to
Manage>Single sign-on>SAML - Go to the
Basic SAML Configurationsection underSet up Single Sign-On with SAMLand clickEdit- Add the
Audience URIunderIdentifier (Entity ID). - Add the
Redirect URLunderReplay URL (Assertion Consumer Service URL). - Click
Save
- Add the
- In the
Attributes & Claimssection, clickEdit- Edit the "Unique User Identifier (Name ID)" claim:
- Select
Email addressfrom theName identifier formatdropdown - Choose
Attributeas theSource - In the
Source attribute, selectuser.mail - Click
Save
- Select
- Edit the "Unique User Identifier (Name ID)" claim:
- Go to the
SAML Certificatessection and copy theApp Federation Metadata URL - on the Application's Overview page,
- Click
Users and groups, - Add the necessary users or groups to the application.
- Click
NocoDB, Configure Azure AD as an Identity Provider
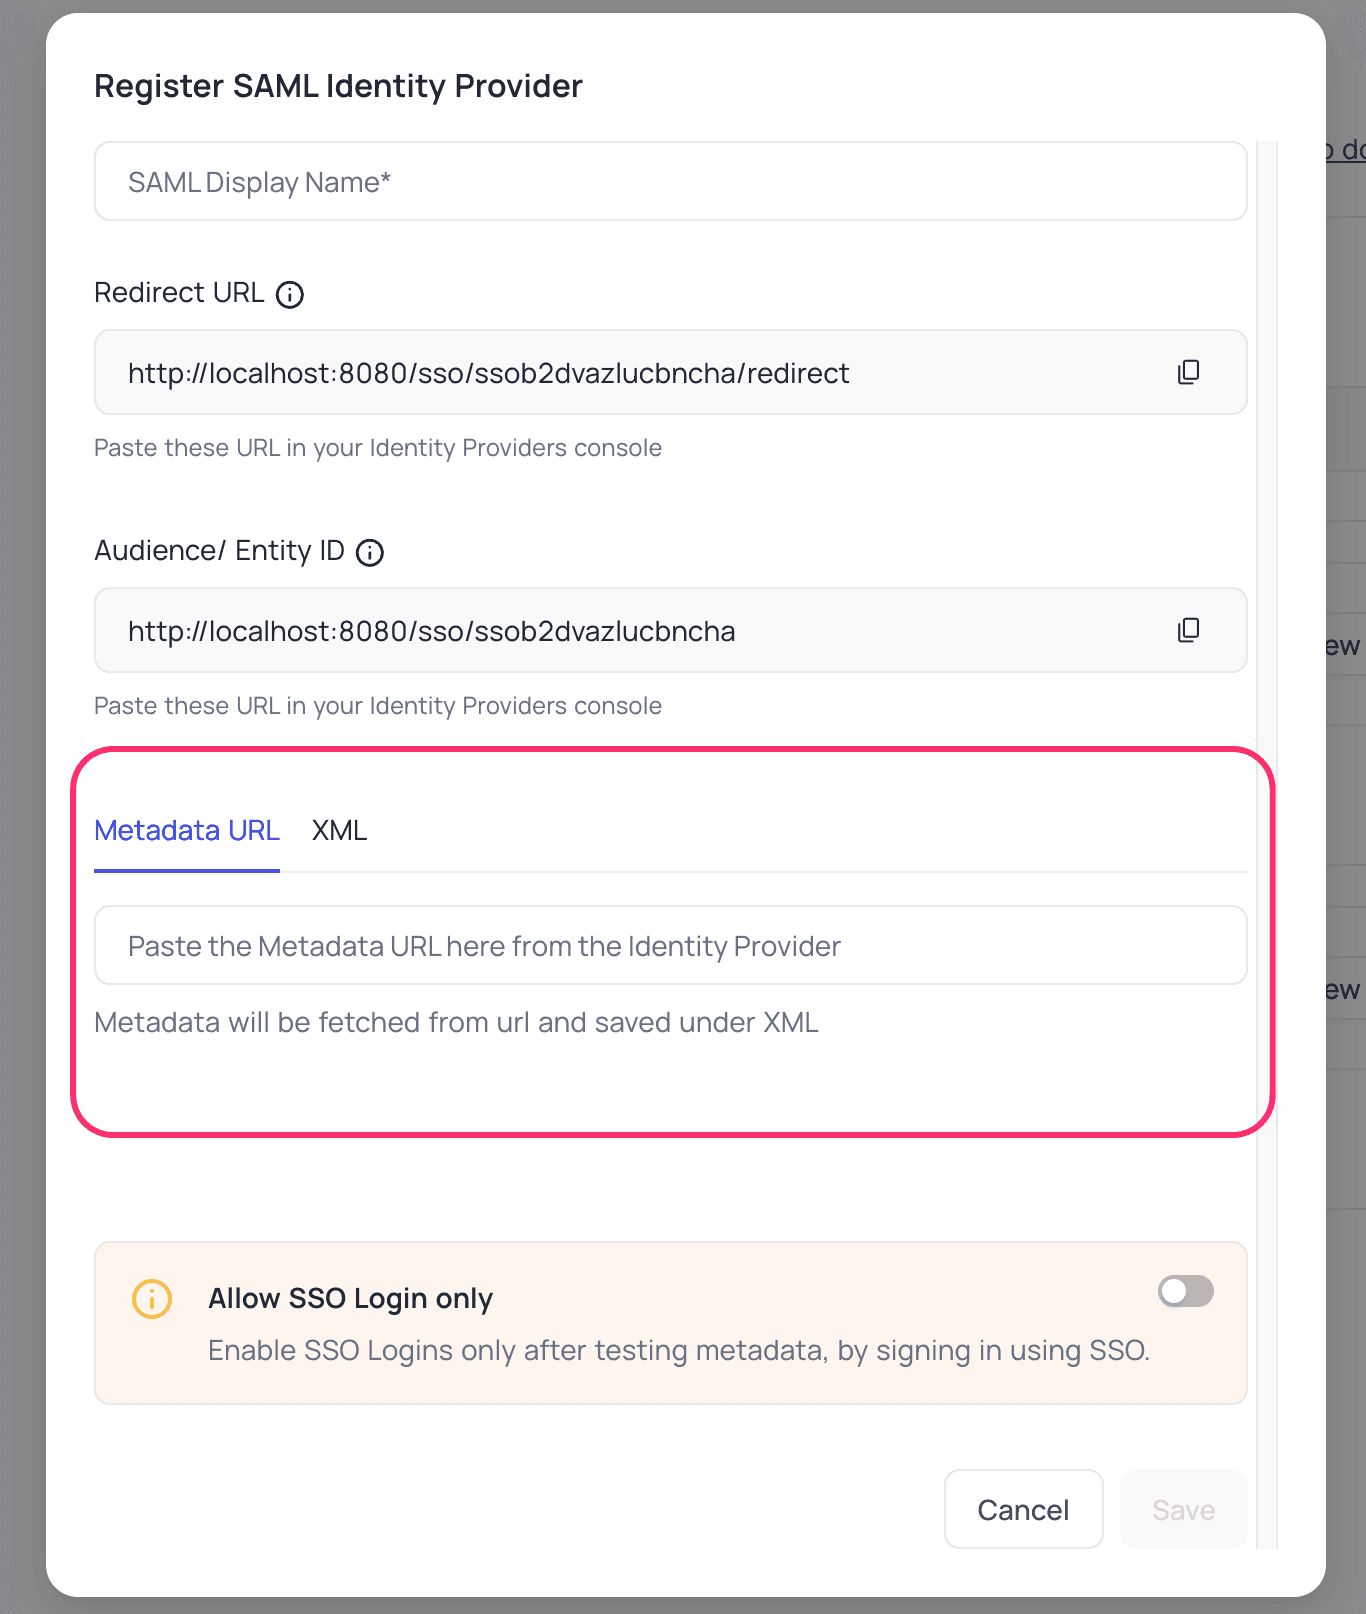
- Go to
Account Settings>Authentication>SAML - Insert
Metadata URLretrieved in step above; alternatively you can configure XML directly as well Save
For Sign-in's, user should be able to now see Sign in with <SSO> option.
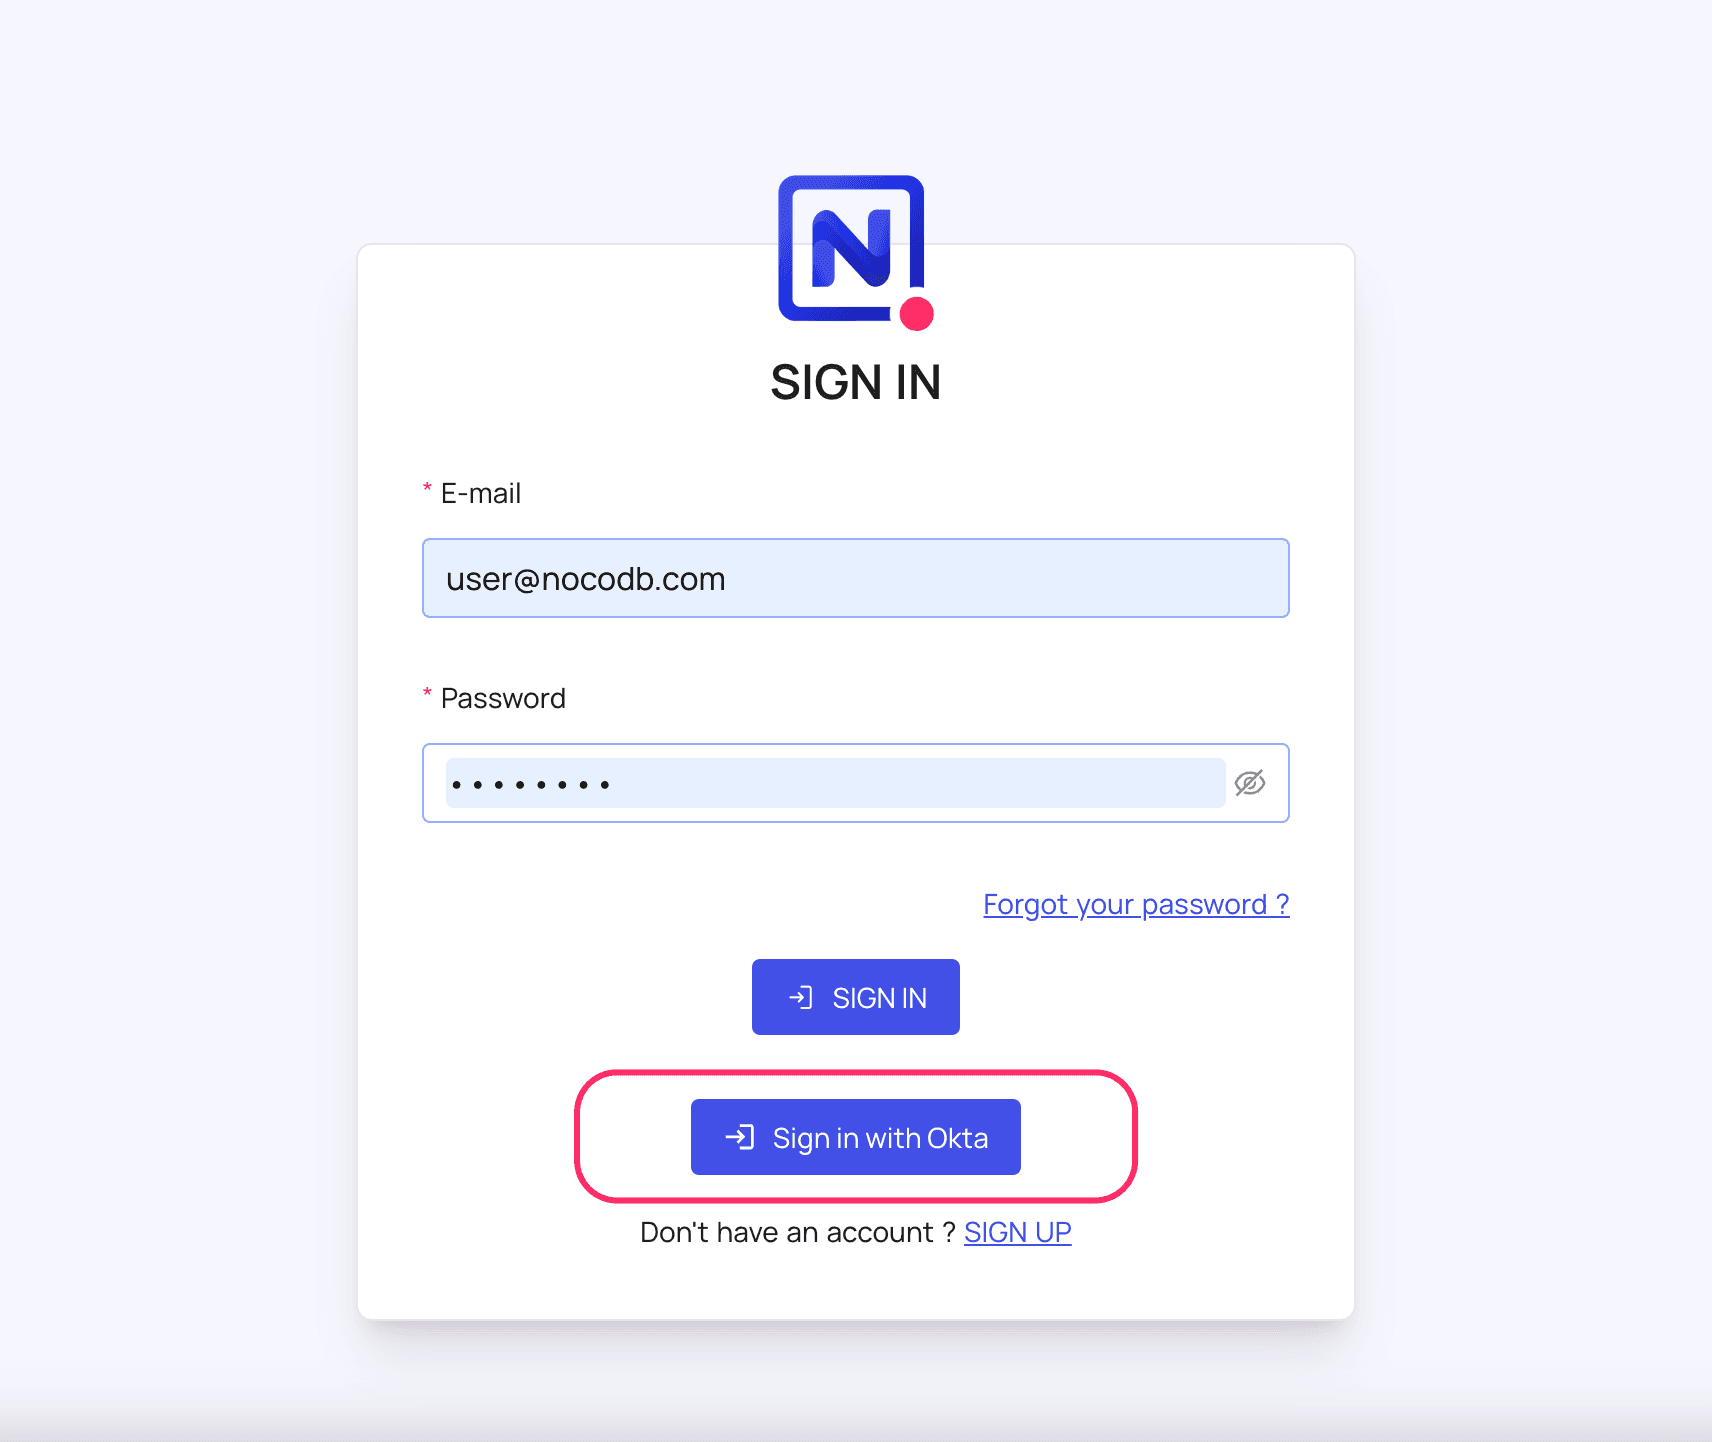
Post sign-out, refresh page (for the first time) if you do not see Sign in with SSO option
For more common questions and troubleshooting, see our SSO FAQ.