App API and MCP
Each deployed NocoDB app has its own REST API and its own MCP server. Both expose the actions of the app: "Let programs and AI agents call this app's actions from outside." Every call needs an app API token. You manage tokens and see the API in App Settings → API / MCP.
The API / MCP tab has three tabs:
| Tab | What it shows |
|---|---|
| Tokens | The app API tokens, and Create New API Token. |
| API Spec | The address of the API and each action you can call, with its input fields and response. |
| MCP | The setup steps and the config block for MCP clients. |
The API and MCP server start when you deploy the app. Before the first deploy, the tab shows Not published yet.
Create an app API token
"A token acts as the person who created it, and reaches every action that person can run."
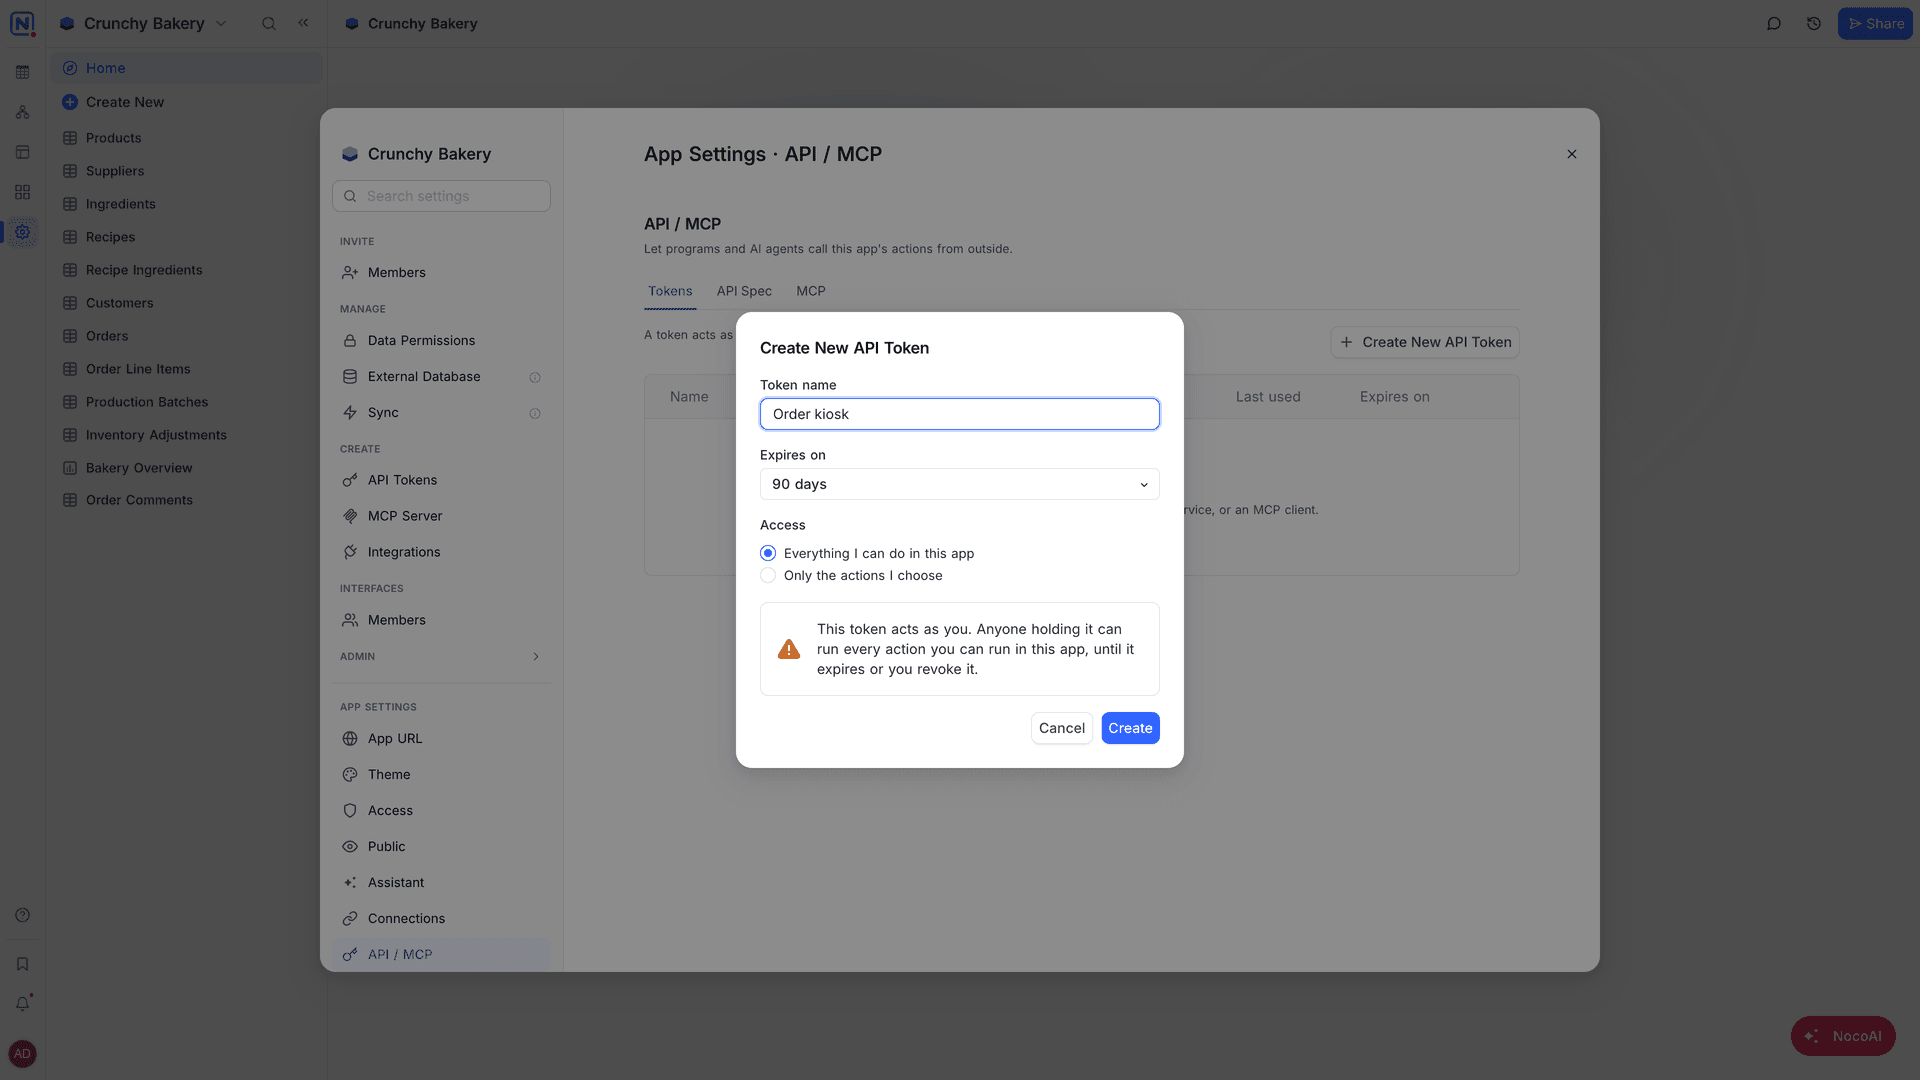
- Open App Settings → API / MCP → Tokens.
- Click Create New API Token.
- Type a Token name, for example "Billing sync".
- Select Expires on: 30, 60, 90 or 365 days, or No expiration. The default is 90 days.
- Select Access:
- Everything I can do in this app: the token can run every action that you can run.
- Only the actions I choose: select the actions that the token can run.
- Click Create. NocoDB shows the token one time.
- Click Copy, then Done. "Copy it now. Only a digest is stored, so it cannot be shown again."
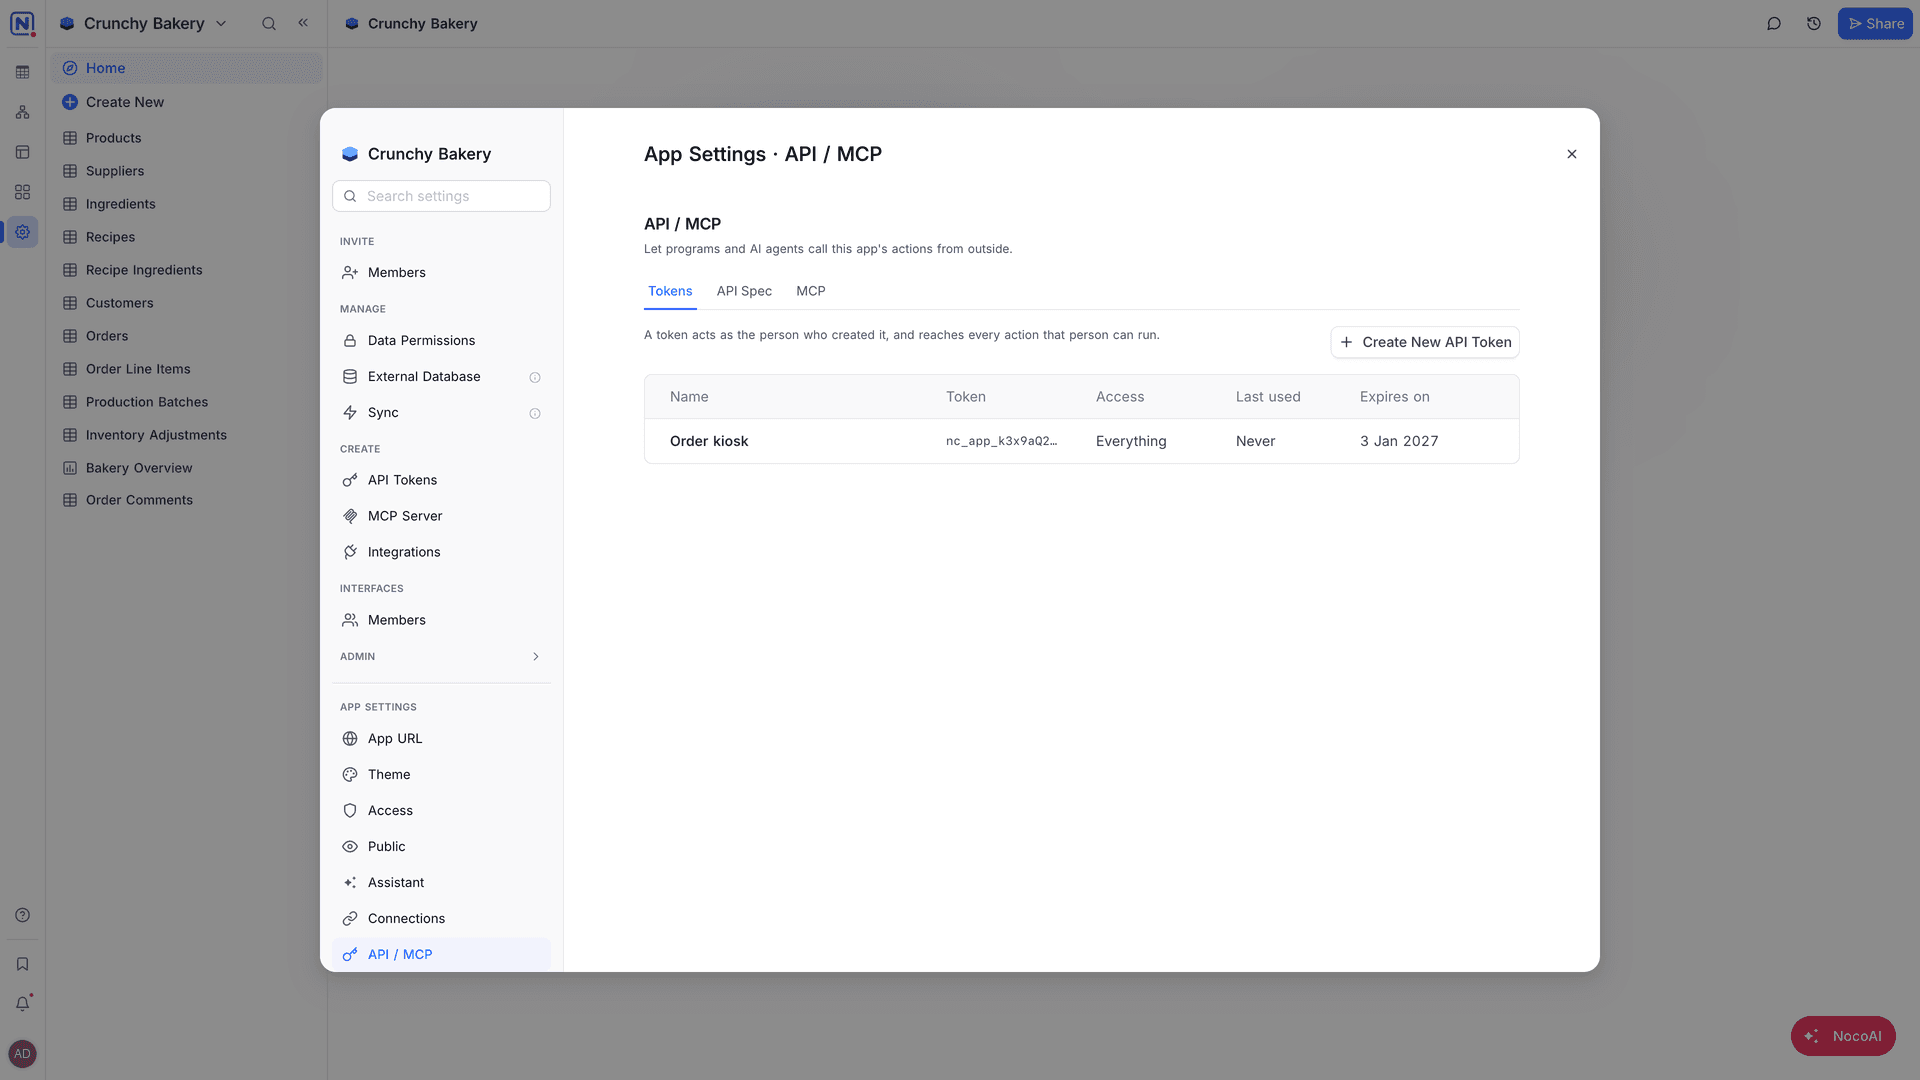
The token list shows the Name, Token, Access, Last used and Expires on of each token. To change a token, open its menu and select Edit. Only the person who created a token can edit it. To revoke a token, select Delete.
Call an action with the API
Send the request to the action address on the app domain. Put the token in the Authorization header and the input of the action under input:
curl -X POST "https://<app address>/api/v1/actions/<action id>" \
  -H "Authorization: Bearer <your-token>" \
  -H "Content-Type: application/json" \
  -d '{"input": {"email": "ada@example.com"}}'
The response returns the result of the action under data. The API Spec tab shows the action IDs, the input fields of each action and the OpenAPI document.
Connect an MCP client
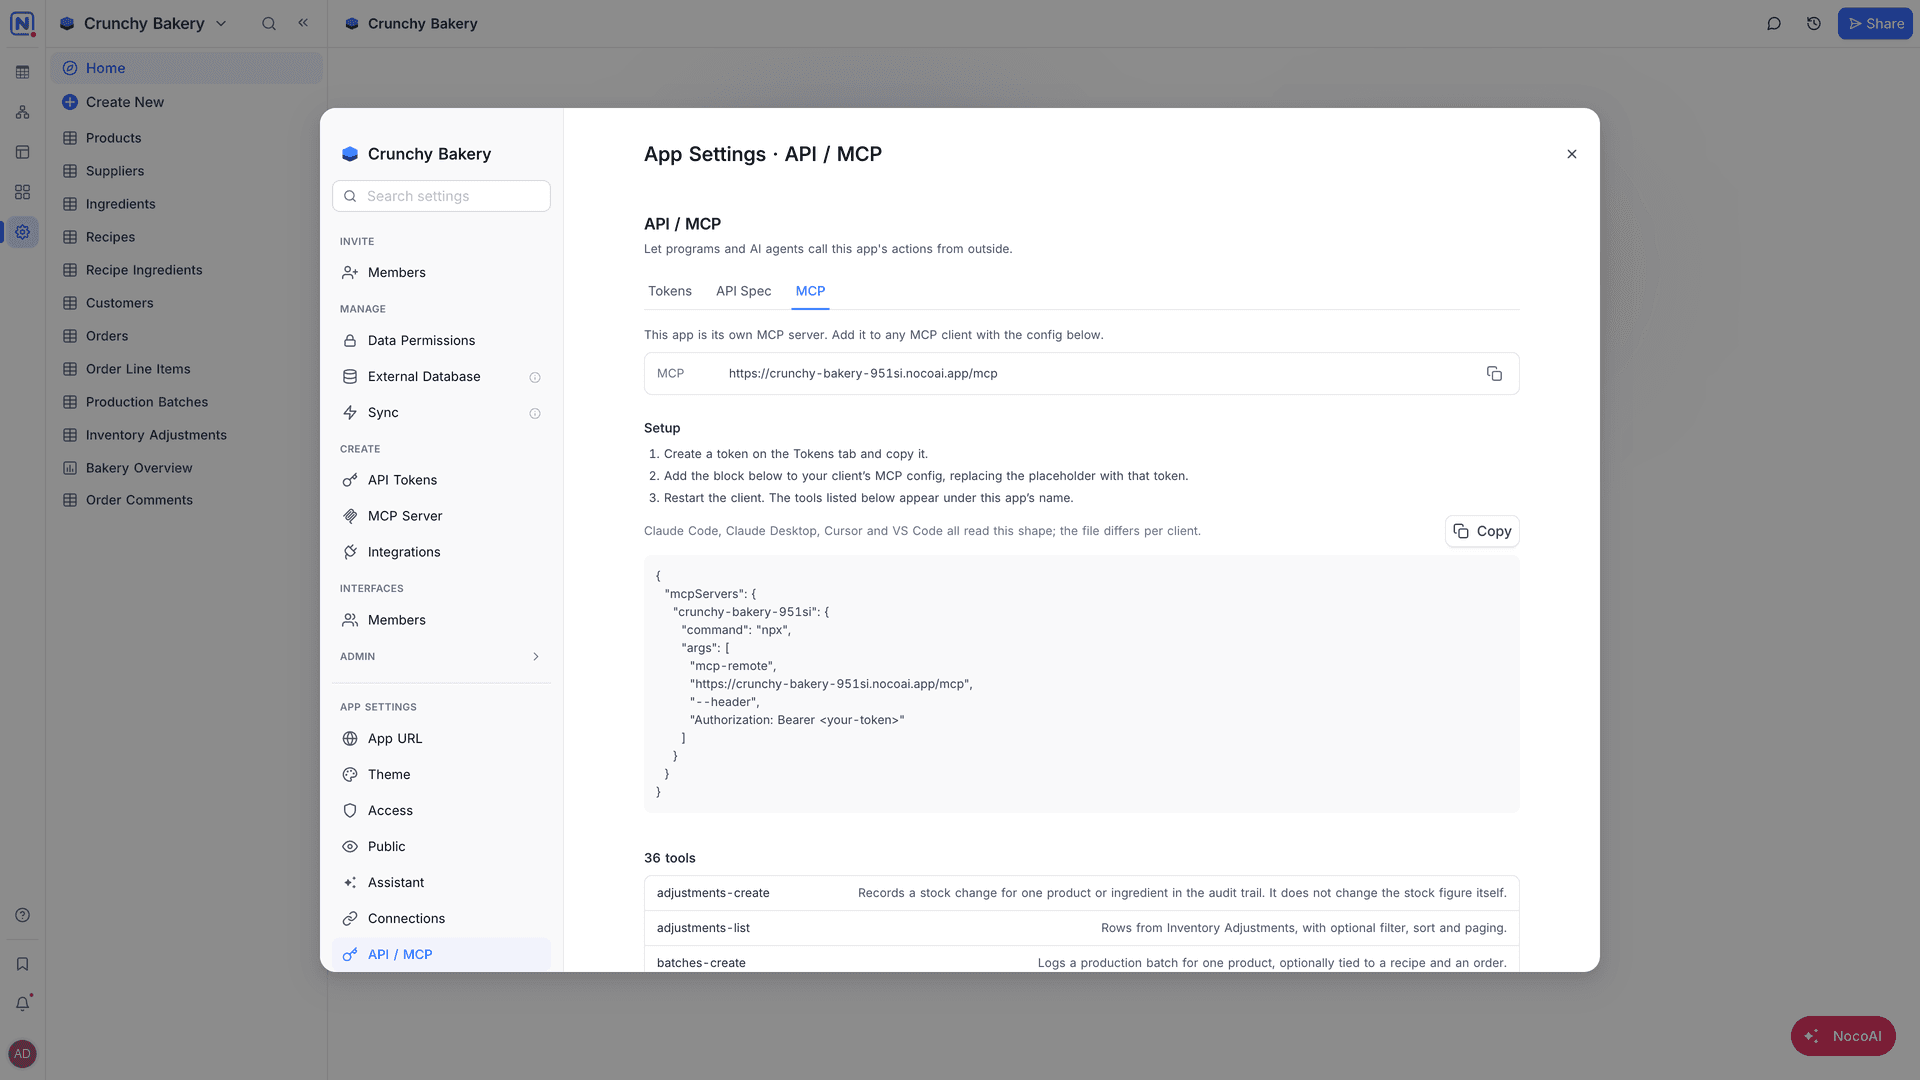
"This app is its own MCP server." Its tools are the actions that your token can run.
- Create a token on the Tokens tab and copy it.
- Open the MCP tab and copy the config block.
- Add the block to the MCP config of your client. Replace
<your-token>with the token. - Restart the client. The tools appear under the name of the app.
The config block has this shape:
{
  "mcpServers": {
    "<app name>": {
      "command": "npx",
      "args": ["mcp-remote", "https://<app address>/mcp", "--header", "Authorization: Bearer <your-token>"]
    }
  }
}
"Claude Code, Claude Desktop, Cursor and VS Code all read this shape." The config file is different for each client.
Good to know
- A token can never do more than its creator. NocoDB checks the access of the creator on every call, so when their team loses an action, the token loses it too.
- Each call with a token counts as an action run. See Availability.
- The app MCP server is separate from the NocoDB MCP server, which works with the whole workspace.
Availability
The app API and MCP server are available on the Plus plan and above.
Related
Last updated on