Create Table via Import
Ask NocoAI
Copy a prompt, paste it into NocoAI in any base, and replace the words in [brackets] with your own.
- Import the attached file as a new table called [Leads]
- Import the attached file and pick the right field type for each column
- Import the attached Excel file and use [Email] as the display value
- Import the attached JSON file as a new table
Import table from CSV / Excel / JSON
Accessing import modal
You can open the import modal in two ways:
1. From the base dashboard
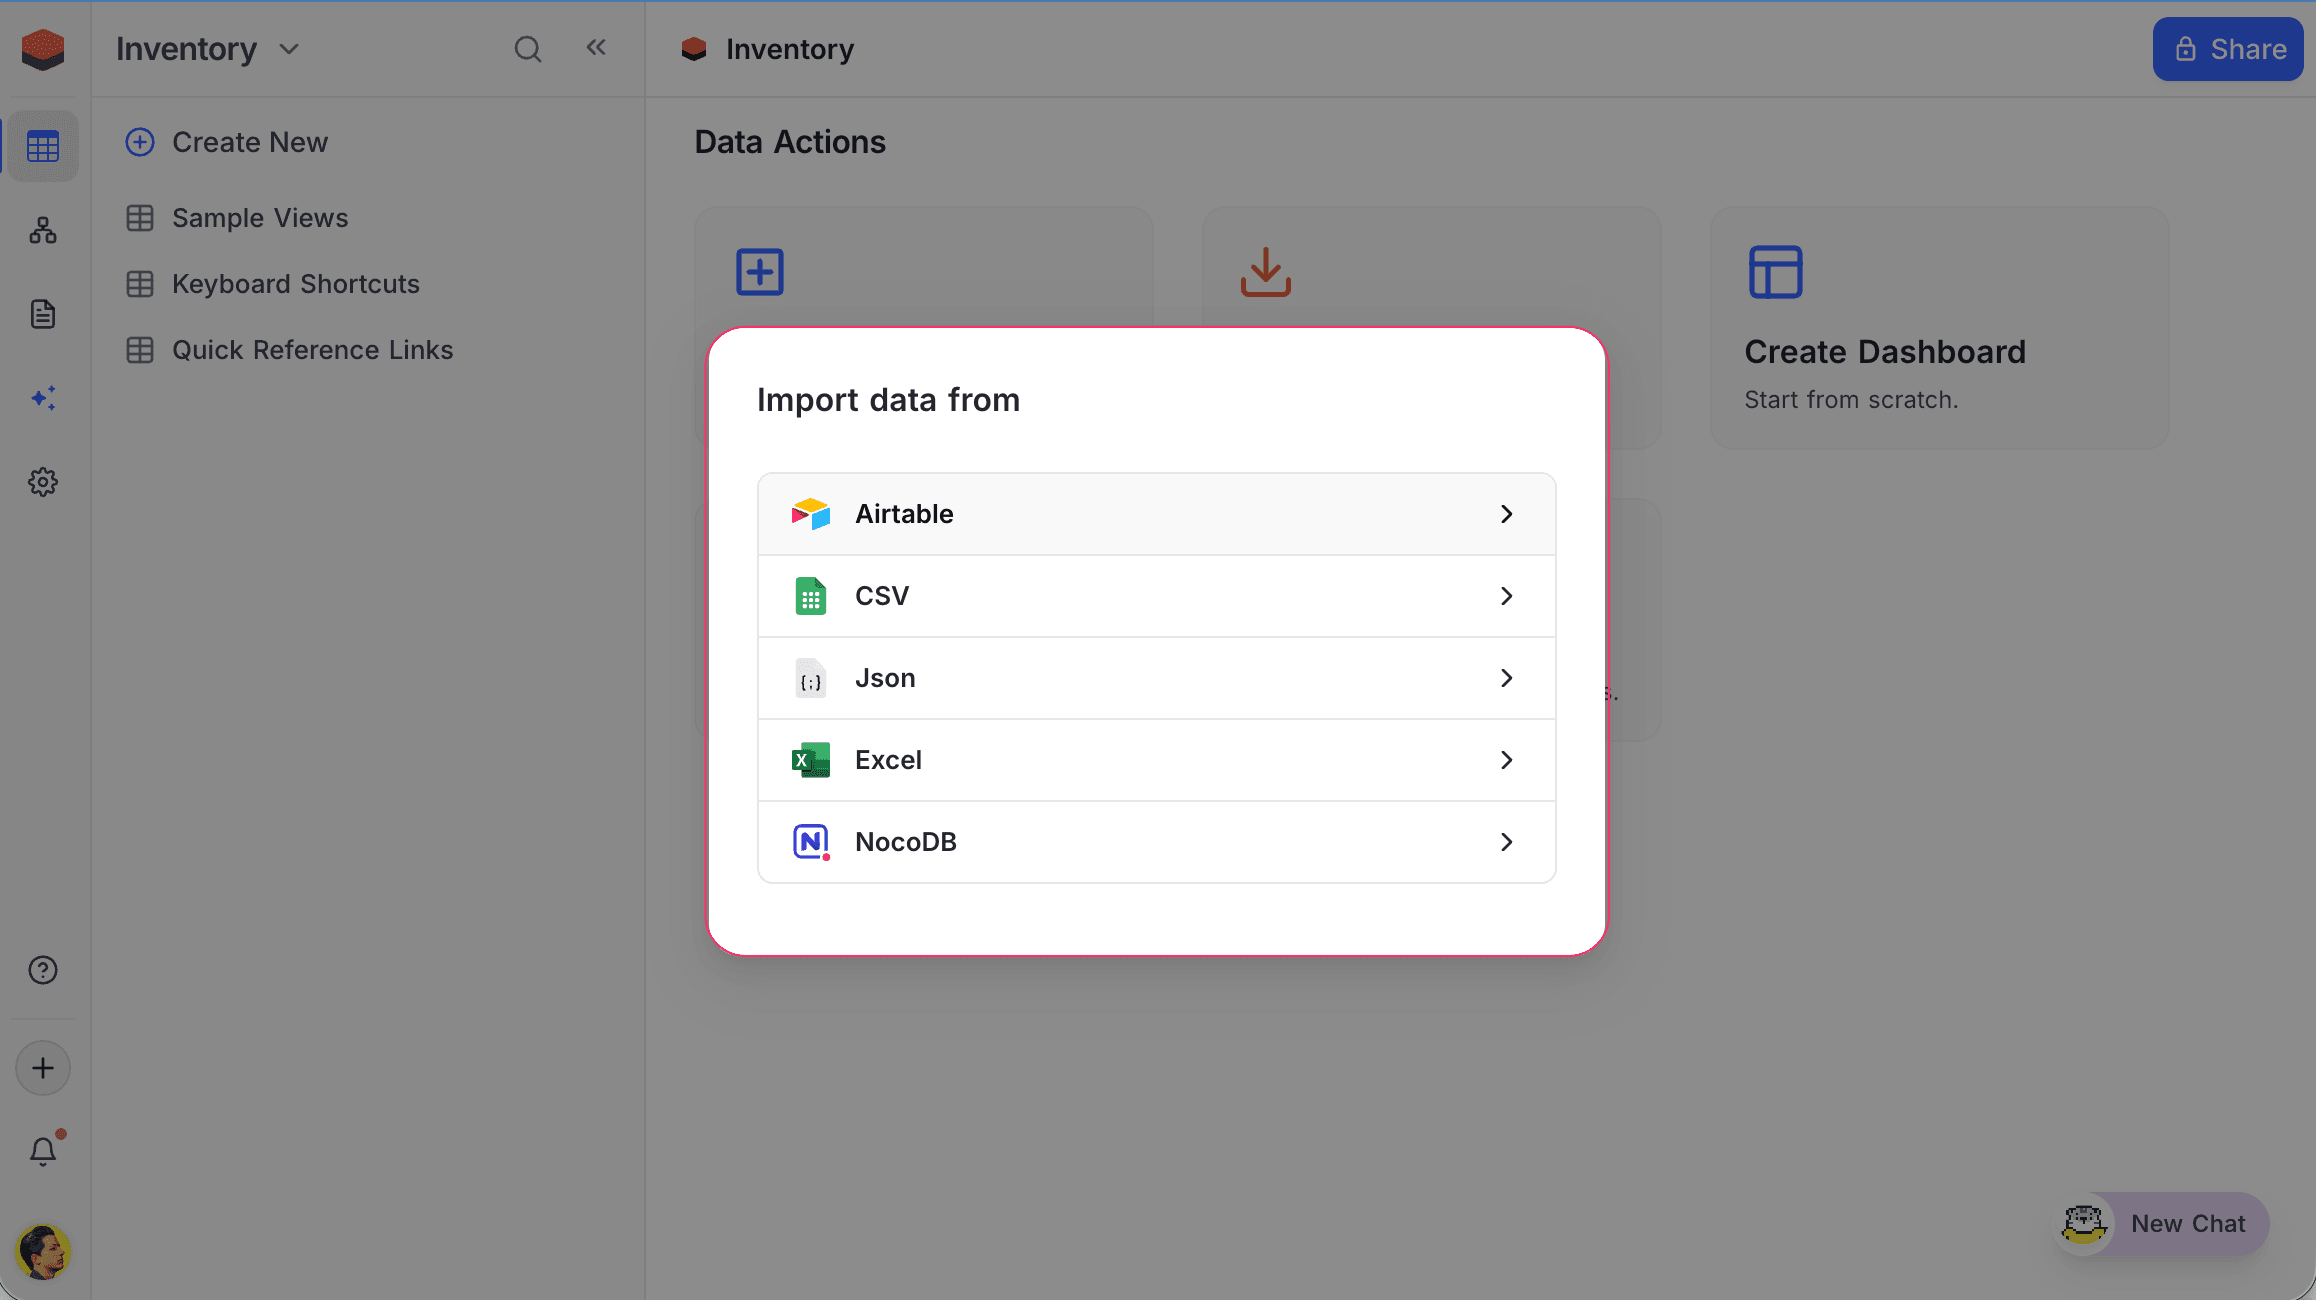
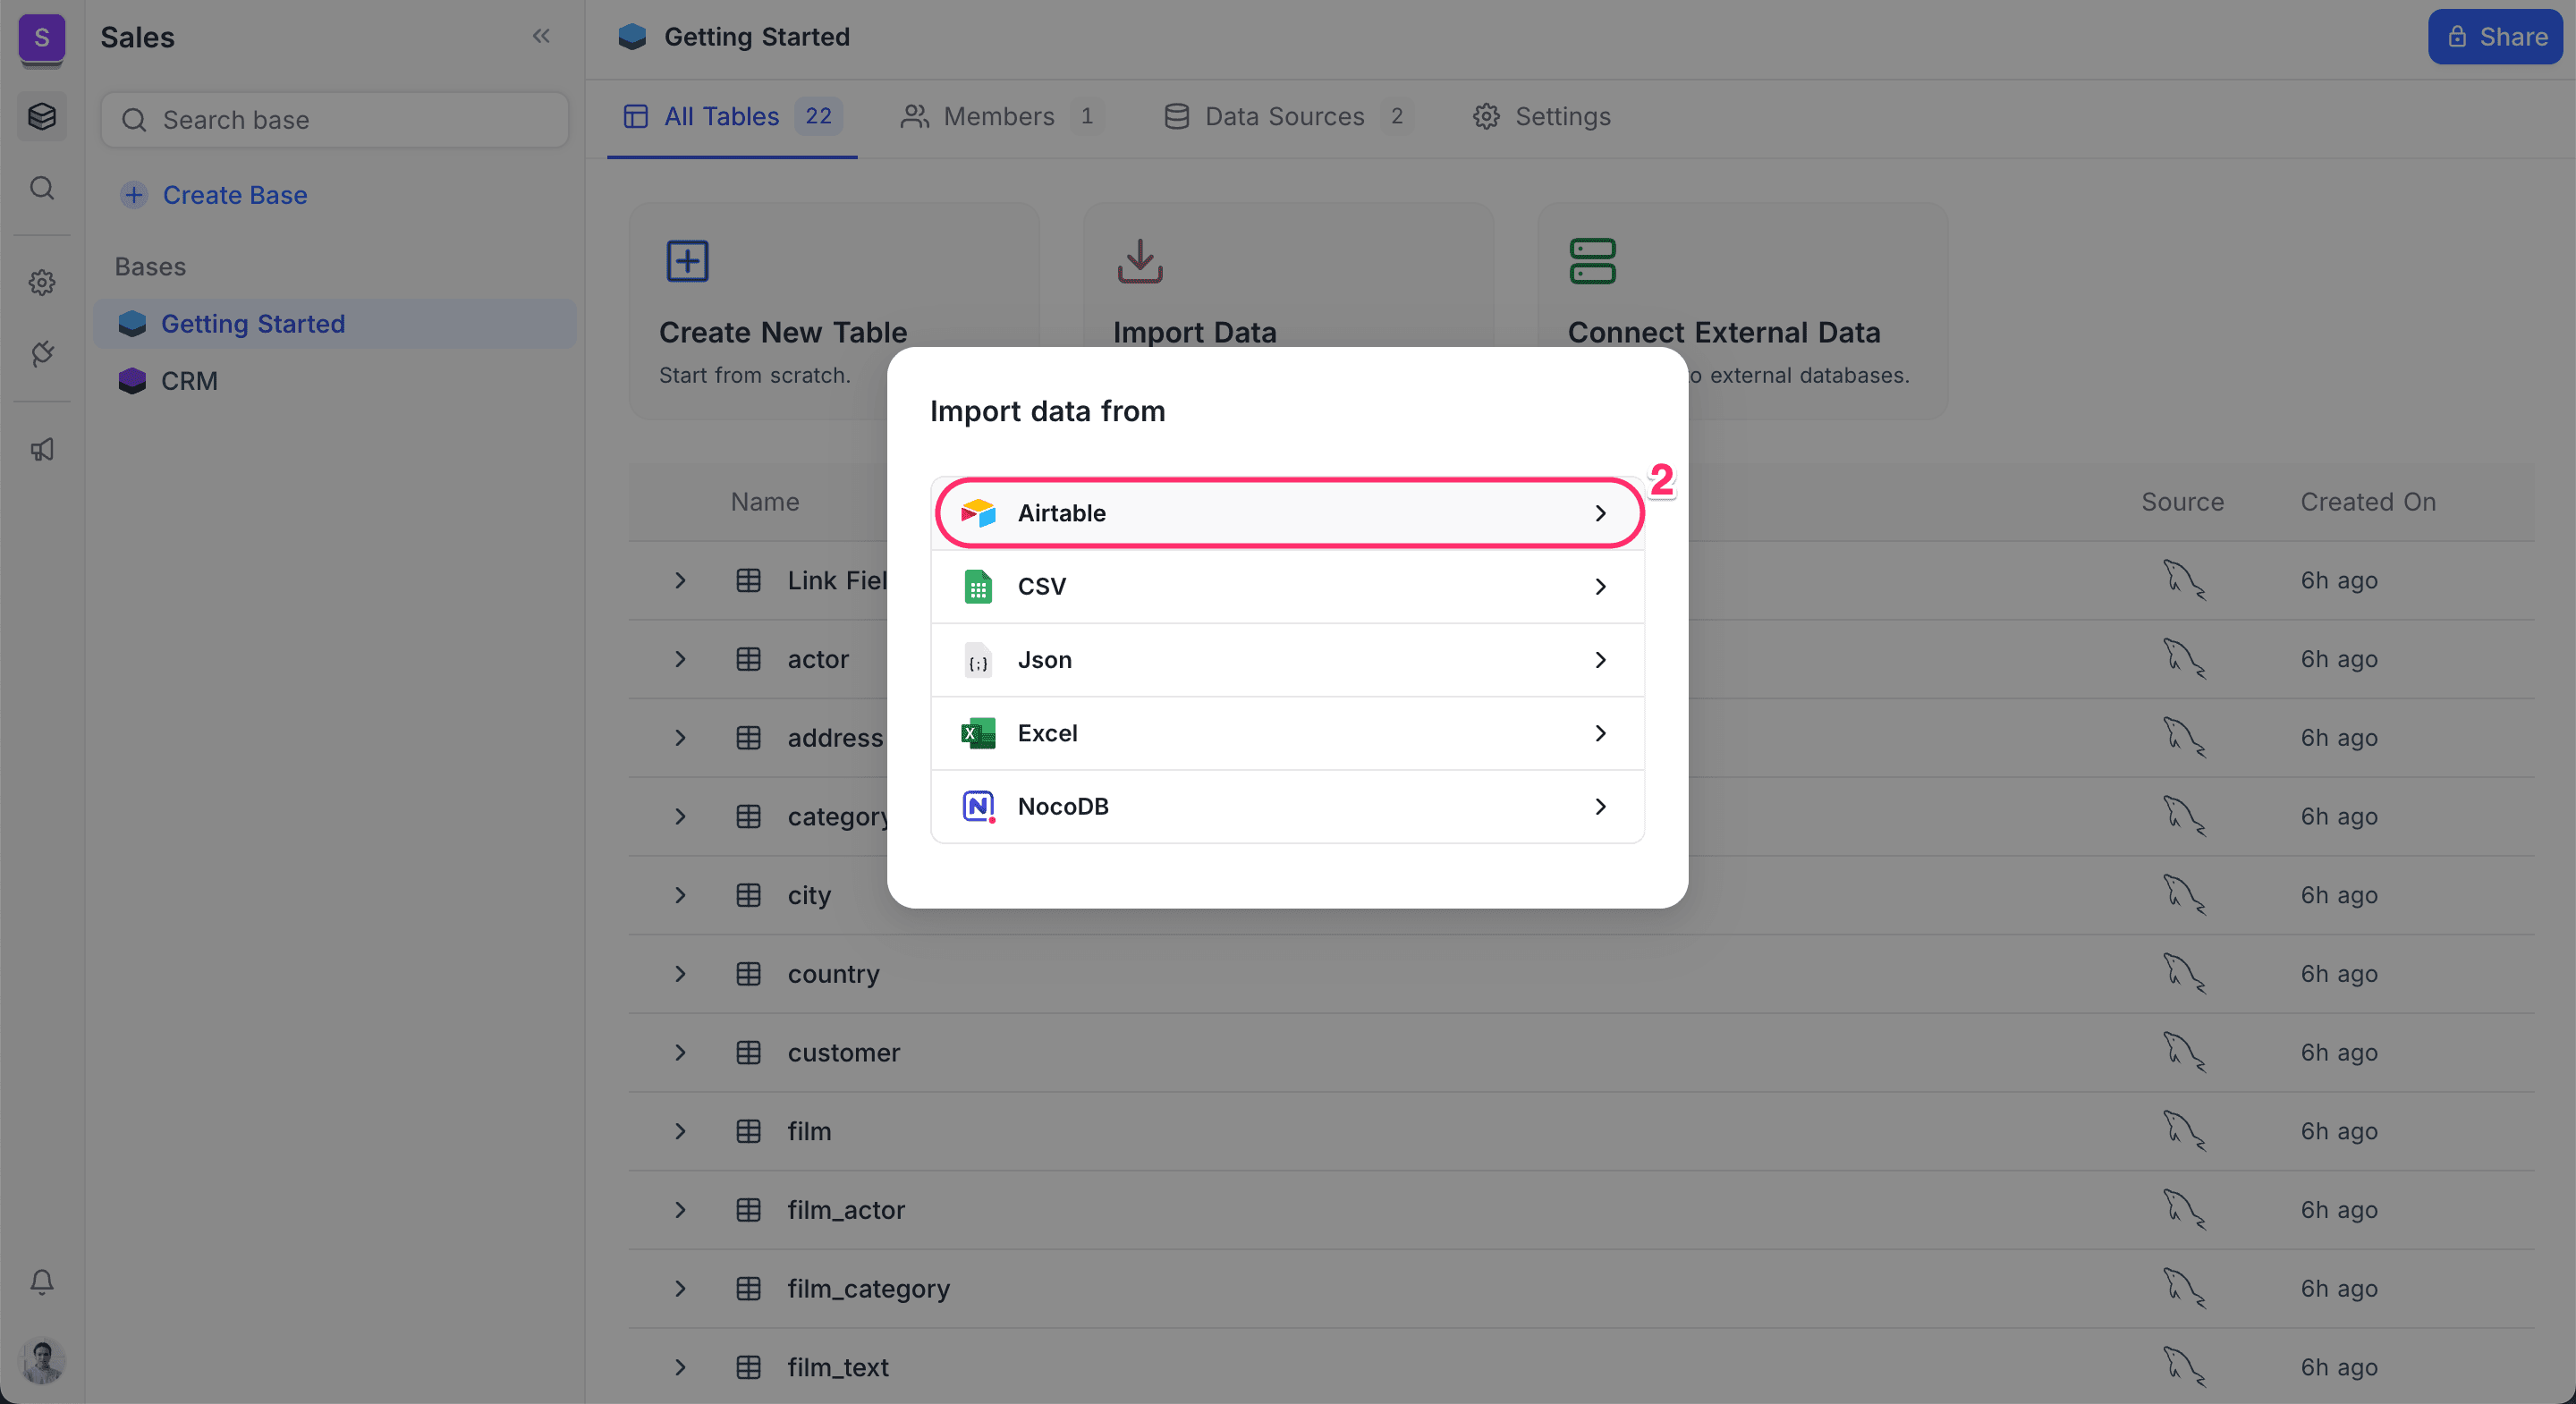
2. From the base context menu
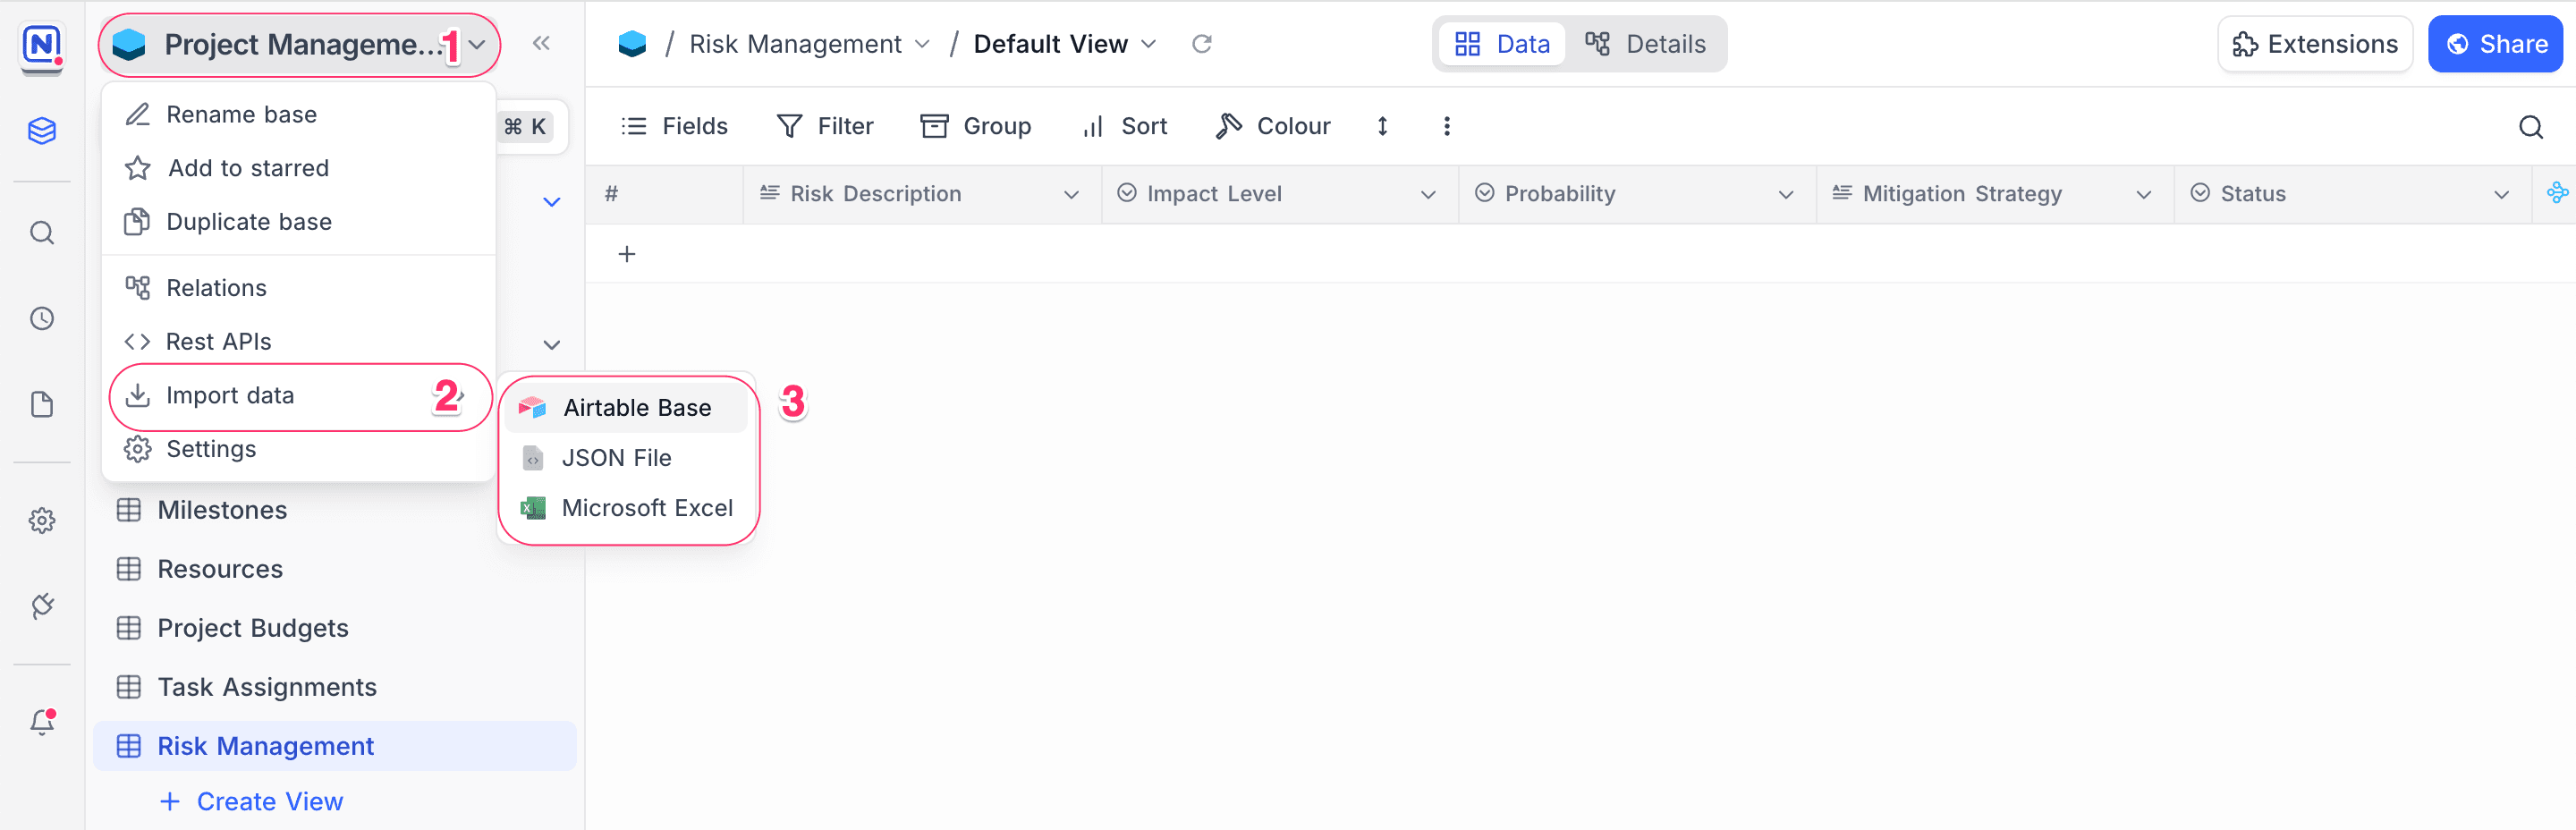
Importing file
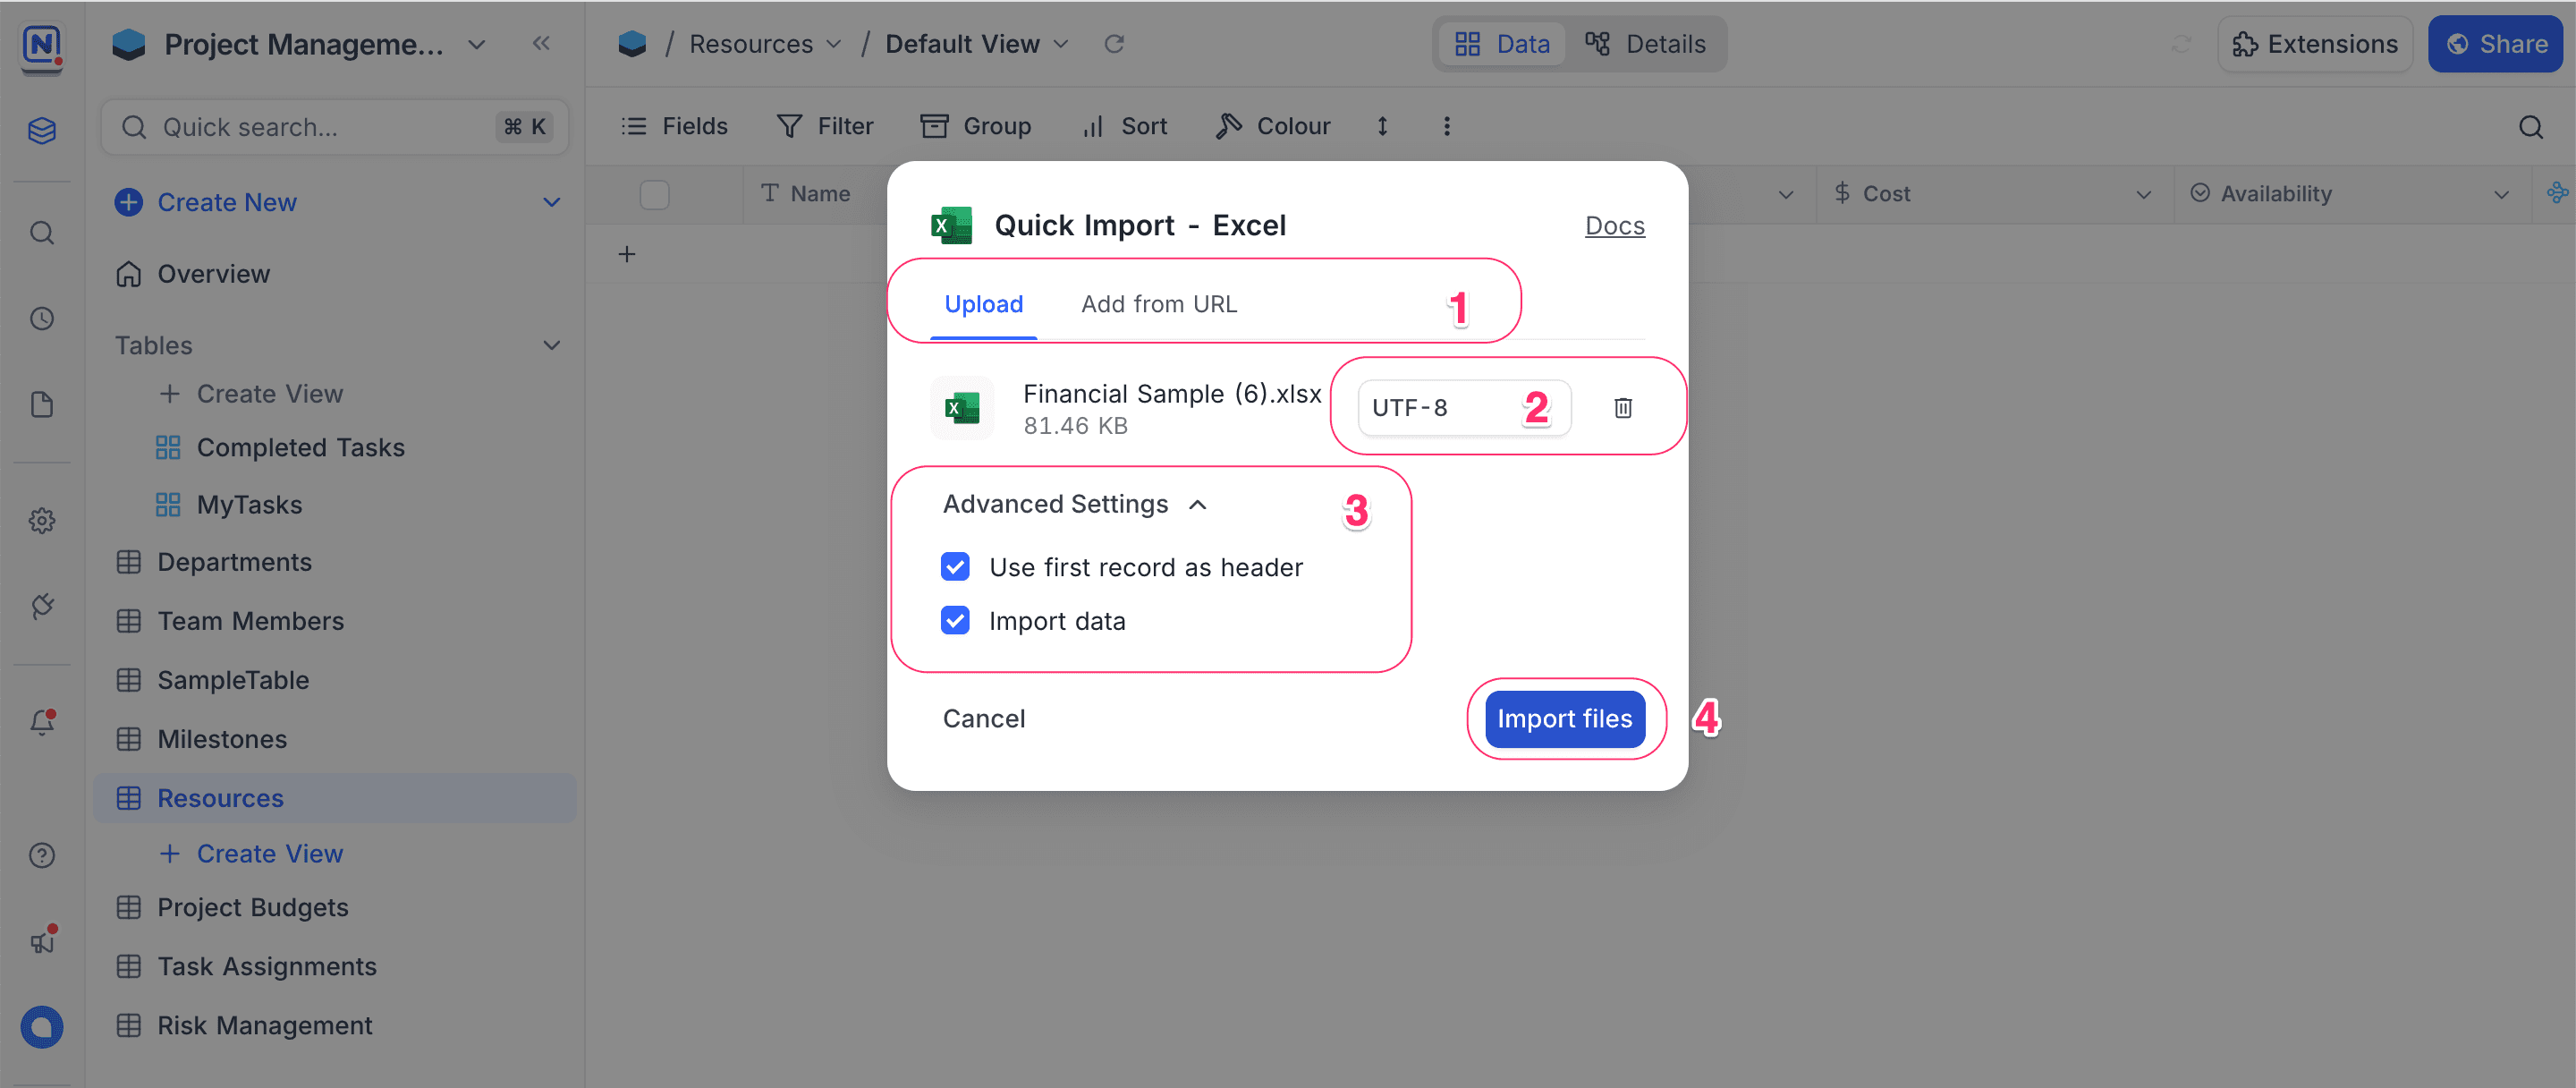
To import a file:
- Add the source file in one of two ways:
- Upload : Upload a file from a local directory. Click 'browse file', or drag and drop the file.
- Add from URL : Enter the URL of the file.
- (optional) Select the character encoding. The default is
UTF-8. - (optional) Set the Advanced Settings.
- Click
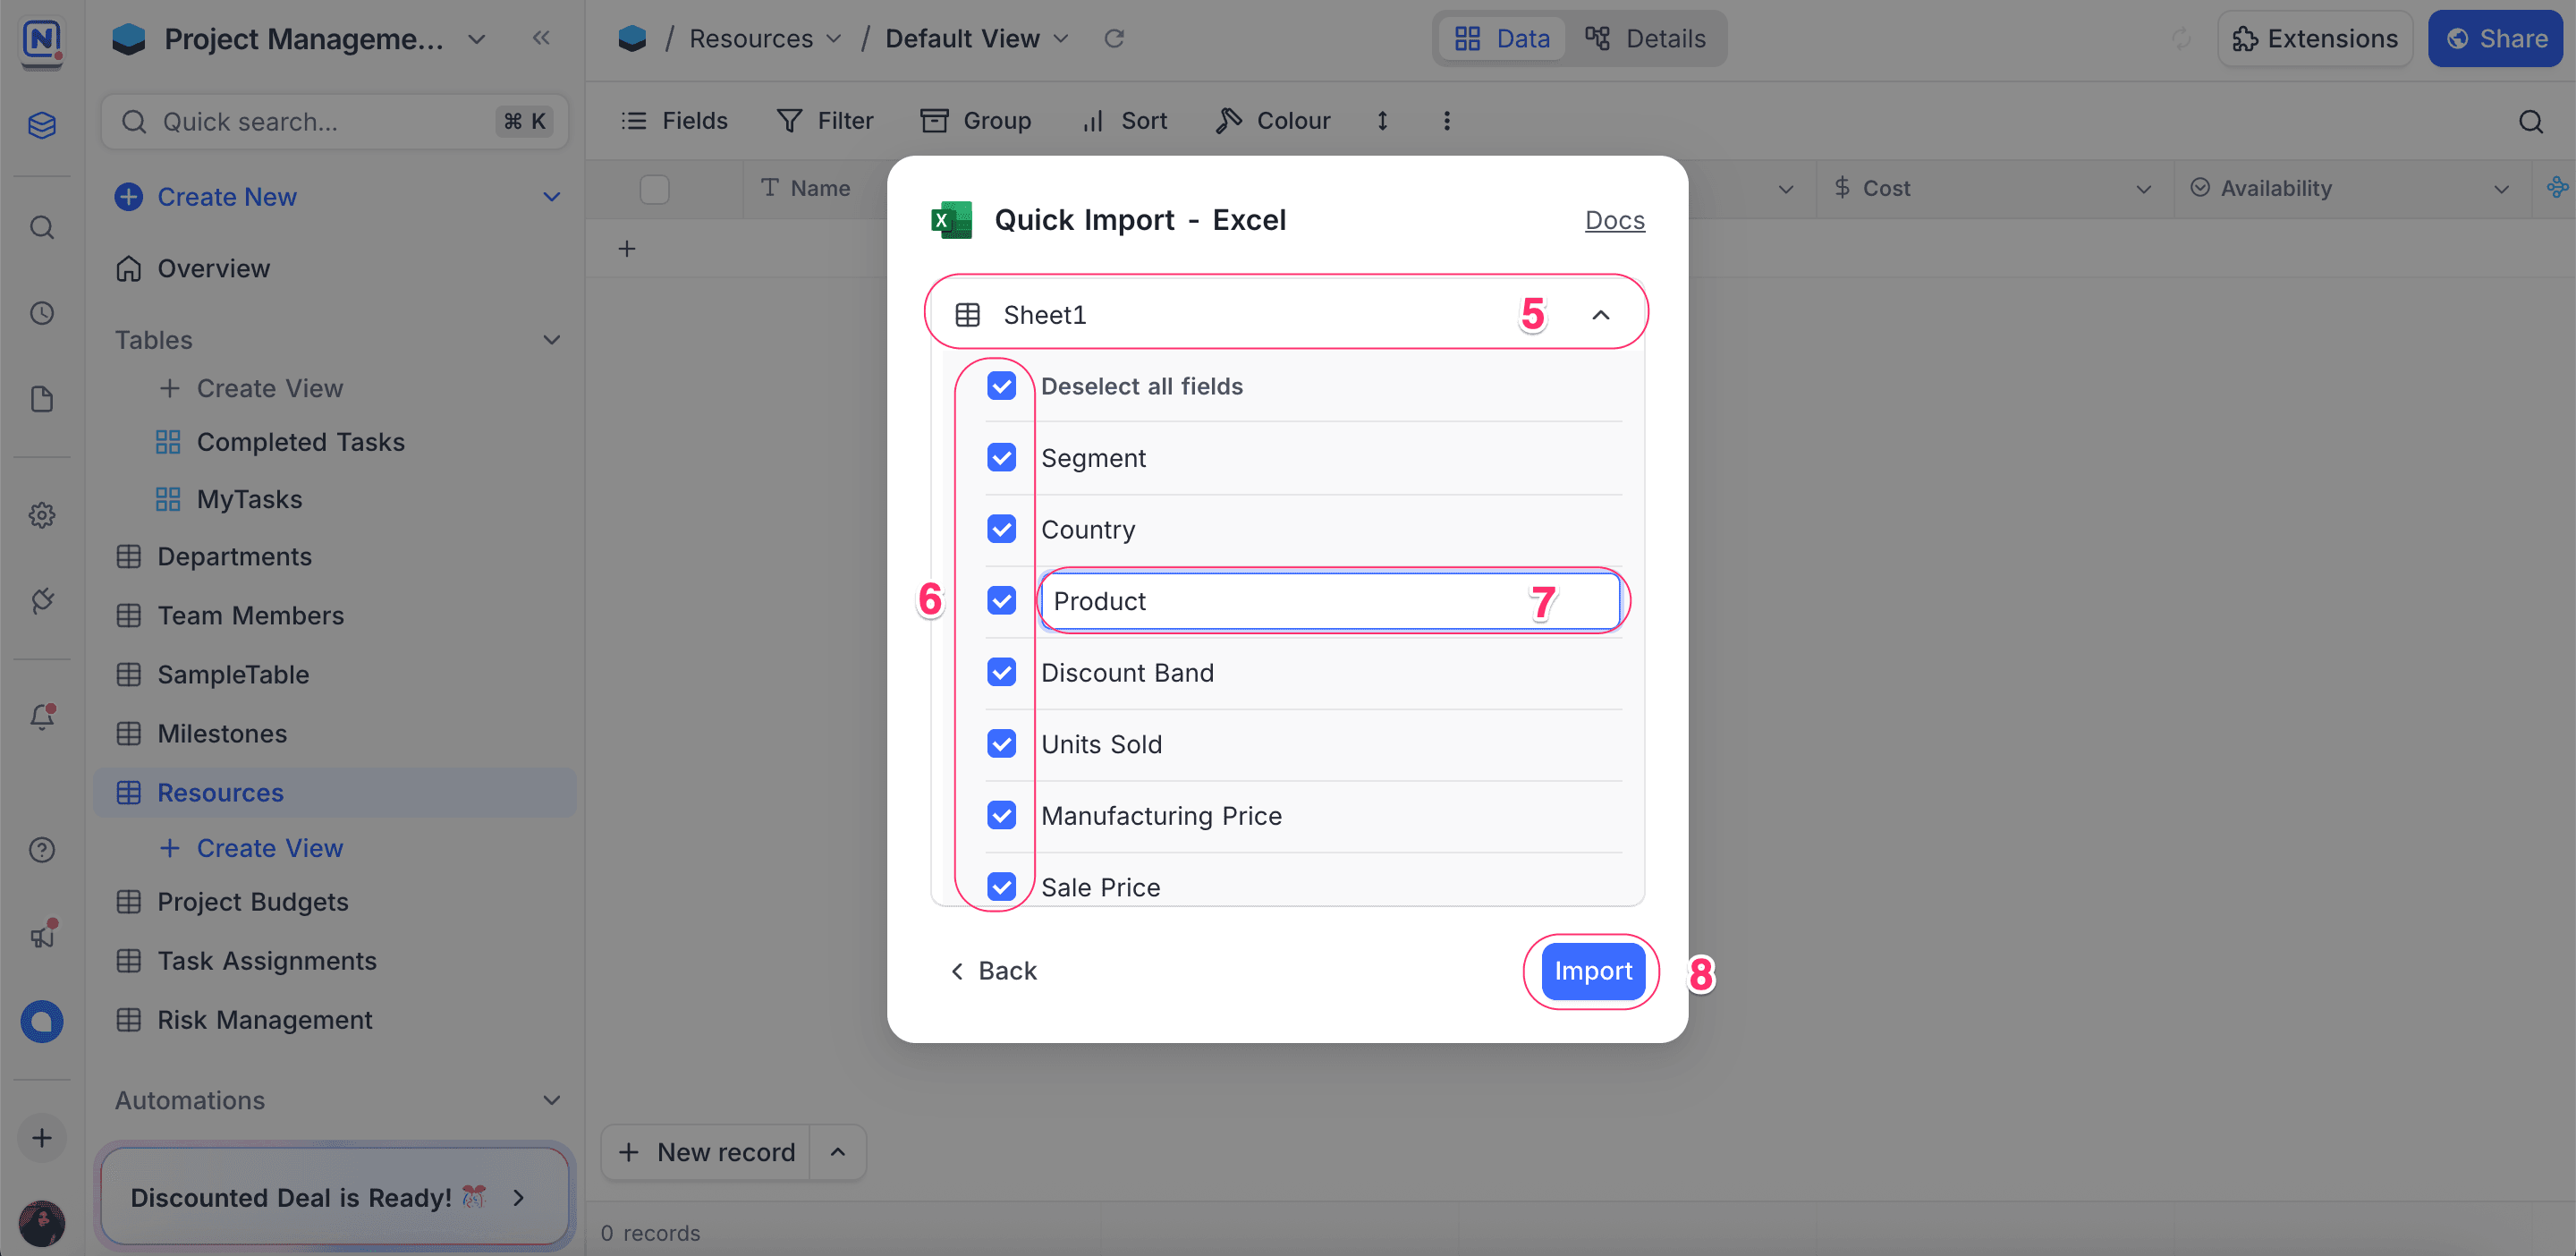
Import. - (optional) Enter the table name. By default, the table name is the file name.
- (optional) Select the columns from the CSV to include in the table. By default, all fields are included.
- (optional) Change the field names. By default, each field name is the same as the column name in the CSV.
- Click
Import. The import starts.
Additional notes
- You can import many files at one time.
- Supported file formats: CSV, Excel, JSON
- Maximum file size: 5 MB
- By default, NocoDB imports all fields as
Single line text. You can change the field types after the import. - By default, the first field is the Display Value.
Excluding sheets from a multi-sheet Excel workbook
When you import an Excel workbook with more than one sheet, each sheet has a checkbox next to its name. Use the checkbox to exclude a sheet from the import. Single-sheet Excel files, CSV files, and JSON files do not show the checkbox.
To leave a sheet out, clear its checkbox. The excluded sheet shows the label Won't be imported, and NocoDB ignores its fields.
The Import button stays disabled until both of these conditions are true:
- At least one sheet is included.
- Each included sheet that creates a new table has at least one field selected.
The same per-sheet checkbox is also available when you upload data into an existing table.
Advanced Settings
| Setting | Default | If selected | If not selected |
|---|---|---|---|
| Use first record as header | Enabled | NocoDB uses the first record in the spreadsheet as the header. Its contents become the field names. | |
| Import data | Enabled | NocoDB imports all data. | NocoDB creates only the table. |
Last updated on
Latest product updates?See Changelog