Actions on base
Understand the structure, actions, and developer tools available in a base.
Base context menu
The base context menu can be accessed in two ways:
- From the workspace Bases tab — click the ⋮ icon on a base card.
- From within a base — click the base name dropdown in the top-left of the sidebar. This menu includes additional options like MCP Server, Rest APIs (API v2 / API v3), and Import data.


Rename base
- Open the base context menu.
- Select Rename base.
- Edit the name and press Enter to save.
Star base
- Open the base context menu.
- Select Add to starred.
Starred bases can be filtered using the Starred option in the base filter dropdown on the workspace Bases tab.
Remove a base from starred list
- Open the base context menu.
- Select Remove from starred.
Duplicate base
- Open the base context menu.
- Select Duplicate base.
- Configure what to include:
- Include records — disable to duplicate schema only, without data.
- Include comments — disable to skip comments.
- Include scripts — disable to skip scripts.
- Include dashboards — disable to skip dashboards.
- Include workflows — disable to skip workflows.
- Include documents — disable to skip NocoDocs documents.
- Select a Workspace to duplicate into (defaults to current workspace).
- Click Duplicate Base.

Delete base
Deleting a base permanently removes all its tables, data, and associated content.
- Open the base context menu.
- Select Delete base.
- Click Delete Base to confirm.

Find base ID
Each base has a unique ID (prefixed with p) visible in the base context menu and in the URL.
Example:
https://app.nocodb.com/wa5dveq3/pptsua3fuosby2jIn this example, the base ID is pptsua3fuosby2j.
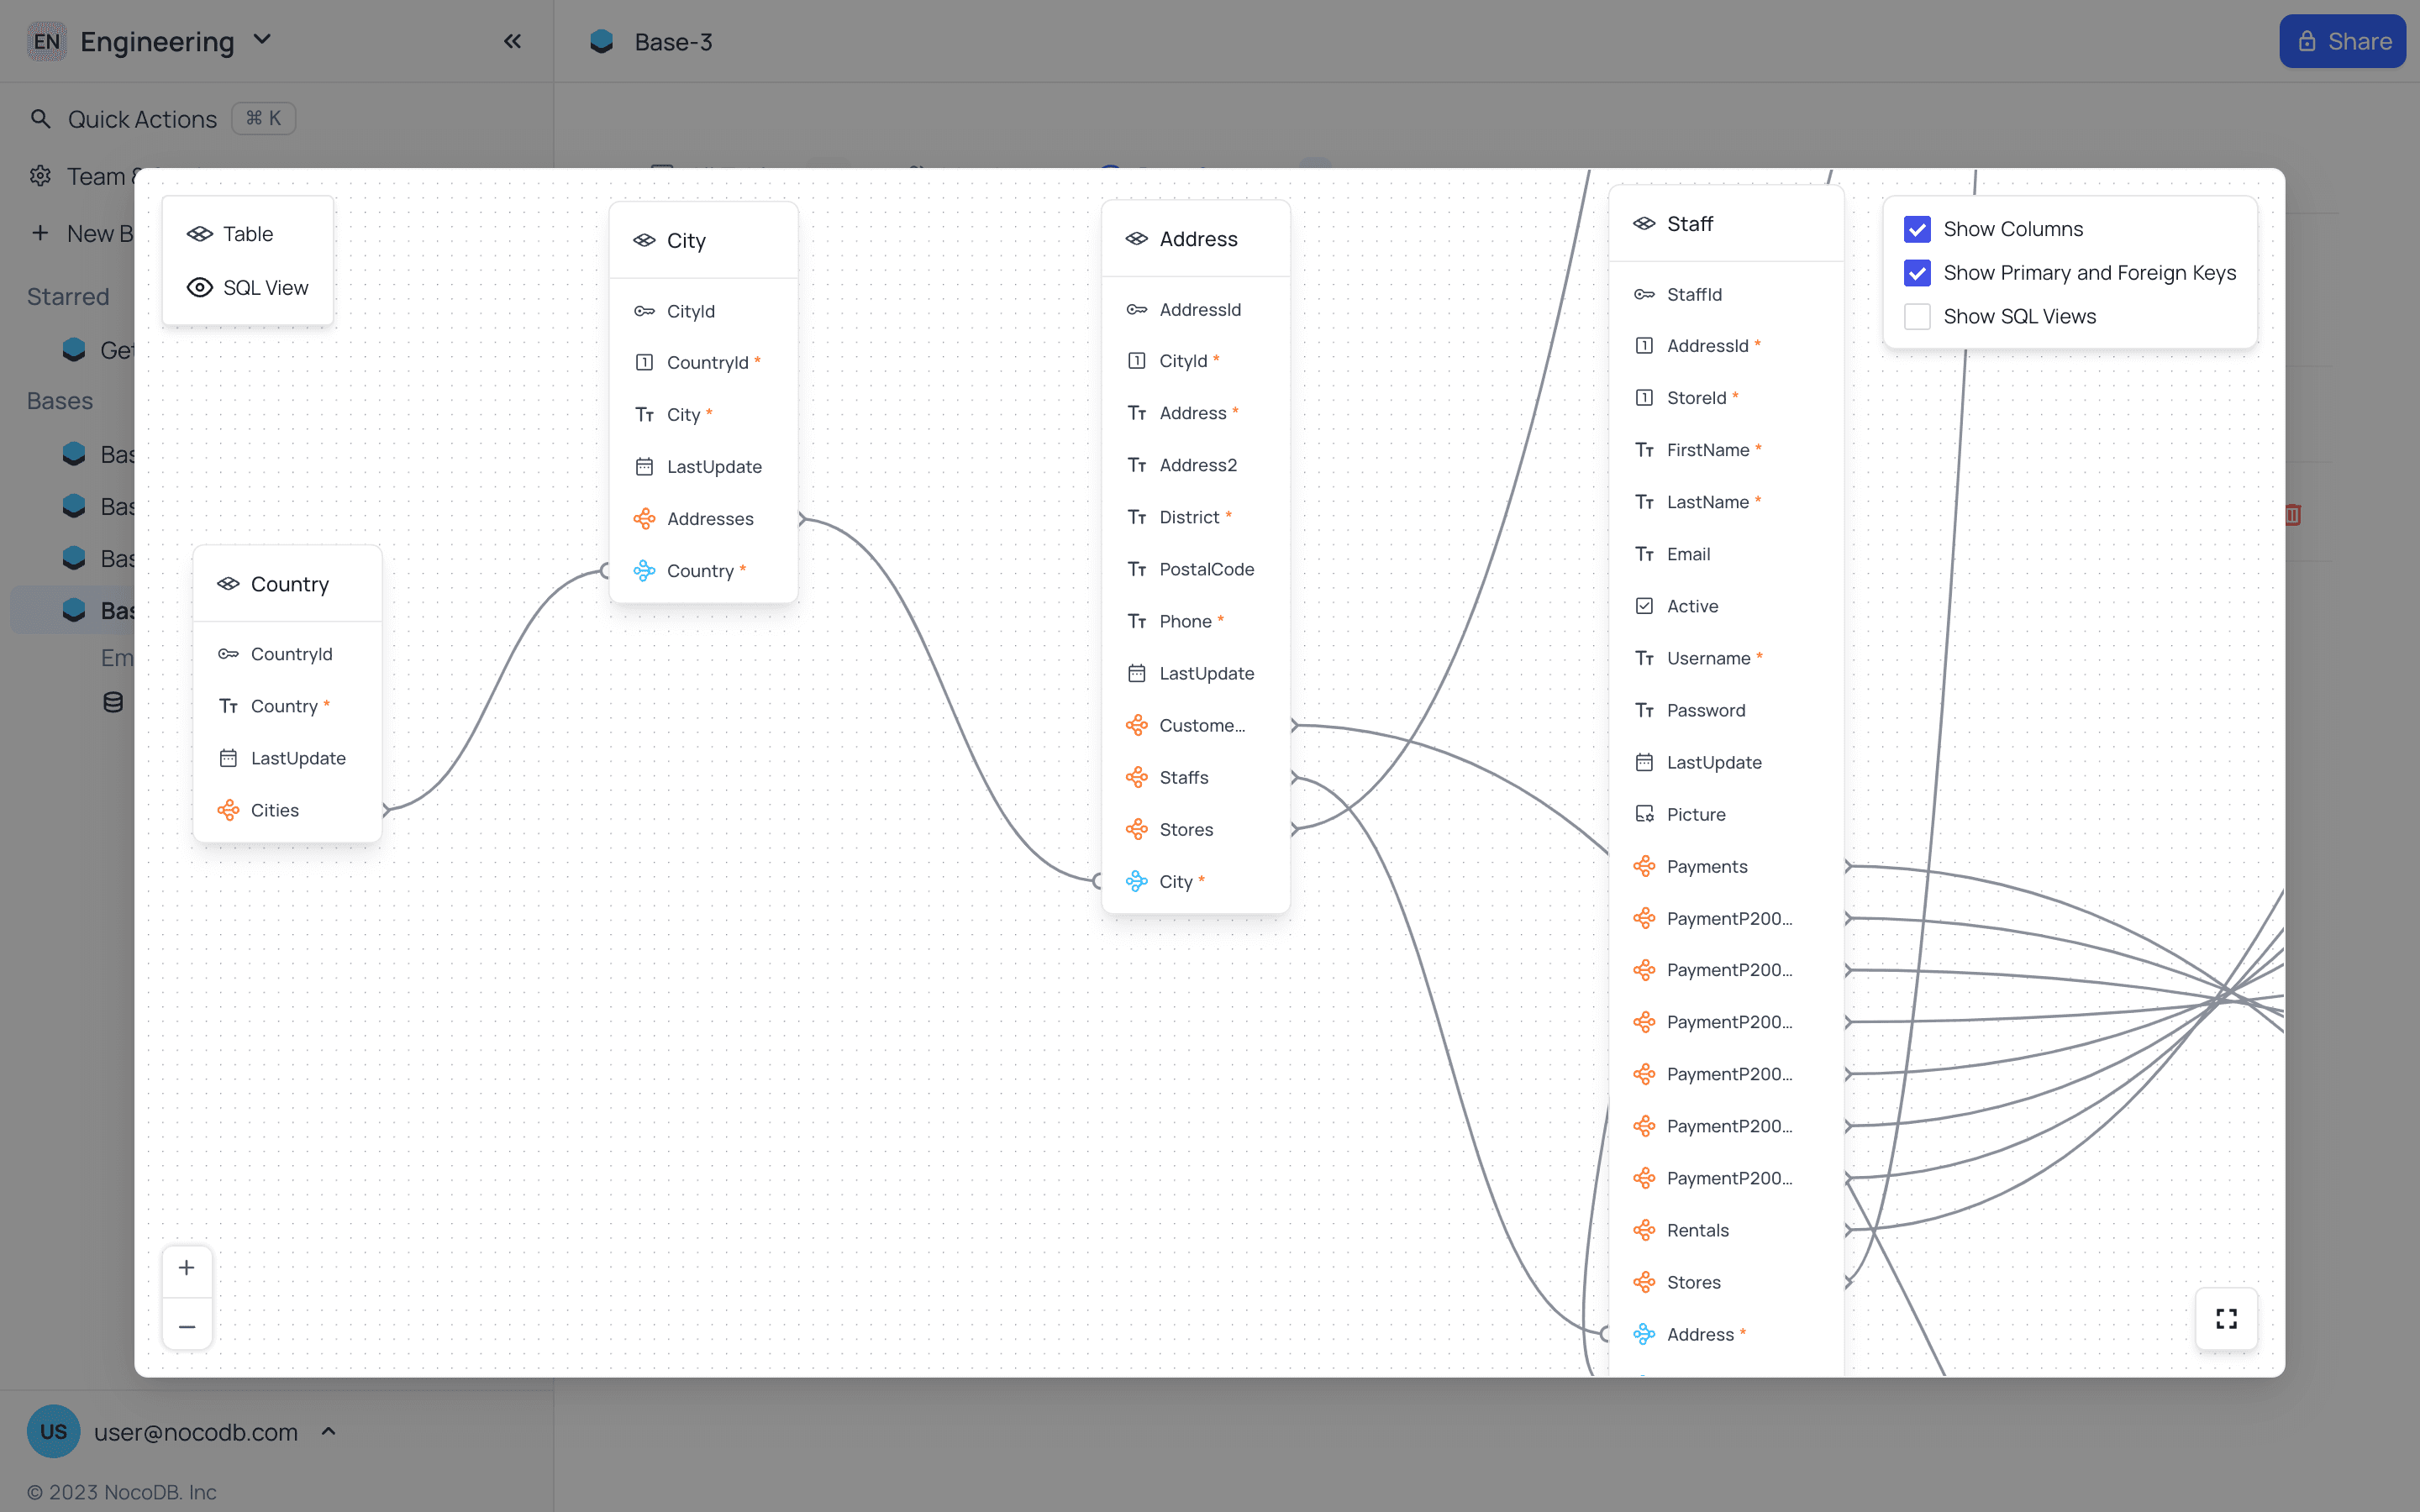
Relations
NocoDB provides a visual diagram of relationships between tables within a base.
- Open the base context menu.
- Select Relations.
REST APIs
NocoDB provides a Swagger UI for each base to interact with its REST API endpoints. Both API v2 and API v3 are available.
- Open the base context menu from within a base.
- Hover over Rest APIs and select API v2 or API v3.
See Accessing APIs for more details.
Base settings
Access base settings from the base context menu → Settings, or via Base Settings → General when inside a base.
Available settings:
- Show M2M tables — Show or hide many-to-many junction tables in the sidebar.
- Show NULL in cells — Display NULL values in cells to differentiate from empty strings.
- Show NULL & Empty in Filters — Enable additional filter options to distinguish NULL from empty string values.