Create an Interface
Create a new interface with the guided setup: name it, choose a layout, and connect it to a table.
Before you start
Every interface is built for a specific audience, and each audience needs something different. A field technician may only need to log site visits, while a finance lead wants a summary of spend across every project. Deciding who the interface serves, and what you want them to accomplish, makes the rest of the setup straightforward: it tells you which records to surface, which actions to expose, and who to grant access to.
If you are unsure where to begin, complete this sentence:
I'm building an interface to [action] for [audience].
For example: "I'm building an interface to triage incoming support tickets for our customer success team."
Keep that answer close as you work through the setup below. It is the quickest way to judge what belongs in the interface, and what to leave out.
Create a new interface
- Open your base and locate the Interfaces section in the left sidebar.
- Click New interface to open the guided setup.
On a base that has no interfaces yet, the guided setup opens automatically the first time you go to Interfaces.
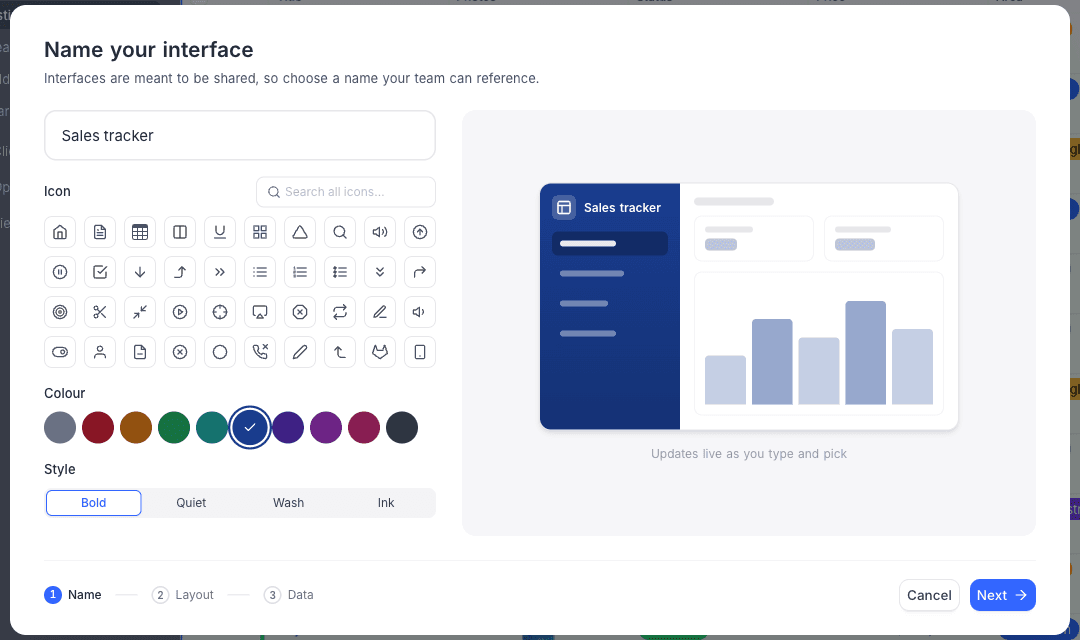
Step 1: Name your interface
Interfaces are meant to be shared, so choose a name your team can reference. You can also customise:
- Icon: Pick from the searchable icon library.
- Colour: Choose an accent colour for the interface.
- Style: Select the visual style applied to the interface chrome: Bold, Quiet, Wash, or Ink.
You can change any of these later from the interface context menu. See Actions on an interface.
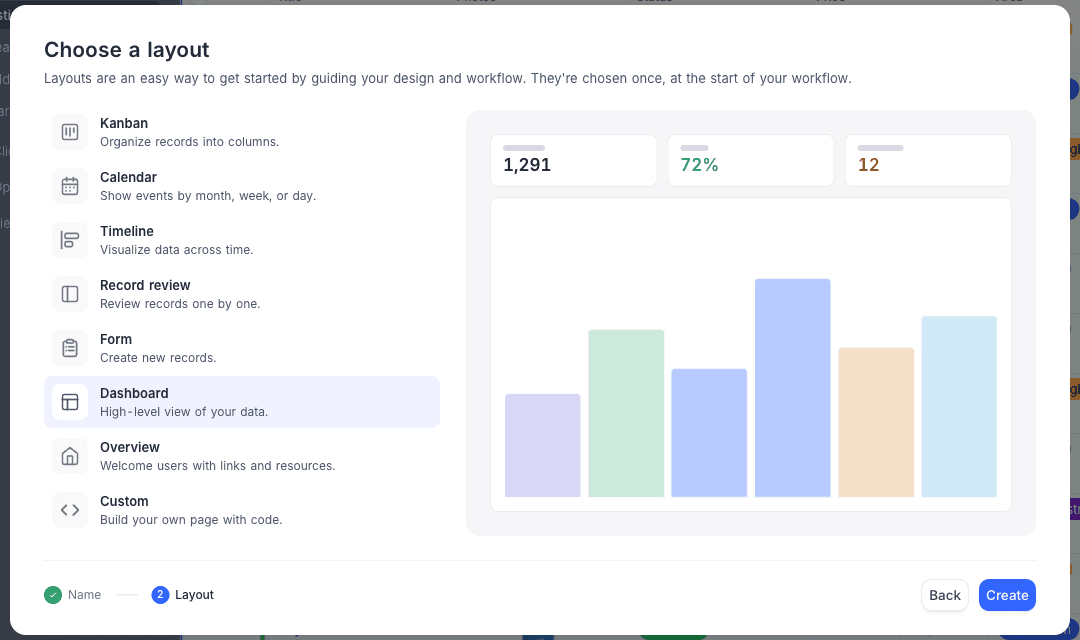
Step 2: Choose a layout
Select the layout for the first page of your interface. See Page layouts for a detailed guide to each option.
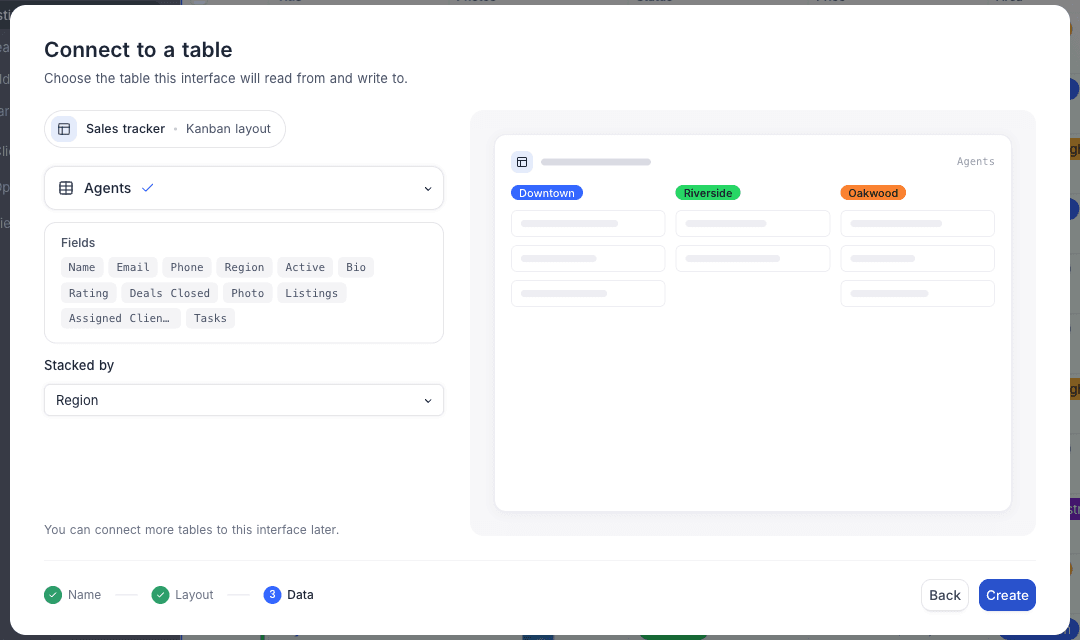
Step 3: Connect to a table
Most layouts display data from a table, so the final step asks which table the page should connect to. Depending on the layout you picked, you may also configure:
- Kanban: The single-select field used for Stacked by.
- Gallery: An optional Cover image field.
Layouts that don't display table data, such as Overview, skip this step.
For Table and Record review layouts, this step also lets you copy settings from an existing view of the connected table.
Once created, the interface opens directly in the interface builder so you can start designing.
Copy settings from a view
If the table already has a view shaped the way you want the page to look, you don't have to re-create its filters, sorts, and field settings by hand. When creating a Table or Record review page, the Connect to a table step includes a Copy settings from a view option that seeds the new page from a view of the connected table.
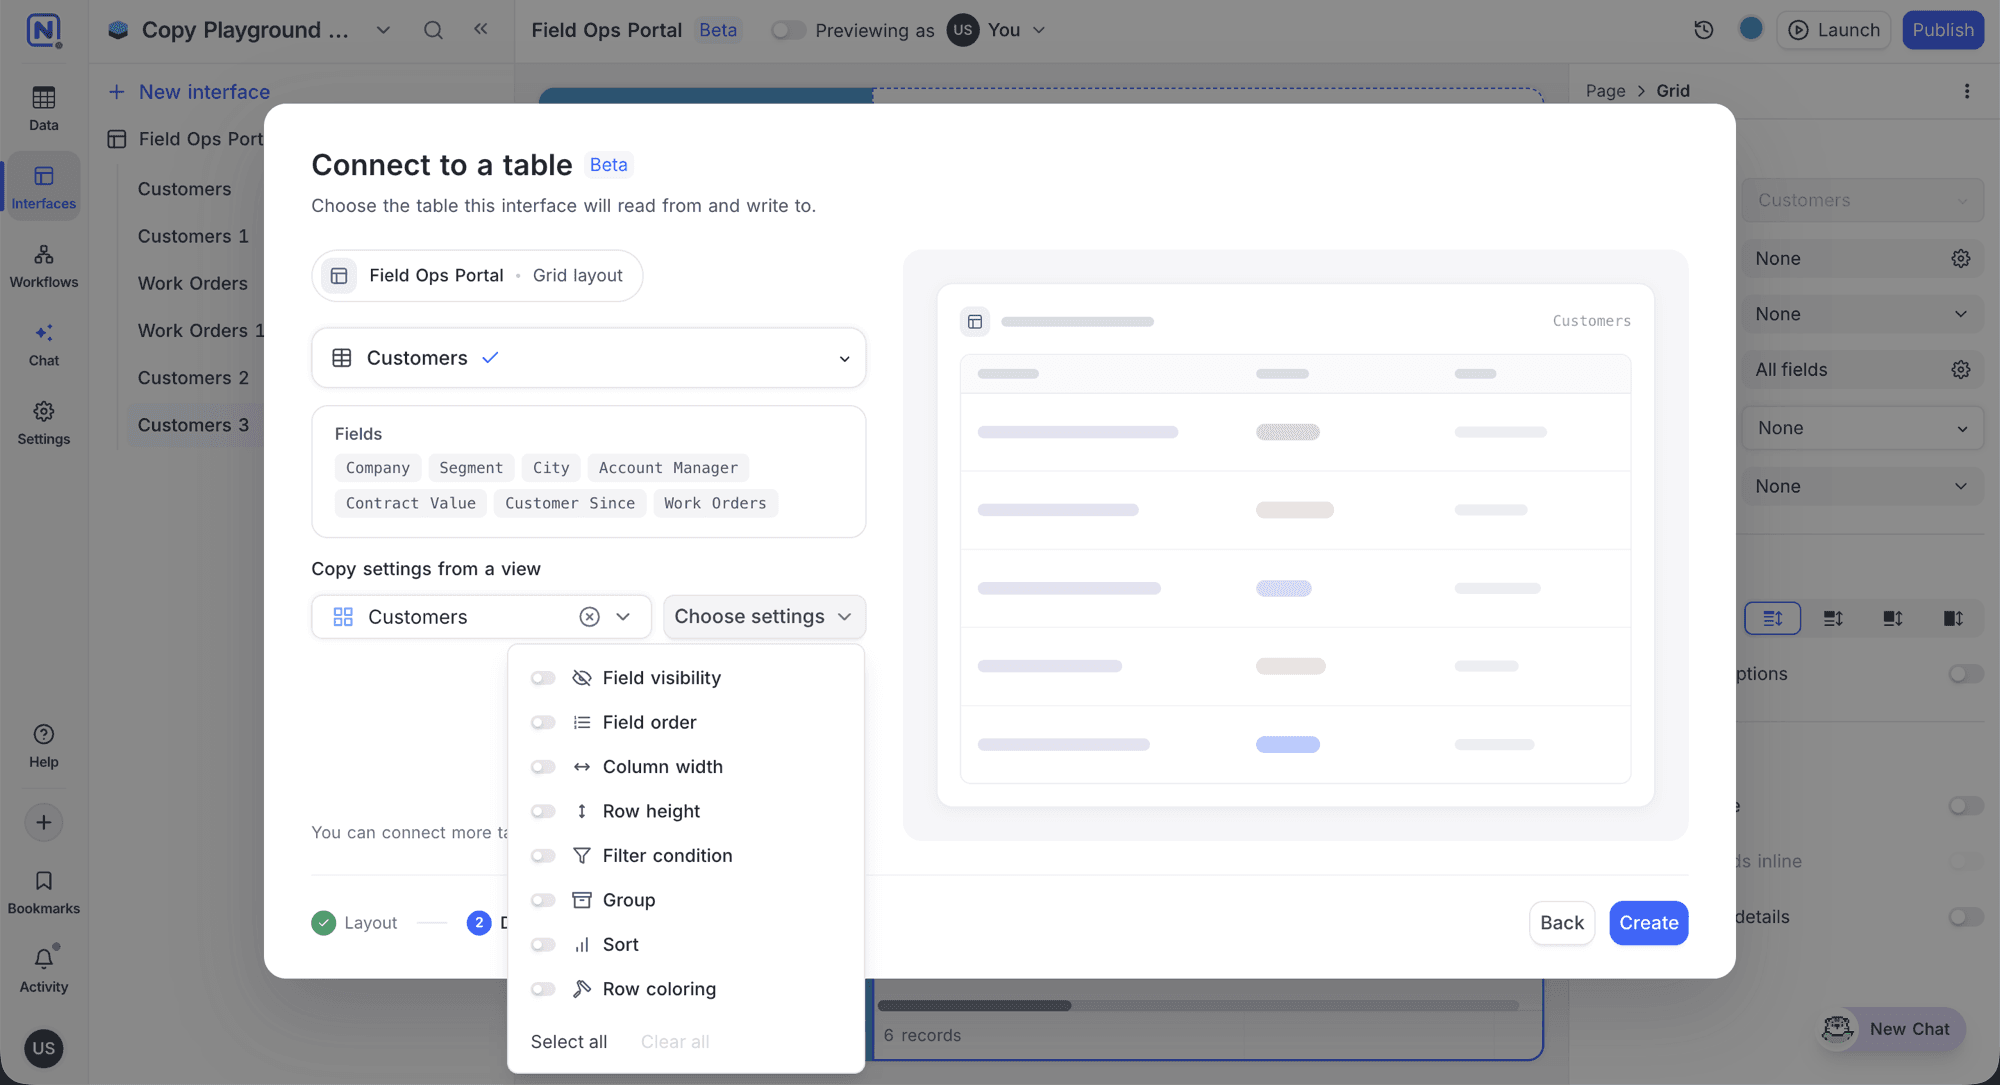
- Select the source view from the dropdown. All views of the connected table are listed, except Form and Map views.
- Click Choose settings and toggle on the settings to copy, or use Select all. The button shows how many are selected.
- Create the page as usual. The copied settings are applied to it, and you can adjust them afterwards in the builder like any other page.
The settings you can copy are the same as in the Copy another view's configuration dialog: Field visibility, Field order, Column width, Row height, Filter condition, Group, Sort, and Row coloring.
You can copy across types, for example a filtered Grid view can seed a Gallery page. Only settings the destination layout can hold are offered:
| Destination | Available settings |
|---|---|
| Grid, List | All eight |
| Timeline, Gantt | All except Column width |
| Gallery, Kanban, Calendar | Field visibility, Field order, Filter condition, Sort, Row coloring |
| Record review | Field visibility, Filter condition, Group, Sort, Row coloring |
Settings the selected view can't provide are greyed out, and your selection narrows automatically if you switch to a source view or visualization that no longer supports it.
Add pages to an interface
An interface can contain multiple pages, though your plan may limit how many. To add one:
- Hover over the interface in the sidebar (or use the page list inside the builder) and click New page.
- Choose a layout and, if required, connect it to a table. The setup is the same as creating an interface, minus the naming step.
Pages appear in the interface navigation in the order listed. You can drag pages to reorder them, rename them inline, or hide them from the navigation. Hidden pages remain available for contextual use, for example a record detail page that opens when a user clicks a record.