Upload data into a table
Learn how to upload data into an existing table in NocoDB.
Import data from CSV / Excel
Accessing import modal
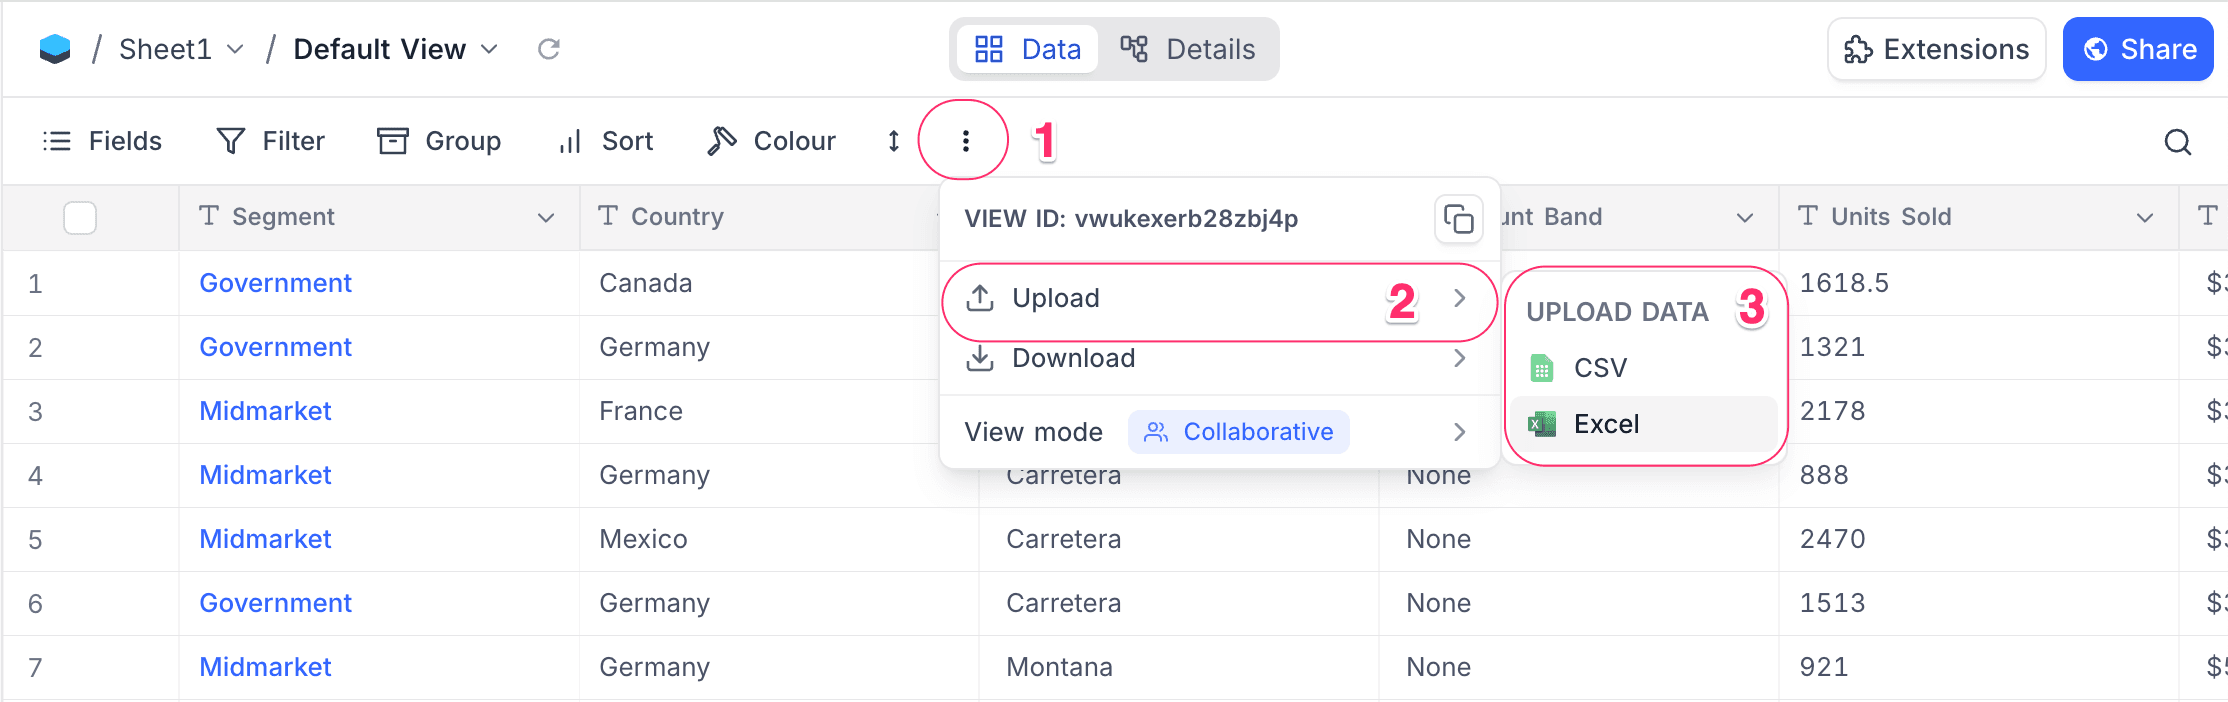
- Click on
⋮context menu from the toolbar. - Select
Uploadfrom the dropdown menu. - Select
CSV/Exceloption.
Importing file data
-
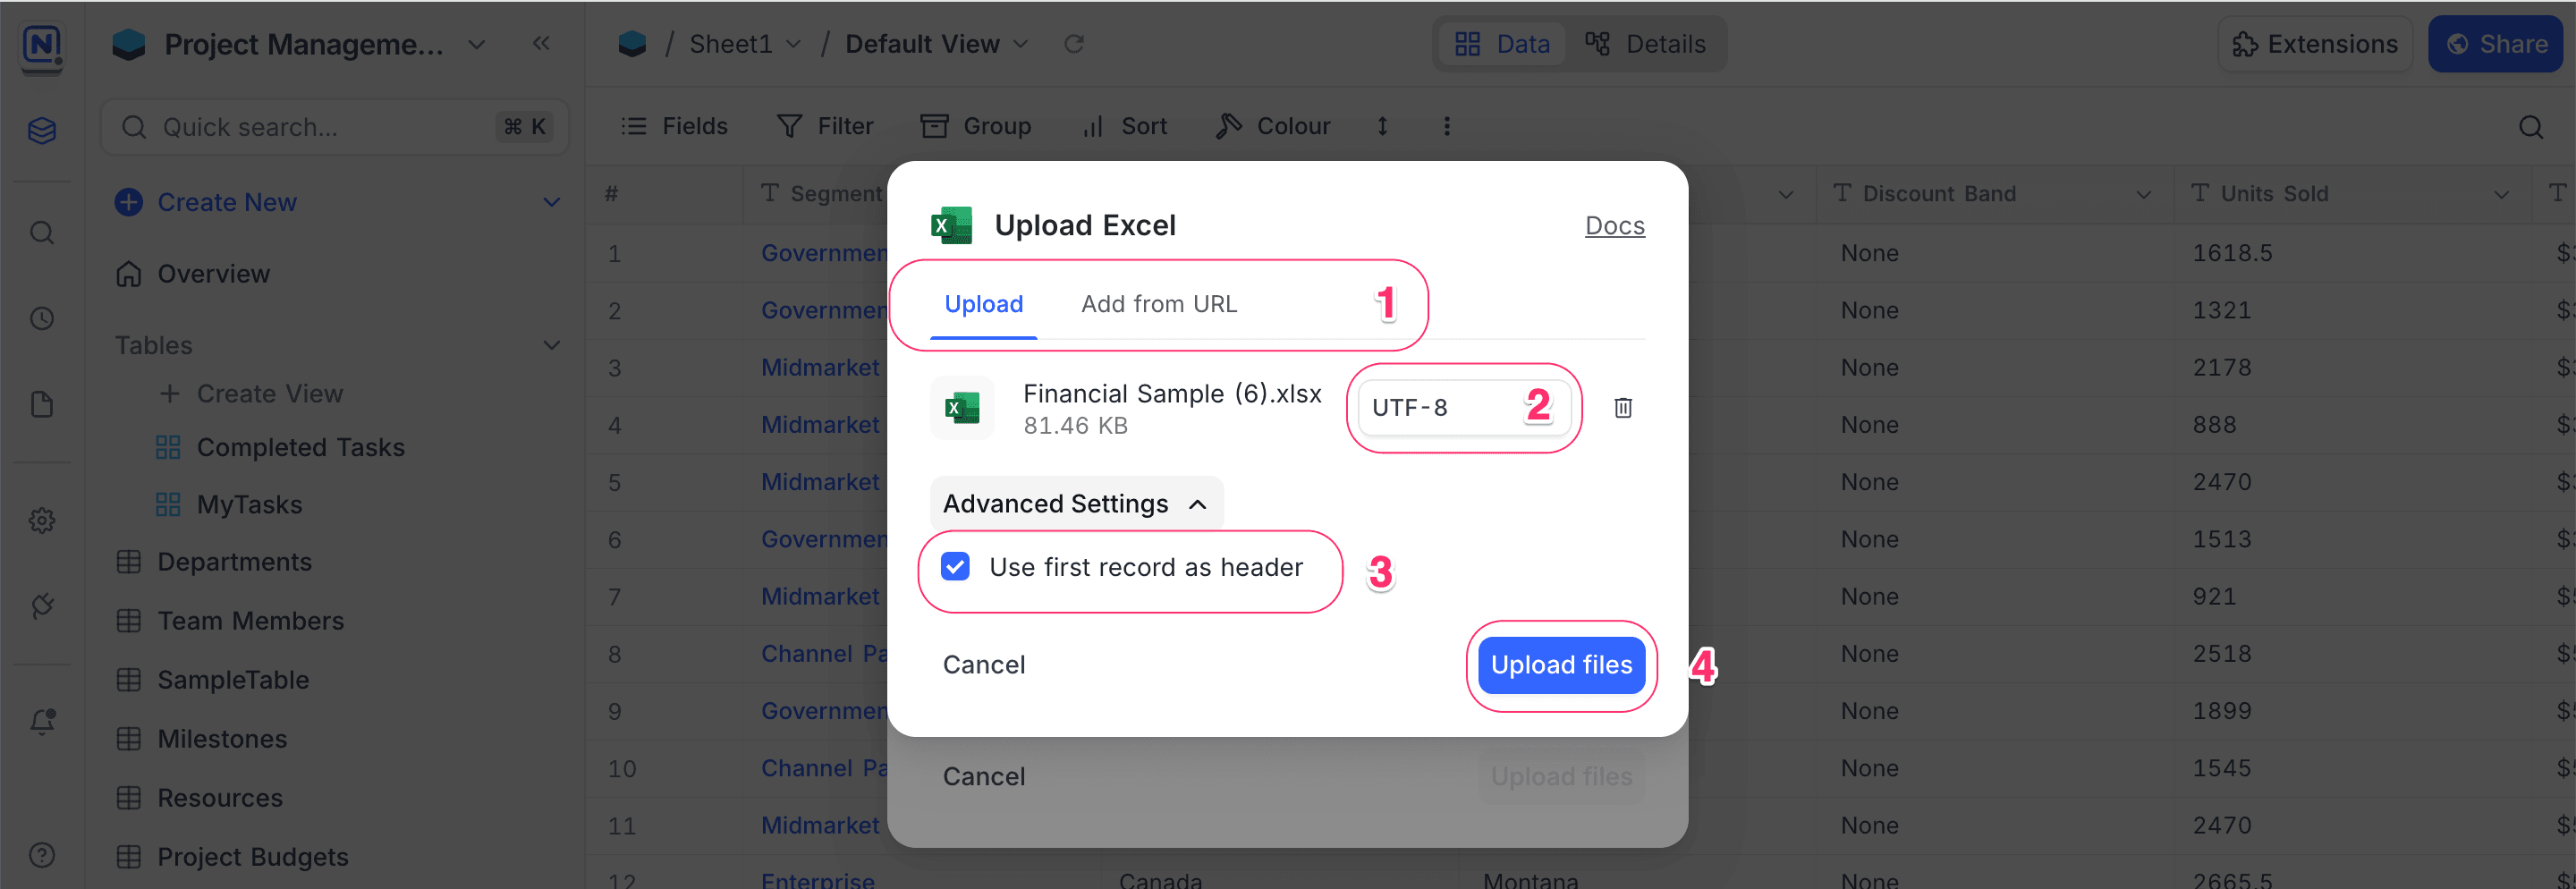
Select file to upload
There are two ways to upload source file:
- Upload : Upload from local directory. Either click 'browse file' or drag and drop file.
- Add from URL : Specify the URL of the file.
-
(optional) Select character encoding. By default, it is set to
UTF-8. -
Advanced Settings : Use first record as header
- Enabled by default. If selected, the first record in the spreadsheet will be treated as the header record and its contents will be used as field names.
-
Click on
Upload filesbutton. -
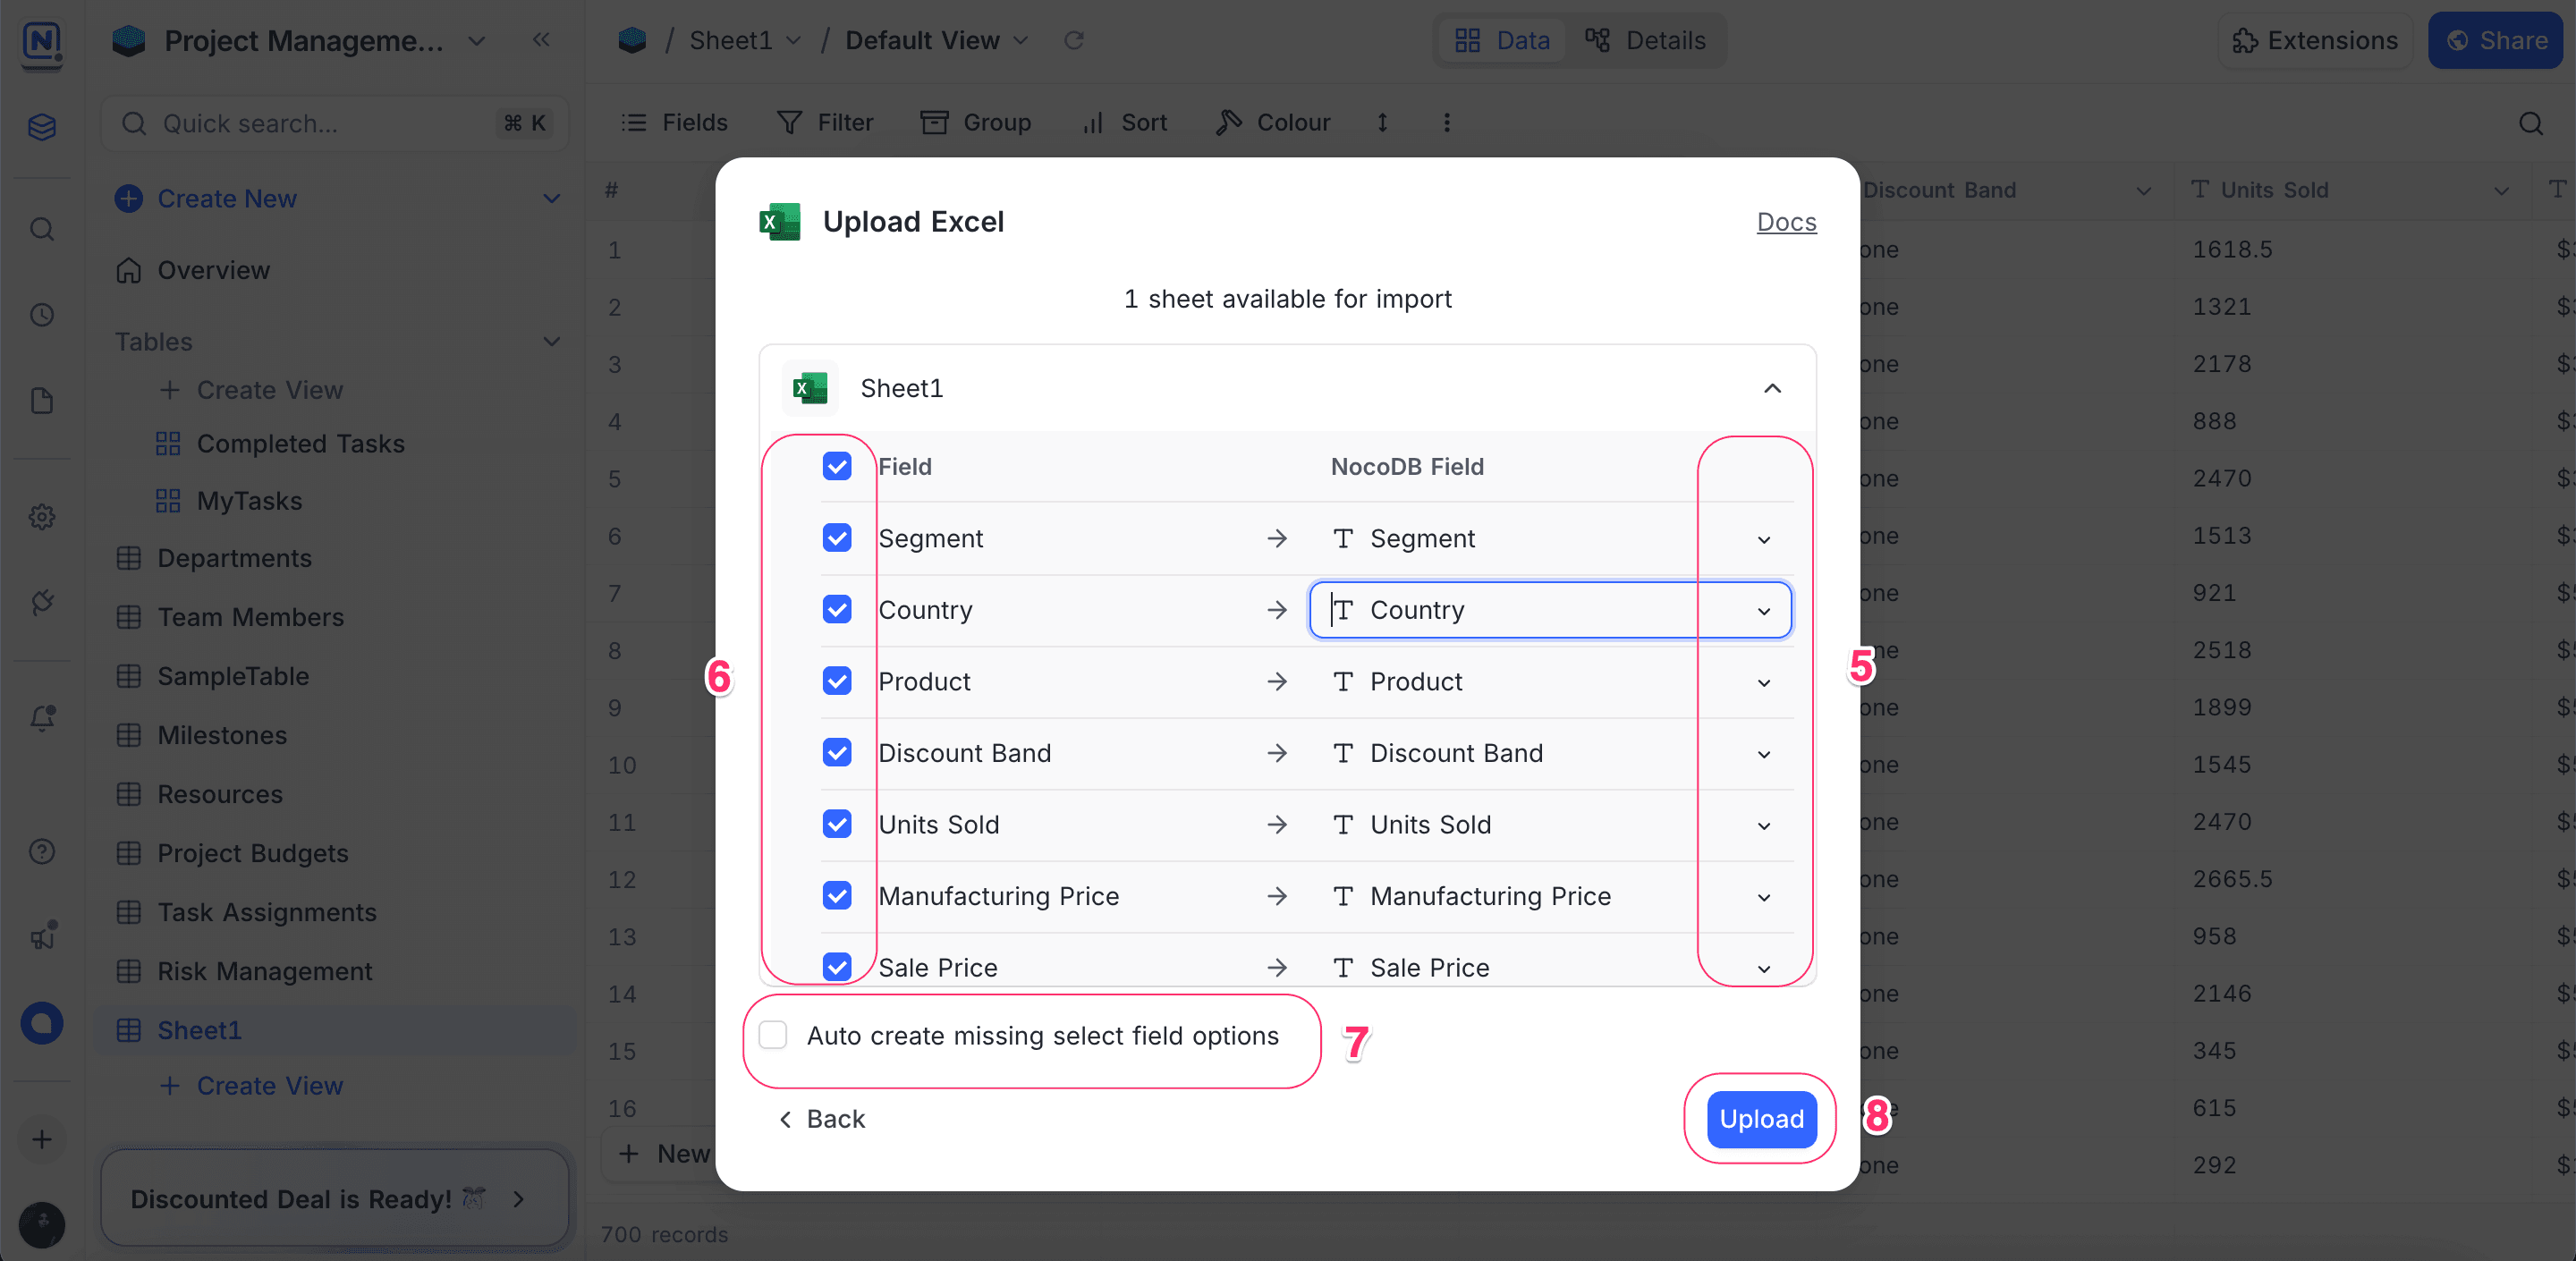
Mapping Fields (Optional)
- You can reconfigure the mapping by utilizing the dropdown menu that appears when you click on the destination field.
- Existing field names are listed under NocoDB field (column to the right), while new fields identified from the import file are listed under Field (column to the left).
- NocoDB automatically maps field names in the import file based on the NocoDB field names.
- A source column that does not match any existing field can be mapped to a brand new field. See Mapping a column to a new field below.
-
Exclude fields (Optional)
- Uncheck checkbox to exclude a field from being imported.
-
Allow create missing select field options (Optional)
- If enabled, NocoDB will create new options for select fields that are not already present in the table.
-
Initiate Import
- Click on the
Uploadbutton to commence the file import process.
- Click on the
On completion, the imported data will be appended to the existing table.
Mapping a column to a new field
If a source column does not match any field in the destination table, you can create a field for it instead of dropping the column. Open the destination dropdown for that column and choose Create new field. The row then shows the field name with a New badge, confirming that a field will be created during import.
Notes:
- New fields are created as
Single line text. You can change the field type after the import completes. - If a source column's title matches an existing field, it maps to that existing field instead of creating a duplicate.
- If a single field cannot be created, for example because your plan's field limit has been reached, that column is skipped and the rest of the import continues.
Excluding sheets from a multi-sheet Excel workbook
When the uploaded file is an Excel workbook with more than one sheet, each sheet shows a checkbox next to its name so you can exclude individual sheets from the upload. An excluded sheet is labelled Won't be imported. At least one sheet must remain included for the upload to proceed.